Crochet Chocolate Easter Bunny


Create your very own adorable Easter bunny with the art of crochet! This delightful project combines the sweetness of chocolate with the charm of a cuddly bunny. Using your crochet skills, you can bring this cute little bunny to life, making it the perfect addition to your Easter decorations or a lovely gift for someone special.
Pro Tip: I recommend using a stitch counter or stitch markers for this project because it is very easy to lose count of your stitch or row count which will lead to your chocolate bunny’s head ending up backward!
For this project, I’m using Caron Simply Soft acrylic yarn in Chocolate, but any weight 4 yarn will work fine depending on your preferences.
Materials
1 Skein Medium Weight 4 Yarn – Caron Simply Soft (Chocolate)
US 4mm/G-6 Hook (My FAVORITE crochet hooks!)
Tapestry Needle
Polyester Filling
Scissors
Optional – Ribbon
Optional – Stitch Markers
Optional – Stitch Counter
Both stitch markers and stitch counters are very helpful for those who easily lose track of their row/stitch counts.
Stitches & Techniques
CH – Chain
SL – Slip Stitch
ST – Stitch
SC – Single Crochet
Pattern Notes
Skill Level – Easy/Intermediate
Measurements – 12″ x 6.5″
Gauge – 20 CH = 4″
This pattern follows US crochet terms
This pattern requires basic crochet skills and knowledge and is suitable for beginner crocheters. The success of this pattern is not dependent upon gauge or yarn type.
Chocolate Easter Bunny Crochet Pattern
R1: CH 26, SC into each CH starting in the 2nd CH from the hook (25 total). Be sure to keep track of your row count as you go to avoid mistakes!
R2: CH 1, turn, SC 2 together, SC 24.
To SC 2 together: Insert hook into the stitch and pick up a loop. Insert hook into the next stitch and pick up a second loop. Yarn over and draw through all loops on the hook.
R3: CH 1, turn, SC 2 together, SC 20, SC 2 together.
R4: CH 1, turn, SC 20, SC 2 together.
R5: CH 1, turn, SC 1 into each ST for the entire row.
R6: CH 1, turn, SC 19, SC 2 together.
R7-9: CH 1, turn, SC into each ST for the entire row (20 total).
R10: CH 1, turn, SC 2 into the first ST, SC 1 into each ST for the rest of the row (21 total).
R11: CH 1, turn, SC 2 together, SC 1 into each ST for the rest of the row (20 total).
R12: CH 1, turn, SC 2 into the first ST, SC 1 into each ST for the rest of the row (21 total).
R13: CH 1, turn, SC 2 together, SC 1 into each ST for the rest of the row (20 total)
R14: CH 1, turn, SC 2 into the first ST, SC 17, SC 2 together.
R15: CH 1, turn, SC 2 together, SC 1 into each ST for the rest of the row (19 total).
R16: CH 1, turn, SC 2 into the first ST, SC 16, SC 2 together.
R17: CH 1, turn, SC 2 together, SC 1 into each ST for the rest of the row (18 total)
R18: CH 1, turn, SC 2 into the first ST, SC 1 into each ST for the rest of the row (19 total).
R19: CH 1, turn. Skipping the first ST, SC 2 together. SC 1 into each ST for the rest of the row (17 total).
R20: CH 1, turn, SC 2 together, SC 13. We will leave the rest of the row unworked.
R21: Without chaining, turn. Skipping the first ST, SC 2 together. SC 9, SC 2 together.
R22: CH 1, turn, SC 9, SC 2 together. (10 total)
R23: CH 1, turn. Skipping the first ST, SC 2 together. SC 7.
R24: CH 1, turn, SC 1 into each ST for the entire row (8 total).
R25: CH 1, turn, SC 7, SC 2 into the last ST.
R26: CH 1, turn, SC 1 into each ST for the entire row (9 total).
R27: CH 1, turn, SC 8, SC 2 into the last ST (10 total). R28: CH 1, turn, SC 2 into the first ST, SC 9 (11 total).
R29-30: CH 1, turn, SC 1 into each ST for the entire round (11 total). R31: CH 1, turn, SC 2 into the first ST, SC 9, SC 2 into the last ST (13 total).
R32: CH 1, turn, SC 1 into each ST for the entire row (13 total).
R33: CH 1, turn, SC 11, SC 2 together (12 total). R34: CH 1, turn, SC 1 into each ST for the entire row (12 total).

R35: CH 1, turn, SC 10, SC 2 together (11 total).
R36: CH 1, turn. Skipping the first ST, SC 2 together. SC 8 (9 total).
R37: CH 1, turn, SC 2 into the first ST, SC 5. We will leave the rest of the row unworked.
R38: CH 1, turn, SC 1 into each ST for the entire row (7 total).
R39-45: Repeat R38.
R46: CH 1, turn, SC 2 together, SC 3, SC 2 together.
R47: CH 1, turn, SC 2 together, SC 1, SC 2 together.
R48: CH 1, turn. SC around the entire edge of the shape until you have reached the CH 1 again. The spaces may not be well defined. Just be sure to space your stitches evenly. SL into the CH 1 space.
R49: CH 1, SC 1 into each ST all the way around the edge again, placing 2 SC into each of the stitches at the corners of the feet. SL into the CH 1 space, tie off and weave in any yarn ends.

Assembly
Once you have created 2 identical halves of the chocolate bunny, sew each half together with a tapestry needle or by slip stitching together the back loop of the top half with the front loop of the bottom half all the way around the edge.
Be sure to leave space to add the polyester filling as you go. Add a bow if you’d like and you have finished your chocolate bunny!
- Recipes
-
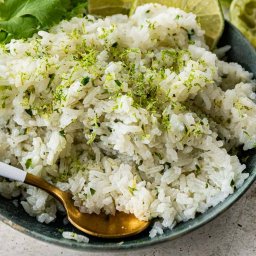 Cilantro Lime Rice
-
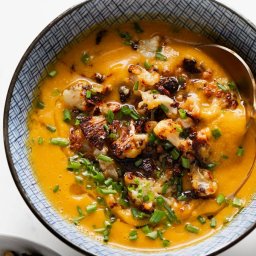 Sweet Potato Soup with Roasted Cauliflower Crumbles
-
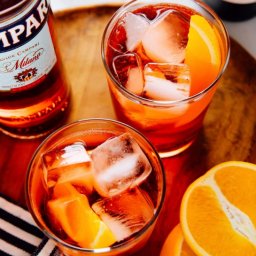 Americano Cocktail
- Funny Pictures
-
 Incredible Animal Pics to Have Some Good Time
-
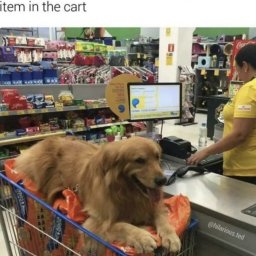 Totally Wholesome Doggo Memes
-
 Cute and Adorable Animals for You
- Crochet Ideas
-
 Crochet Crop Top
-
 Crochet Easter Sheep and Duck Egg Bags
-
 Crochet Summer Top
- Lifehacks
-
 How to Crochet the Plaid Stitch Photo Tutorial
-
 How To Crochet The 3-Colored Crosshatch Stitch Tutorial
-
 Flower With Stem Stitch Photo Tutorial
- DIY
-
 DIY Seashell Hair Pins
-
 Crochet Smiling Flowers
-
 Paper Cup Mini Easter Basket Gifts
- Knitting Ideas
-
 Knitted Tank Top
-
 Knitted Pom-Pom Booties
-
 Knitted Rabbit Dolls