Crochet Easter Bunny Bunting


Create your very own Easter Bunny Bunting using the art of crochet! This adorable decoration will add a touch of charm to your home during the Easter season. With just a few simple materials like yarn, a crochet hook, and some stuffing, you can bring these cute bunnies to life. The bunting can be customized with different colors and sizes to suit your personal style and preferences.
Materials Used:
- Yarn – worsted weight yarn in tan and white (yarn pictured is “I Love This Yarn” in White and “Yarn Bee Yarn ID” in Fawn. Another option: 24/7 Cotton in White and Taupe)
- Size E/3.5mm crochet hook
- Yarn Needle
- Blocking board and straight pins
Stitches/Abbreviations Used:
- ch – chain
- R – row
- st/sts – stitch/stitches
- RS – right side
- WS – wrong side
- sl st – slip stitch
- sc – single crochet
- hdc – half double crochet
- sk – skip
Finished Size:
Each panel pictured measures 5 1/2″ wide x 5 3/4″ long. Gauge – 20 rows x 18 stitches = 4″.
Tips:
This pattern has colorwork between tan and white yarn. This style of colorwork, called tapestry crochet, requires switching between colors without fastening off. There is a right side and a wrong side of the pattern (marked in each row). The right side of the work will show the bunny image and the wrong side will hide your color changes.
When working on the right side, I recommend carrying the tan yarn behind your stitches and crocheting over it when crocheting with the white yarn. When working on the same right side but crocheting in tan, I recommend dropping the white yarn, only picking it up when needed. When working on the wrong side, I recommend dropping the yarn you’re not using until you need it. Then, pick it up, allowing the extra yarn to float behind your stitches

Pattern:
Using tan, ch 25.
R1 (RS): Sc in 2nd ch from hook and in each across. Ch 1, turn. (24)
R2 (WS): Sc in each st across. Ch 1, turn.
BUNNY COLORWORK
The colorwork between tan and white begins in row 3 and continues through row 22. You will alternate between colors as you single crochet in each st across (24 sts total in each row). Color changes are as marked.
R3 (RS): 6 sc in fawn, 2 sc in white, 1 sc in fawn, 2 sc in white, 13 sc in fawn. Ch 1, turn.
R4 (WS): 13 sc in fawn, 2 sc in white, 1 sc in fawn, 2 sc in white, 6 sc in fawn. Ch 1, turn.
R5 (RS): 6 sc in fawn, 5 sc in white, 13 sc in fawn. Ch 1, turn.
R6 (WS): 14 sc in fawn, 5 sc in white, 5 sc in fawn. Ch 1, turn.
R7 (RS): 5 sc in fawn, 5 sc in white, 14 sc in fawn. Ch 1, turn.
R8 (WS): 15 sc in fawn, 5 sc in white, 4 sc in fawn. Ch 1, turn.
R9 (RS): 3 sc in fawn, 6 sc in white, 15 sc in fawn. Ch 1, turn.
R10 (WS): 15 sc in fawn, 7 sc in white, 2 sc in fawn. Ch 1, turn.
R11 (RS): 2 sc in fawn, 7 sc in white, 15 sc in fawn. Ch 1, turn.
R12 (WS): 7 sc in fawn, 7 sc in white, 1 sc in fawn, 6 sc in white, 3 sc in fawn. Ch 1, turn.
R13 (RS): 5 sc in fawn, 13 sc in white, 6 sc in fawn. Ch 1, turn.
R14 (WS): 5 sc in fawn, 14 sc in white, 5 sc in fawn. Ch 1, turn.
R15 (RS): 4 sc in fawn, 16 sc in white, 4 sc in fawn. Ch 1, turn.
R16 (WS): 4 sc in fawn, 16 sc in white, 4 sc in fawn. Ch 1, turn.
R17 (RS): 4 sc in fawn, 16 sc in white, 4 sc in fawn. Ch 1, turn.
R18 (WS): 4 sc in fawn, 16 sc in white, 4 sc in fawn. Ch 1, turn.
R19 (RS): 4 sc in fawn, 15 sc in white, 5 sc in fawn. Ch 1, turn.
R20 (WS): 5 sc in fawn, 14 sc in white, 5 sc in fawn. Ch 1, turn.
R21 (RS): 5 sc in fawn, 3 sc in white, 2 sc in fawn, 8 sc in white, 6 sc in fawn. Ch 1, turn.
R22 (WS): 6 sc in fawn, 8 sc in white, 2 sc in fawn, 4 sc in white, 4 sc in fawn. Ch 1, turn
R23 (RS): 24 sc in fawn. Ch 1, turn.
Trim white yarn, leaving a tail and weaving in on the wrong side. Do not trim tan yarn.
BUNTING POINTS
The “points” of the bunting begin in row 24. You will work in partial rows before fastening off, then repeat the same stitches on the other side (noted below as the matching partial rows).
R24 (WS): 12 sc. Leave remaining sts unworked. Turn without chaining 1.
R25 (RS): Sk 1 st, 2 sl sts, 7 sc, 2 hdc. Ch 2, turn.
R26 (WS): 2 hdc, 4 sc, 2 sl sts. Leave remaining sts unworked. Fasten off, weaving in end.
Matching partial rows:
R1 (RS): Holding work upside down, with right side facing you, return to R23. Attach yarn with a sl st to the furthest right st of R23. Ch 1, and sc in that same 1st st and in remaining 11 unworked sts. Turn without chaining 1.
R2 (WS): Sk 1 st, 2 sl sts, 7 sc, 2 hdc. Ch 2, turn.
R3 (RS): 2 hdc, 4 sc, 2 sl sts. Leave remaining sts unworked. Sc evenly around entire shape. Fasten off, weaving in ends.
Final Steps
After you’ve finished making your bunting panels, I highly recommend blocking them. This will prevent the individual crochet panels from curling up around the edges and give each panel a finished look. To block my panels, I sprayed them with water, then pinned them to a foam board until they were completely dry. Then I made little pom-poms with my white yarn and attached them to each bunny’s backside.
To string the panels up, I used my tan yarn and wove it through the tops of the panels. Then I hung them up and added some extra Easter decorations above them.
- Recipes
-
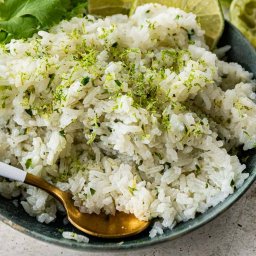 Cilantro Lime Rice
-
 Sweet Potato Soup with Roasted Cauliflower Crumbles
-
 Americano Cocktail
- Funny Pictures
-
 Incredible Animal Pics to Have Some Good Time
-
 Totally Wholesome Doggo Memes
-
 Cute and Adorable Animals for You
- Crochet Ideas
-
 Crochet Crop Top
-
 Crochet Easter Sheep and Duck Egg Bags
-
 Crochet Summer Top
- Lifehacks
-
 How to Crochet the Plaid Stitch Photo Tutorial
-
 How To Crochet The 3-Colored Crosshatch Stitch Tutorial
-
 Flower With Stem Stitch Photo Tutorial
- DIY
-
 DIY Seashell Hair Pins
-
 Crochet Smiling Flowers
-
 Paper Cup Mini Easter Basket Gifts
- Knitting Ideas
-
 Knitted Tank Top
-
 Knitted Pom-Pom Booties
-
 Knitted Rabbit Dolls