Create Your Own Adorable Crochet Bunny Appliqué with This Comprehensive Guide
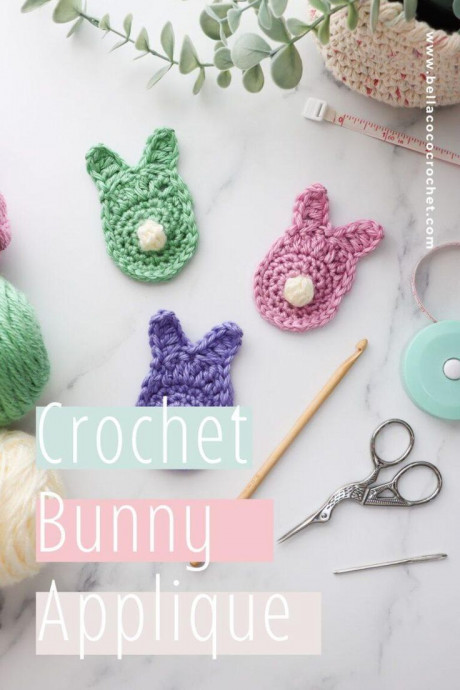
Creating a Crochet Bunny Appliqué is such a delightful project that adds a touch of charm to any item! These cute little bunnies can be attached to hats, blankets, or even bags, bringing a whimsical flair to your handmade pieces. Whether you're a beginner or a seasoned crocheter, crafting these adorable appliqués is a fun way to add a personalized touch to your projects.
Materials & Tools
Yarn: In the video, I have used Stylecraft Special DK, and in the samples pictured, I have used Caron Simply Soft.
Hook: In the video, I have used a 4mm hook.
Scissors
Darning Needle
Pattern Notes
- Written in UK terms
- Bunny body and head are worked in rounds with one row for ears. The tail is worked in a separate colour and tied on at the end.
- Beginning chain does count as a stitch.
Terms & Abbreviations
- Chain (ch): Yarn over, pull through one loop on the hook.
- Double Crochet (dc): Insert hook into stitch, yarn over, pull up a loop, you will have two loops on the hook. Yarn over, pull through remaining two loops.
- Half Treble Crochet(s) (htr): Yarn over, insert into stitch, yarn over, pull up a loop, you will have three loops on the hook. Yarn over, pull through all three loops.
- Double Treble(s) (dtr): Yarn over hook twice, insert hook into stitch, yarn over, pull up a loop, you will have four loops on the hook. Yarn over, pull through two loops, you will have three loops on the hook. Yarn over, pull through two loops, yarn over, pull through remaining two loops.
- Treble Crochet (tr): Yarn over, insert hook into stitch, yarn over, draw up a loop (3 loops on hook), (yarn over, pull through 2 loops) twice.
- Slip Stitch (ss): Insert hook into stitch, yarn over, pull yarn through stitch and loop on hook.
Free Pattern: Crochet Bunny Appliqué
You are viewing this pattern in UK terms.
Bunny Body
Round 1: With coloured yarn, starting with a magic circle, work 6 dc in circle, pull circle tail tight, ss into first dc. (6 dc)
Round 2: Ch 1, work 2 dc in each st around, ss into ch-1. (12 dc)
Round 3: Ch 1, 1 dc into first st, 2 dc into next st, (1 dc in next st, 2 dc in next st) around, ss into first dc. (18 dc)
Round 4: Ch 1, 1 dc in each of the first 2 sts, 2 dc in the next st, (dc in next 2 sts, 2 dc in next st) around, ss into first dc. (24 dc)
Bunny Head
Ch 1, work 1 htr into first st, tr in next st, dtr in next 4 sts, tr in next st, htr in next st, ch 1, ss into next st, ss in each st around.
Ears
SS in htr, ss in tr, ss in first dtr, *ch 5, in second ch from hook work htr, tr in next 3 chs,* ss into top of third dtr from previous round, repeat from * to * ss into htr after the fourth dtr in the previous round, ch 1, ss in next st, yo and cut yarn with a long tail.
Sewing Ears
Attach tail to needle. From the back side of the bunny, sew through the bottom-most tr of each ear to the head round to close the gap between the ears and the body. Secure the tail on the back side. Weave in the beginning tail.
Tail
With cream or white yarn, leaving a long tail begin with a slip knot on the hook, ch 2, *yo, insert hook into first ch, yarn over, pull through, yarn over, draw through 2 loops on hook; repeat from * three times so that there are 5 loops on hook, yarn over, pull through all loops on hook, ch 1 to tighten stitch. Leaving a long tail, cut yarn and pull through loop on hook.
Attaching Tail
Insert hook in the spaces of the first round (not the centre of the bunny), take one tail and pull through. Position the tail as you like it, insert hook and pull the opposite tail through the body. Tie a knot or two in tails on the backside of the bunny.


