Crochet Bunny Coaster


Crochet Bunny Coaster is an adorable addition to any tea party or dining experience! These charming little coasters are not only practical for keeping your surfaces safe from drips and spills but also bring a touch of whimsy to your table setting. The crochet technique gives them a handmade feel, perfect for adding a cozy and inviting vibe to your home.
Materials:
White yarn
5 mm crochet hook
Instructions:
Abbreviations:
Ch = Chain
DC = Double Crochet
SC = Single Crochet
Sl st = Slip Stitch
MR = Magic Ring
Step-by-Step Pattern:

Base Circle:
Magic Ring:
Create a magic ring.

Round 1:
Ch 2 (this does not count as a stitch).
Work 11 DC into the MR.
Tighten the MR and join with a sl st to the first DC.
Round 2:
Ch 2.
Work 2 DC into the next stitch and every stitch around.
At the end of the round, work 1 DC in the last stitch (where you had your initial ch 2).
Join with a sl st to the first DC.
Bunny Ears:

Single Crochets and First Ear:
Ch 1.
SC in the next stitch.
SC in the next stitch.
Ch 9.
SC into the second chain from the hook.
SC into each chain back down to the base (8 SC).
SC into the same stitch where the ear started.
Single Crochets Between Ears:
SC in the next 3 stitches.
Second Bunny Ear:
Ch 9.
SC into the second chain from the hook.
SC into each chain back down to the base (8 SC).
SC into the same stitch where the ear started.
SC into the next stitch.
Finishing the Round:

Increasing SC:
Work 2 SC in the next stitch.
SC in the next stitch.
Repeat 2 SC in the next stitch, SC in the next stitch around.
Join with a sl st to the first SC.
Slip Stitches to Ears:
Sl st in the next stitch.
SC in the next 8 stitches up to the top of the ear.
At the top, work an additional SC in the top stitch for a smooth turn.
SC down the other side of the ear.
Continue to the Next Ear:
Sl st across the base to the next ear (4 sl st).
Repeat the same process for the second ear (SC up to the top, additional SC in the turning stitch, SC down the side).
Final Slip Stitches Round:
Join with a sl st to the base.
Work a sl st around the entire base.
Finishing:
Cut your yarn and weave in the ends.
No comments
Write a comment
- Recipes
-
 Vegan Lemon Pasta
-
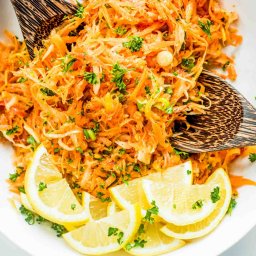 Easy Grated Carrot Salad with Lemon Vinaigrette
-
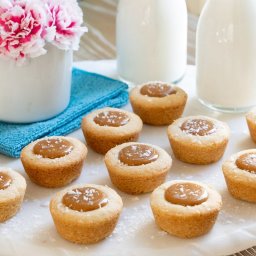 Ridiculously Easy Salted Caramel Shortbread Bites
- Funny Pictures
-
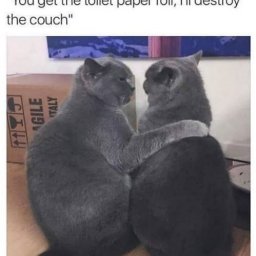 Funny Pics of the Day
-
 Funny Pics for Your Scrolling
-
 Some Pics to See When You’re Bored
- Crochet Ideas
-
 Crochet Baby Loafers
-
 Crochet Crop Top
-
 Crochet Easter Sheep and Duck Egg Bags
- Lifehacks
-
 Crochet Sunburst (Sunflower) Granny Square Pattern
-
 How to Crochet the Plaid Stitch Photo Tutorial
-
 How To Crochet The 3-Colored Crosshatch Stitch Tutorial
- DIY
-
 DIY Seashell Hair Pins
-
 Crochet Smiling Flowers
-
 Crochet Glasses Pouch
- Knitting Ideas
-
 Simple Knitted Easter Egg
-
 Knitted Mosaic Shawl
-
 Knitted Beautiful Tank Top