Crochet Bunny Pouch


The Crochet Bunny Pouch is an adorable and fun accessory that adds a touch of whimsy to your everyday life. This charming little pouch is perfect for storing small items like coins, lip balm, or even a special trinket. The cute bunny design will bring a smile to your face every time you use it. Whether you're a crochet enthusiast looking for a new project or just want to add a playful element to your day, the Crochet Bunny Pouch is sure to delight you and those around you.
Yarn
- We used two strands of #4 medium yarn (worsted, Afghan, Aran, or 10-ply) with 11 wraps per inch
- Color A, green (body) - 56.8 yards (52 meters) - total needed to work in two strands
- Color B, pink (nose) - 27 inches (70 cm) - total needed to work in two strands
- Color C, black (mouth) - 11 inches (30cm) - embroider mouth using a single strand
Hook
- 6.5mm
Notions
- Scissors
- Yarn Needle
- 2 stitch marker
- Eyes - 12mm safety eyes (or glue on eyes + glue)
Gauge
- Not important for this pattern
Finished Size
- The finished size of the crochet bunny pouch is about 3 inches (7.6 cm) wide, 3.25 inches (8.3 cm) to the top of the pouch opening, and about 7 inches (18cm) tall to the tip of the ear when fully extended up.
Stitches and Abbreviations Used (US Terms)
- ch - chain stich
- sc – single crochet
- hdc - half double crochet
- dc - double crochet
- BO - bobble stitch
- col - color
- invdec - invisible decrease - see special stitches below
- rnd/rnds – round/rounds
- rpt – repeat
- sk - skip
- sp - space
- sl st – slip stitch
- st/sts – stitch/stitches
- FLO - front of the loop - see special stitches below
- BLO - back of the loop - see special stitches below
- YO - yarn over
- hk – hook
- lp/lps - loop/loops
- [ ] - at the end of a round, indicates the number of stitches in that round
Special Stitches
- invdec – Insert hk in FLO of next st, then in FLO of next st, YO, pull through 2-lps, YO, pull through 2-lps.
- BO - YO, insert hk into specified st, YO pull up lp (3-lps on hk), YO pull through 2-lps (2-lps on hk), YO pull up lp (4-lps on hk), YO pull through 2-lps (3- lps on hk), YO pull up lp (5-lps on hk), YO pull through 2-lps (4- lps on hk), YO pull up lp (6-lps on hk), YO pull through 2-lps (5- lps on hk), YO pull up lp (7-lps on hk), YO pull through 2-lps (6- lps on hk), YO and pull through all lps (1-lp on hook).
Pattern Notes
- This pattern is worked with two strands of yarn throughout.
- Use stitch marker to mare the first stitch of each round, and where indicated in the pattern.
Instructions
- Foundation, col A - ch3, sl st into 1st ch to form a ring.
- Rnd 1 – ch1 (not counted as a st), 8sc into ring, sl st into 1st st to join. [8sc]
- Rnd 2 – ch1 (not counted as a st), 2sc in same sp as ch-1, 2sc in next 7-sts, sl st into 1st st to join. [16sc]
- Rnd 3 – ch1 (not counted as a st), 2sc in same sp as ch-1, * 2sc in next, 1sc in next, rpt from * 7 times, sl st into FLO of 1st st to join (mark the back loop of this st for the next round). [24sc]
- Rnd 4 - sl st in FLO of next 7-sts, foot 1: in FLO of next st (1sc, 1hdc, 1dc, 1hdc, 1sc), sl st in FLO of next 7-sts, foot 2: in FLO of next st (1sc, 1hdc, 1dc, 1hdc, 1sc), sl st in FLO next 8-sts, sl st into the marked st on rnd 3 to join. [26sc, 4hdc, 2dc]
- Rnd 5 – ch-1 (not counted as a st), 1sc in same sp as ch-1,1sc in BLO of next 23-sts. [24sc]
- Rnd 6 – sl st into next 2-sts, ch1 (not counted as a st), 1sc in same sp as ch-1, 1sc in next 22-sts, BO in next. [23sc, 1BO]
- Rnd 7 - 1sc in each st. [24sc]
- Rnd 8 - 1sc in next 11-sts, drop col A (keep lp on hk), nose: pick up col B (work with two strands), insert hk into next st and pull up a lp, YO, insert hk back into same st, YO and pull up a lp, drop col B and pick up col A, YO and pull through all lps on hk, 1sc in each of the next 12-sts. [23sc, nose]
- Finish nose and mouth- Before moving onto the next round, knot the yarn ends of col B to secure in place and trim away the excess.- Then with a single strand of col C (black) worsted yarn embroider on an upside down “T” for the mouth.
- Rnd 9 – *1sc in next 4-sts, invdec, rpt from * 4 times. [20sc]
- Rnd 10 – *1sc in next 3-sts, invdec, rpt from * 4 times. [16sc]
- Rnd 11 – 1sc in next 4-sts, ear 1: ch13, 1dc in 3rd ch from hk, 1dc in next 2-sts, 1hdc in next 8-sts, 1sc in next st on pouch edge, invdec, 1sc in next 4-sts, ear 2: ch13, 1dc in 3rd ch from hk, 1dc in next 2-sts, 1hdc in next 8-sts, sk 2-sts on pouch edge (buttonhole), 1sc in next 3-sts.
- Rnd 12 – sl st into next 4-sts, sl st into the 1st st on the ear, 1sc in next 10-sts of the ear, (1sc, ch3, 1sc) in the turning ch (top of ear), 1sc in next 10-sts down the ear, sl st into last st on ear, s st into next 5-sts along the edge of the pouch, sl st into 1st st of next ear, 1sc in next 10-sts of the ear, (1sc, ch3, 1sc) in the turning ch (top of ear), 1sc in next 10-sts down the ear, sl st into last st on ear, sl st into next 2-sts on the pouch, cut yarn fasten off and weave in ends.
- Finishing- Position the eyes about 1 row above the nose evenly spacing them apart.- Fill the pouch with small treats or gifts.-To close the pouch, slip the right ear into the buttonhole created in round 11 and pull tight.
Notes
Tips
- When creating the bobble stitch tail, pull the loops up higher making them slightly looser which will make it easier to pull all the loops through the stitch, and it will also make it easier for you to pull your hook through all the loops to complete the stitch.
- Don't add a chain stitch after making the bobble stitch tail. This will increase the stitch count making the pattern incorrect.
No comments
Write a comment
- Recipes
-
 Keto Salmon Caesar Salad
-
 Cozy & Creamy White Bean Soup
-
 Cottage Cheese Egg Bites
- Funny Pictures
-
 Some of the Funniest Parenting Tweets of the Week
-
 Some Memes to Get You Into Halloween Spirit
-
 Funny Memes to Enlighten Your Mood
- Crochet Ideas
-
 Crochet Fireside Cardigan
-
 Crochet Beautiful Cupcake
-
 Crochet Flat Slippers
- Lifehacks
-
 How to Crochet the Thermal Stitch Photo Tutorial
-
 How to Crochet the Sultan Stitch Photo Tutorial
-
 How to Crochet the Feather Stitch Photo Tutorial
- DIY
-
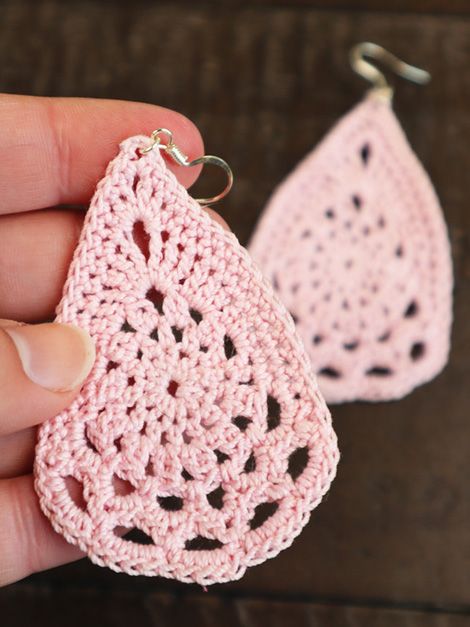 Crochet Elegant Tear Drop Earring
-
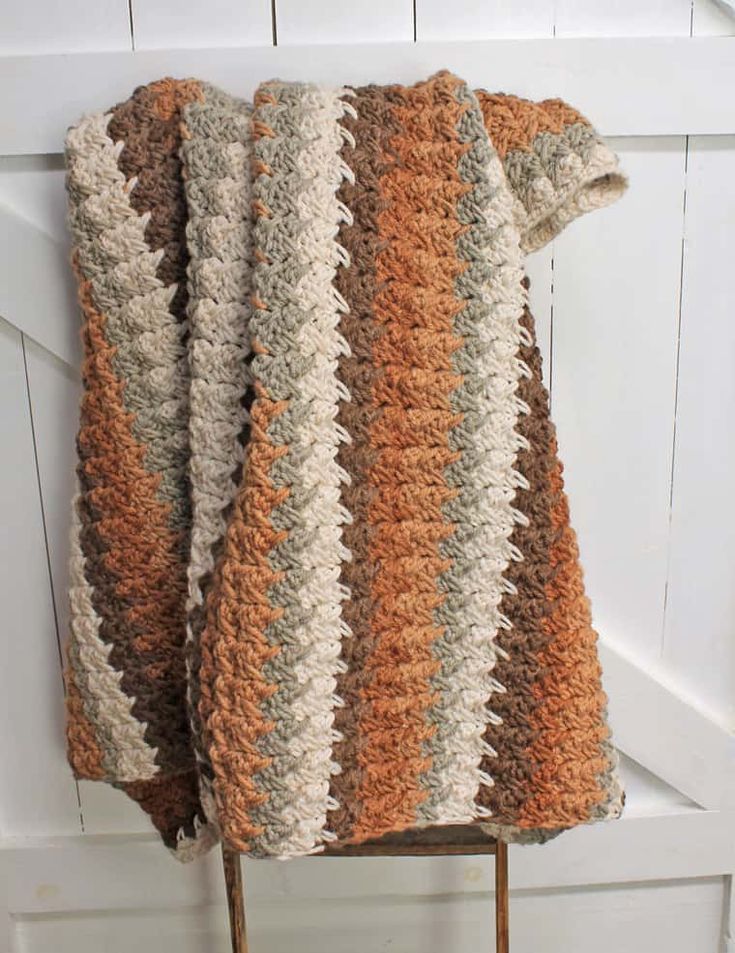 Crochet Bulky Yarn Blanket
-
 Crochet Baby Bunny
- Knitting Ideas
-
 Knitted Cabled Boot Cuffs
-
 Knitted Chic Cable Crossbody Bag
-
 Knitted Feather and Fan Ocean Bonnet