Crochet Cutlery Holder Pouch
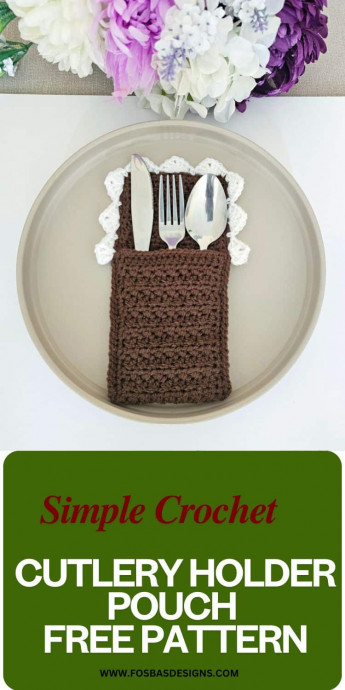
Crochet cutlery holder pouches are not just functional but also add a delightful touch to your dining table or picnic spread. These handy creations keep your utensils organized and easily accessible while adding a pop of color and charm to your dining experience. They are perfect for outdoor gatherings, picnics, or even just brightening up your everyday meals. Whether you choose a classic design or opt for something more whimsical, crochet cutlery pouches are a fun and eco-friendly way to elevate your table settings. Get ready to impress your guests and bring a touch of handmade warmth to your dining experience with these adorable crochet creations.
Cutlery Holder Pattern Details
Materials
Yarn – Any DK-weight yarn can be substituted.
The prototype was made using Stylecraft Special DK, (#4, 100% Acrylic, 196 m per 3.5 oz/100g Ball)
Colors
Color A – Gingerbread
Color B – White
Estimated Yardage
Color A – 30 yards
Color B – 5 yards
Hook and other materials
- 5 mm Crochet Hook
- Yarn needle
Gauge
Gauge isn’t important to this project.
Pattern notes
- Please kindly read through the pattern before starting.
- Similar #3 weight yarn can be substituted; please check the gauge.
Adjustments/fittings:
Length: increase or decrease the repeats until you have the required length to cover your cutleries.
Skill level – Easy
Terms – US Terminology
Stitch Abbreviations
Chain(s) – ch(s)
Single Crochet – sc
Repeat – rep
Half double crochet – hdc
Slip stitch – sl st
Crossed half double crochet – xhdc
Special Stitch
Crossed half double crochet – *skip next st, hdc in next st, crocheting over the hdc just made, work hdc into the skipped st, rep from * to the end.
Crochet cutlery holder pouch finished measurement.
The finished pouch measures about 7” by 3.5”
How to crochet a cutlery holder pouch
With color A
Row 1: Chain 17, sc in 2nd ch from hook and in each ch across, turn. 16 sc
Row 2: Ch 1, hdc in first st, xhdc across until the last st, hdc in last st, turn. 2 hdc, 7 xhdc.
Rows 3 – 29: Repeat Row 2
Continue the repeats until it measures 13”
Increase or Decrease the number of repeats for a length long enough so that when you fold the lower ¾ over, it can cover the cutlery and still have about 2 – 3” as the cover.
Edging
- Crocheting across both long sides and just one short end.
Continue with A.
Row 1: Ch 1, sc in each st around the whole panel, aim for (2 sc, ch 2, 2 sc) at each corner.
Fasten off.
Weave in all ends.
To fold
- Fold the lower 1/3 of the panel over the remaining part.
- Join with a sl st to the lower end of the fold and crochet across to the opposite side.
Crocheting around the panel – folded lower 2/3rd together and then the upper part.
Row 1: Ch 1, working through both layers, sc in each st, towards the cover, aim for (2 sc, ch 2, 2 sc) at each corner, and leave the folded part of the edge (base).
Fasten off A, join B with a sl st to the start of the cover.
Row 1: ch 3, 2 dc, ch 2, 3 dc in same st as with the beginning ch, *skip next 2 sts, sc in next st, skip next 2 sts, (3 dc, ch 2, 3dc) in next st, rep from * until the opposite edge of the cover.
Fasten off
Weave in all ends.


