Crochet Sand Buckets Pillow
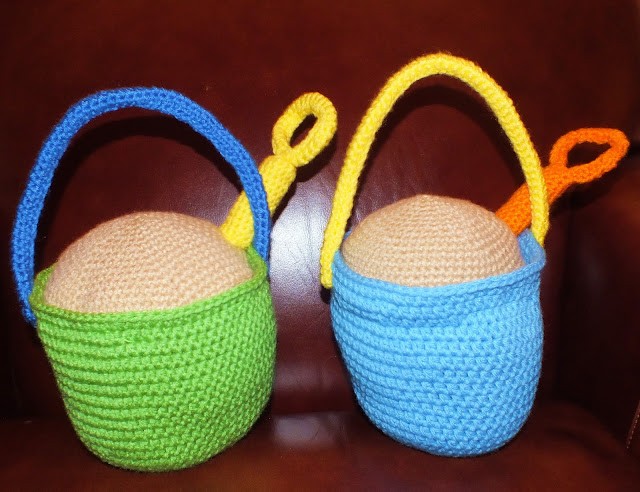
The Crochet Sand Buckets Pillow is a delightful addition to any beach-themed decor, bringing a touch of whimsy and charm to your space. Its intricately crocheted design showcases adorable sand buckets that transport you to a sunny day by the shore. This cozy pillow not only adds a playful element to your home but also invites a sense of relaxation and beachy vibes.
Materials Used:
- Red Heart Spring Green, Blue, Bright Yellow, Pale Blue, Tan, and Pumpkin Orange.
- Fiber-fill
- Needle
- Matching thread in Blue, Tan, Yellow, Orange, Green
- G Hook
Abbreviations used in pattern
ch-chain
wk-work
sc-single crochet
hdc-half double crochet
st-sts-stitch & stitches
BLO-back loops only
With Spring Green
(Ch 2 will count as your 1st st throughout this pattern)
Row 1
ch3, wk 11 hdc in the 2nd ch from the hook, join
Row 2
ch 2, wk 1 hdc in the same st as ch 2, 2 hdc in every st, join
Row 3
ch 2, wk 2 hdc in the next st, 1 hdc in the next st, join
Row 4
ch 2, wk 1 hdc in the same st as ch 2, 2 hdc in the next st
(so it's 2 hdc in one st, 2 hdc in the next st, repeat all the way around & join
Row 5
ch 2, wk 1 hdc in the next 2 sts, 2 hdc in the next, repeat & join
(so it's 1hdc in the next 3 sts, 2 hdc together in the next st)
Row 6
ch 2, 1 hdc in the next 3 sts, 2 hdc in the next, repeat & join
(so it's 1 hdc in the next 4 sts, 2 hdc in the next)
Row 7
ch 2 1 hdc in BLO in each st, join
Row 8
ch 2, wk 1 hdc in both loops all the way around, join
Row 9
ch 2, 1 hdc in each st, adding 1 st in each new row
(place them randomly) join
Rows 10 to 17
repeat row 9
Rows 18 to 21
I stopped increasing in row 18 to 21, the next 4 rows are for making the bucket taller.
Fasten off at the end of row 21
With Tan make the sand
(use a st marker)
Row 1
wk 6 sc it the magic ring, no not join (this is worked in the round)
(6sts)
Row 2
wk 2 sc in each st around (12sts)
Row 3
wk 1 sc in the next st, wk 2 sc in the next, all the way around (18sts)
Row 4
wk 2 sc in the next 2 sts, 2 sc in the next st, around (24sts)
Row 5
wk 3 sc in the next 3 sts, 2 sc in the next, around (30sts)
Row 6
wk 4 sc in the next 4 sts, 2 sc in the next st, around (36sts)
Row 7
wk 5 sc in the next 5 sts, 2 sc in the next st, around (42sts)
Row 8
wk 6 sc in the next 6 sts, 2 in the next, around (48sts)
Row 9
wk 7 sc in the 7 sts, 2 sc in the next st, around (54sts)
Row 10
wk 8 sc in the next 8 sts, 2 in the next one, around (60sts)
Row 11
wk 9 sc in the next 9 sts, 2 sc in the next, around (66sts)
Row 12
wk 10 sc in the next 10 sts, 2 sc in the next st, around (72sts)
Row 13
wk 11 sc in the next 11 sts, 2 sc in the next, around (78sts)
Row 14
wk 12 sc in the next 12 sts, 2 sc in the next st around (84sts)
Row 15
wk 13 sc in the next 13 sts, 2 in the next, around (90sts)
Row 16
1 sc in the BLO all the way around (this will make it easier to sew to the bucket)
Row 17
1 sc in each st under both loops, all the way around
Fasten off
The Handle
Row 1
ch 69, wk 1 hdc in 2nd ch from hook and in each st across, ch 2 & turn
wk 1 hdc in the 2nd ch from hook and in each st across
Fasten off
With matching thread sew the two sides together like a tube. Using thread makes it look better then using the yarn.
The Shovel (the long part)
Row 1
ch 2, wk 1 sc in the 2nd ch from the hook, do not join
Row 2
wk 2 sc in each st around, do not join
Row 3
wk 1 sc in each st around, and continue that until your piece is about 3 inches long (I did about 12 rows)
when it's as tall as you want it, sc dec all the way around until closed.
For the Round Handle part
Row 1
ch 29, wk 1 sc in each st across
Rows 2 & 4
repeat row 1 and fasten off.
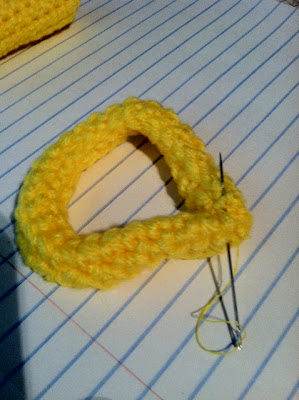
Sew this piece together like you did for the bucket handle.
Then sew the two ends together joining them like in picture 1.
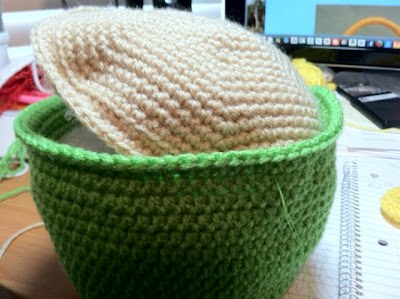
Stuff your bucket with fiberfill and attach the sand piece to the top of the bucket. As shown in picture 2. Be careful when sewing the two pieces together, try not to pull the thread to tightly or your bucket will bunch up.
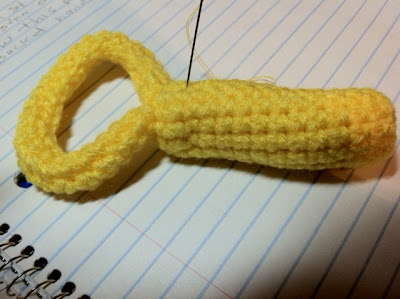
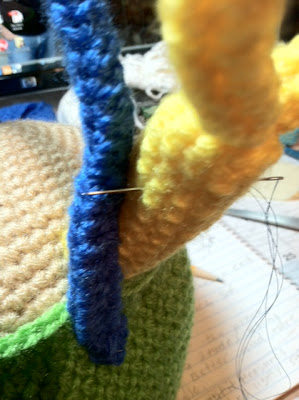
Sew the top handle part of the shovel to the 3 inch tube in picture 3 and then attach that to the top of the sand part as shown in the picture. To help my bucket handle stand up I placed the shovel close to the handle to help support it and sewed them together (like in picture 4).
No comments
Write a comment


