How to Crochet a Colorful Butterfly Fish


Crochet butterfly fish are delightful creations that bring a touch of whimsy to any space. These colorful fish, with their intricate crochet patterns and vibrant hues, are sure to brighten up your day. Whether you place them on a coffee table as a unique decorative piece or use them as a playful addition to a child's room, crochet butterfly fish are guaranteed to make you smile. Handmade with love and attention to detail, each fish has its own personality, making it a special and charming addition to your home decor. Embrace the magic of these whimsical creatures and let them swim into your heart with their charm and beauty.
Materials and Tools
- Cotton yarn in DK / light worsted or 4-Ply / fingering weight in white, yellow and black [I used Scheepjes Catona in Snow White, Yellow Gold and Jet Black]
- 2.5mm crochet hook / Size B-1 or C-2 depending on how tightly you crochet
- 5mm safety eyes
- Fiberfill
- Stitch markers
- Yarn needle
- Sewing pins
- Scissors
Abbreviations
R(s) = row(s)
Rnd(s) = round(s)
St(s) = stitch(es)
Ch(s) = chain(s)
sk = skip
Sl st = slip stitch
Sc = single crochet
Inc = sc increase: 2 sc in same st
Dec = single crochet invisible decrease
Hdc = half double crochet
Dc = double crochet
Tr = triple crochet
Dtr = double triple crochet
[…] = series of stitches to be repeated
(&…) = stitch count of completed round
*… = number of repetitions
img = image
Instructions
Crochet the Head and Body
Make a magic ring in white.
Rnd 1 to 3 (3 rnds): 6 sc (6)
Rnd 4: Inc, 5 sc (7)
Rnd 5: Inc, 6 sc (8)
Rnd 6: [sc, inc]*4 (12)
Rnd 7: Sc, inc, 2 sc, 3 inc, sc, [sc, inc]*2 (18)
Rnd 8: 5 sc, [sc, inc]*3, 7 sc (21) Change to yellow in last stitch.
Rnd 9: 2 sc, inc, 2 sc, [2 sc, inc]*3, sc, [2 sc, inc]*2 (27) Change to white in last stitch.
Rnd 10: 8 sc, [2 sc, inc]*3, 10 sc (30)
Rnd 11: 8 sc, [3 sc, inc]*3, 10 sc (33) Change to yellow in last stitch.
Rnd 12: 8 sc, [4 sc, inc]*3, 10 sc (36)
Rnd 13: 36 sc (36) Change to white in last stitch.
Rnd 14 to 17 (4 rnds): 36 sc (36) Change to yellow in last stitch of rnd 17.
Rnd 18 and 19 (2 rnds): 36 sc (36) Change to white in last stitch of rnd 19.
Rnd 20: 36 sc (36)
Rnd 21: 5 sc, dec, [10 sc, dec]*2, 5 sc (33)
Rnd 22: [9 sc, dec]*3 (30)
Rnd 23: 4 sc, dec, [8 sc, dec]*2, 4 sc (27)
Insert the safety eyes right behind the first yellow stripe, aligning with the top side of the long mouth.
Rnd 24: 4 sc (change to yellow in last stitch), 23 sc (27)
Rnd 25: [7 sc, dec]*3 (24)
Rnd 26: 4 sc (change to white in last stitch), dec, [4 sc, dec]*3 (20)
Rnd 27: [3 sc, dec]*4 (16)
Make 4 sc and fasten off.
Embroider Mouth
Cut an approx. 40 cm/16” long piece of white yarn and thread it on a yarn needle.
Make a sideways stitch between rounds 1 and 2, pulling the yarn piece halfway through.
Repeat this two more times so that you have three horizontal stitches.
Bring the needle under the three stitches and pull it through.
Repeat this 7 more times to wrap the yarn around the three stitches and shape the upper lip. Insert the needle at the corner of the mouth to bring the yarn end to the inside of the head. This is the upper lip.
Thread the other yarn end on the needle and make three horizontal stitches underneath the upper lip between rounds 1 and 2.
Wrap the yarn around the three stitches about 8 times and insert the needle in the corner of the mouth to bring the yarn end to the inside of the head. This is the lower lip.
Tie the yarn ends together inside the amigurumi.
Make Surface Slip Stitches Along the Back and Belly
Make 15 surface sl st along the back (starting at the second yellow stripe):
Insert the hook centered on top of the body, right in front of the second yellow stripe.
Pull a white loop up.
Insert the hook between the next two yellow rounds on top of the body.
Pull up a loop and make a sl st with the two loops on your hook.
Continue making surface slip stitches, centered along the back by moving one round backwards with every stitch. Be careful not to make the slip stitches too tight.
Once you have reached the last two rounds, fasten off and weave the yarn end in thoroughly.
Make 7 surface sl st along the belly (starting behind the third yellow stripe):
Repeat this process centered on the bottom side of the body, starting right behind the third yellow stripe.
Crochet the Dorsal Fin
Fill the body with fiberfill, without overfilling it. The fish should be slightly flat.
The dorsal fin is crocheted in a row into the surface slip stitches along the back and part of the last round of the body.
Join the yellow yarn in the first surface sl st on the back and crochet in the other surface slip stitches as follows:
4 ch, sl st in 3rd ch (picot), sc in next sl st (change to white),
3 ch, sl st in 3rd ch (picot), hdc in next sl st,
[3 ch, sl st in 3rd ch (picot), dc in next sl st]*2,
3 ch, sl st in 3rd ch (picot), dc in next sl st (change to yellow),
3 ch, sl st in 3rd ch (picot), dc in next sl st,
3 ch, sl st in 3rd ch (picot), dc in next sl st (change to white),
3 ch, sl st in 3rd ch (picot), dc in next sl st,
tr in next 3 sl st (change to yellow in last tr),
tr in next 2 sl st,
1 tr and 2 dtr in next sl st,
2 dtr and 1 tr in 2 opposite stitches of last round,
dc in next 2 opposite stitches,
hdc in next 2 opposite stitches
Fasten off.
Crochet the Anal Fin
The anal fin is crocheted in a row into part of the last round of the body and the slip stitches along the belly.
Skip 2 stitches on both sides of the last round and join the yellow yarn in the next 2 opposite stitches.
2 ch, hdc in same 2 opposite stitches,
dc in next 2 opposite stitches,
tr and 2 dtr in next 2 opposite stitches,
dtr and 2 tr in first surface sl st,
tr in next sl st,
dc in next sl st,
hdc in next sl st,
sc in next 2 sl st,
sl st in next sl st
Fasten off and weave in the yarn end.
Crochet the Tail Fin
The tail fin is crocheted in 3 rounds, out of the last round of the body, with one final row.
Join the yellow yarn at one of the 4 skipped stitches and start crocheting in the round of 4 skipped stitches.
Rnd 1: [inc, sc]*2 (6) Change to black in last stitch.
Rnd 2: 6 sc (6) Change to white in last stitch.
Rnd 3: 6 inc (12)
Rnd 4: Ch 4, [tr in the next 2 stitches on opposite sides]*6, 4 ch, sl st in same stitches
Fasten off and weave in the yarn end.
Crochet the Pelvic Fins
The pelvic fins are crocheted in rows.
Ch 7 in white
R 1: 2 sc (starting in 2nd ch), 2 hdc, 2 dc, join yellow yarn, ch 1, turn (6)
For the Left Pelvic Fin:
R 2: 5 sc, inc, 3 ch, sl st in 3rd ch (picot), sc in same ch on the other side, sc in other side of 5 chain stitches (13)
For the Right Pelvic Fin:
R 2: 6 sc, 3 ch, sl st in 3rd ch (picot), inc in same ch on the other side, sc in other side of 5 chain stitches (13)
Fasten off the white and yellow yarn, leaving long yarn ends for sewing.
Crochet the Black Markings (Make 2)
6 sc in magic ring (6)
Fasten off, leaving a long yarn end.
Bring the yarn end through the first stitch and then through the back loop of the last stitch, so the markings get the shape of a circle.
Assembly
Sew the pelvic fins low on the body, between the second and third yellow stripes.
The fins should point slightly backwards. Weave in the yarn ends.
Sew the markings on the fourth yellow and the last white stripe. They sit half on the body and half on the dorsal fin.
Sew them on all around and bring the yarn ends to the same spot on the belly.
Tie them together, cut them short and pull them into the amigurumi with your hook.
- Recipes
-
 Chickpea Tikka Masala
-
 Salt and Pepper Tofu (椒盐豆腐)
-
 Raspberry Rose Choux Cream Puffs
- Funny Pictures
-
 Extremely Good Memes That Will Simply Describe Your Life
-
 The Best Office Memes to Laugh and Remember Some Great Things
-
 Relatable Memes to Laugh Before Going to Sleep
- Crochet Ideas
-
 Crochet Copper Gleam Cardigan
-
 Crochet Bohemian Cardigan
-
 Crochet Adorable Kimono
- Lifehacks
-
 Raspberry Ripple Crochet Square Photo Tutorial
-
 Tripple Puff Crochet Granny Square Photo Tutorial
-
 Dally Dahlia Crochet Granny Square Photo Tutorial
- DIY
-
 Crochet Tilly The Turkey Hat
-
 Cute Skull Rocks
-
 Easy Fabric Pumpkins
- Knitting Ideas
-
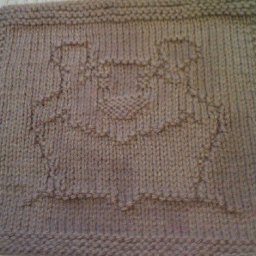 Knitted Adorable Washcloth
-
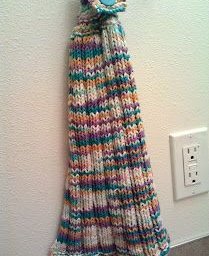 Knitted Button-top Ribbed Hand Towel
-
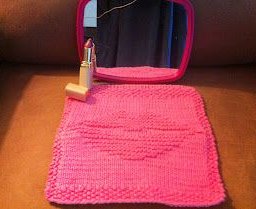 Knitted Kiss Me Lips Dishcloth