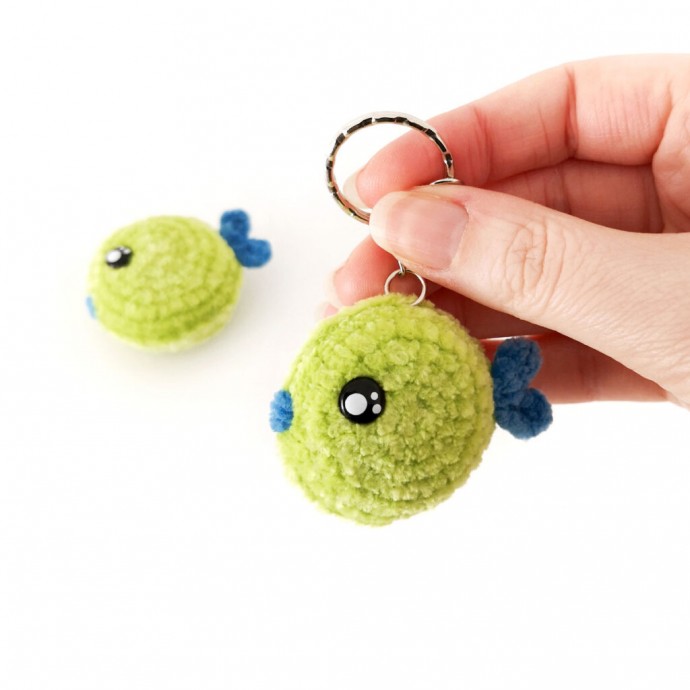
Crochet Fish Keychain

Crochet fish keychains are such a delightful addition to any set of keys, don't you think? They bring a unique touch of charm and handmade appeal that is hard to resist. The intricate details and vibrant colors make them stand out and add a fun, playful vibe to your daily essentials. Whether you're a crochet enthusiast looking for a new project or simply someone who appreciates cute accessories, a crochet fish keychain is sure to bring a smile to your face every time you reach for your keys.
Materials
- DK weight chenille yarn in 2 different colours (main colour and contrasting colour – I used DMC Happy Chenille in Fizzy and Splash)
- 3mm crochet hook
- 8mm safety eyes
- Polyester fiberfill
- Keychain (I used a 1″ keychain ring with a 1.25″ chain)
- Stitch marker
- Yarn needle
- Scissors
Abbreviations (US Terms)
- ch – chain
- sc – single crochet
- inc – increase
- hdc – half double crochet
- sl st – slip stitch
- st/s – stitch/es
- […] – repeat the instructions in brackets
- (…) – indicates stitch count at end of round
Notes
- The finished item measures approximately 1.75″ x 2.25″ (4.5cm x 6cm) including the tail, when using the materials listed.
- Pieces are worked in a continuous spiral starting with a magic ring unless otherwise specified. Mark the first stitch of each round with a removable stitch marker.
- This is a no-sew pattern. The body is worked flat and slip stitched together and the tail is crocheted directly onto the body.
- I’m using a ch 2 start as I find it easier with this type of yarn. Feel free to use a magic ring if you prefer.
- Gauge is not important in this pattern. Use a hook size to match your chosen yarn. Make sure that your stitches are tight enough to prevent stuffing showing through and adjust hook size if necessary.
LET’S GET STARTED!
Fish (make 2, main colour)
R1: Ch 2, 6 sc in first ch (6)
R2: [Inc] x6 (12)
R3: [Sc, inc] x6 (18)
R4: Sc, inc, [2 sc, inc] x5, sc (24)
R5: [3 sc, inc] x6 (30)
R6: [Sc] x30 (30)
Fasten off the first piece invisibly, do not fasten off the second piece.
Joining
Place both pieces wrong sides together with the second piece on top (the piece that still has the yarn attached).
Sl st together through the inner loops only (the back loop of the side facing you and the front loop of the side facing away from you). Stop when you’re approximately half way around.
Insert safety eyes between R3 and R4 on both sides, approximately 1 round higher than the magic ring. Make sure to look at it head on to check that the safety eyes are aligned with each other before putting the backs on.
Start stuffing and continue to stuff as you go.
Continue to sl st together.
Fasten off invisibly and weave in end.
Mouth
Using contrasting yarn, sew a horizontal line across the sl st join between the eyes approximately 1 st below the centre of the eye. Sew over it 5 times or until you have your desired look.
Tail
The tail is created in a single stitch. There isn’t an exact placement, you want to try and line it up with the centre of the magic ring.
Find the stitch that is roughly inline with the centre of the magic ring on the opposite edge from the mouth. Join contrasting yarn.
[Ch 3, hdc in second ch from hook, sc in next ch, sl st in same st as starting ch] x2
Fasten off and weave in ends.
Attach keychain if desired. If you’re using a keyring and chain like the ones I use, you can just open the jump ring and slip it through a stitch at the top or you can sew it in place using matching yarn.


