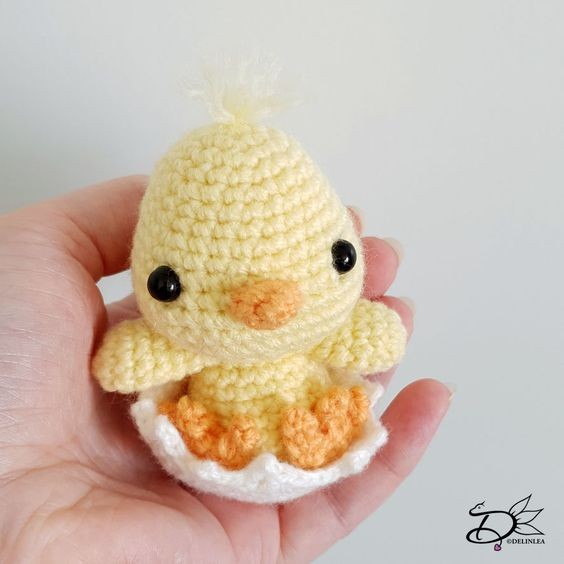
Crochet Baby Chicken

Crochet baby chickens are absolutely adorable! These charming creations make for a delightful addition to any nursery or as a lovely handmade gift for expecting parents. With their small, fluffy bodies and tiny beaks, they exude cuteness in every stitch. The intricate details and bright colors of these crochet baby chickens bring a touch of whimsy and charm to any space.
Crafting these little gems can be a fun and rewarding project, perfect for anyone with a love for both crochet and all things cute. Whether you're a seasoned crocheter or just starting out, making a crochet baby chicken is sure to bring a smile to your face and warmth to your heart.For this DIY you’ll need:
♥ Yarn in the colors; Yellow, Orange and White. (I used Budgetyarn)
♥ Crochet Hook (I used a 2,5mm hook).
♥ Stuffing.
♥ Scissors.
♥ Sewing Pins.
♥ Yarn Needle.
♥ Safety eyes, 6mm.
Stitches used (US Terms):
Magic Ring.
Ch = Chain.
SC = Single Crochet.
HDC = Half Double Crochet.
DC = Double Crochet.
Picot = made of 3 Chains.
ST = Stitch.
Inc = Increase.
Dec = Decrease.
(…) = Repeat the space in brackets the given number of times.
[…] = Total number of stitches.
Pattern
The Body, Head and Wings will be the same as the Boho Duckling. Use Yellow for these parts.
Beak
In the color Orange.
1: 4SC in Magic Ring. [4]
2: (inc, 1SC) 2 times. [6]
Fasten off and leave a long tail for sewing.
Feet
In the color Orange.
1: 6SC in Magic Ring. [6]
2: (1SC, inc) 3 times. [9]
The next part will be a bit tricky. If you can’t do it you can always make the feet from boho Duckling. You’ll devide your workin 3 parts. So the row you work on, make flat, side by side. Follow row 3/4 as written and repeat 3 times (2 times you need to re-attach your yarn).
3/4: 1SC, go to the other side of your work/row (that’s why you had to flatten). Count 3 stitches back (so the 1 you just made and 2 from the last row). Insert your hook in that stitch. Make 2SC. You will work in a tiny circle. make 3 more SC on top of the 3 st you just made.
Fasten off and weave in all tails.
Egg Shell
In the color White.
1: 6SC in Magic Ring. [6]
2: 2SC in each st around. [12]
3: (1SC, inc) 6 times. [18]
4: (2SC, inc) 6 times. [24]
5: (3SC, inc) 6 times. [30]
6: 30SC. [30]
7: 30SC. [30]
8: (4SC, inc) 6 times. [36]
9: 36SC. [36]
|
11: 36SC. [36]
12: (HDC, DC, Picot, HDC, Picot, 3SC, HDC, DC, Picot, HDC, 2SC, Picot, 1SC) 3 times.
Fasten off and weave in tail.
Assembling
I always use sewing pins to place all parts first, before sewing. This way you can easily move all parts around until you are happy with the outcome.
Sew on the body to his head and place the wings at both sides of the body, sew on. His beak will go in between his eyes, but slighly lower. You don’t have to stuff the beak, but you can do if you want, do that when you are almost done sewing it on. Last sew on his feet.
Tip, add some pink pastel dust on his cheeks, for an extra cute look.
