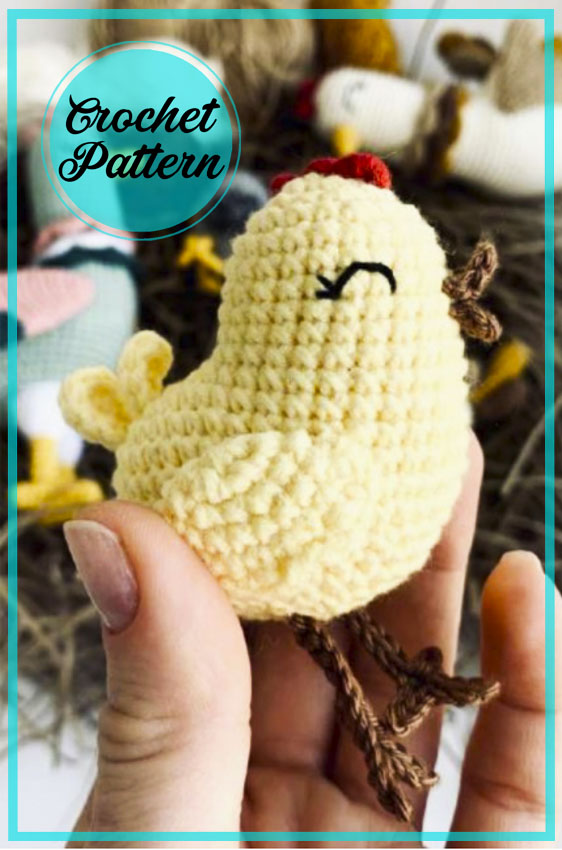
Crochet Little Chicken Amigurumi

Create your very own adorable little chicken toy with the art of crochet! This amigurumi project is perfect for beginners and experienced crocheters alike. Using soft yarn in yellow and orange hues, you can bring this charming little chicken to life with just a few simple stitches. The finished amigurumi will make a delightful addition to any Easter basket or nursery decor.
You can customize your creation by adding details like a tiny comb on its head or a pair of googly eyes for extra personality. Whether you're making it as a gift for a friend or simply as a fun project for yourself, this crochet little chicken amigurumi is a charming and whimsical addition to your collection of handmade toys.You will need:
- Yarn
- Eyes on a secure fastening or a little black yarn for embroidery;
- Your favorite hook 2.0mm;
- Knitting needle for sewing on details and face embroidery;
- Any filler to your taste (I use holofiber or synthetic fluff, which is available);
- Marker for marking stitches (desirable!), if it is not, it is not scary, you can mark the end of the row with a thread of a contrasting color;
- Scissors;
- Inspiration and a couple of cups of hot coffee, tea or cocoa navash =)
Abbreviations
AR – Amigurumi Magic ring
MR – Amigurumi Magic ring
App – application
ll – lift loop
sc : Single Crochet
inc : Increase
dec : Decrease
tr : Triple Crochet/ Treble Crochet
st: Stitch
dc : Double Crochet
hdc: Half Double Crochet
sl-st : Slip Stitch
ch : Chain
..in : make increase into same stitch as many as the number which is given in front of “inc” abbreviation (exp; 3inc, 4inc..).
FLO : Crochet into front loops only
BLO : Crochet into back loops only
BL : Bobble Stitch – do 5dc all in the same stitch and then yarn over and pull through all the loops on your hook (the original loop + 1 loop for each partially completed dc).
Head and body:
We knit the head with yellow yarn:
RND1: 6 sc in MR (6)
RND2: 6 inc (12)
RND3: (1sc, 1inc)*6 (18)
RND4: (2sc, 1inc )(24)
RND5-9: 24sc (24)
The head is ready , but we do not cut the thread, from this place we will continue to knit the body of our Chicken.
Body
We collect a chain of 3 ch, in the second loop from the hook we knit:
RND1:1inc, 1sc (chain), 24sc, 2sc (chain) (29)
RND2:2inc, 26sc, 1inc (32)
RND3:(1sc, 1inc)*2, 27sc, 1inc (35)
RND4:(2sc, 1inc)*2, 28sc, 1inc (38)
RND5-6: 38sc (38)
RND7:2sc, 1dec, 17sc, 1dec, 15sc (36)
RND8:(4sc, 1dec)*6 (30)
RND9-10: 30sc (30)
Stuff your head and body with filler as you knit
RND11:(3sc, 1dec)*6 (24)
RND12:(2sc, 1dec)*6 (18)
RND13:(1sc, 1dec)*6 (12)
RND14:6dec (6)
Fill the part tightly with filler, then cut the thread, pull off the hole with it, secure and hide it inside the product.
Wings:
2 details
We knit with yellow yarn:
RND1:6sc in MR (6)
RND2:6inc (12)
RND3:(1sc, 1inc)*6 (18)
RND4:18sc (18)
Fold the wing in half and knit 9sc through both halves. Then do ch, turn knit over and continue:
RND5:(3sc in one base, 2slst)*3.
Cut the thread, leaving a tail for sewing the wing to the body.
Legs:
2 details
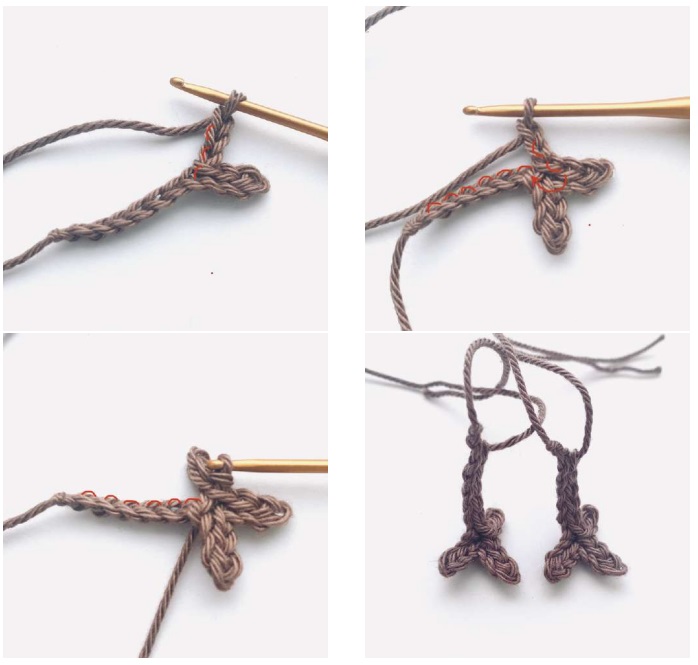
Cast on a chain of 10ch, starting from the second loop from the hook, make 3slst (for half loops), then cast on 3ch.
Make a 2slst chain and one in the center between two fingers. Cast on 2ch again, knit 1slst into the second half from the hook and 1slst into the center.
Now knit 6slst along the chain you typed in kb at the beginning .
The leg needs to be spread a little with your fingers, giving it the necessary shape – the leg is ready.
We knit the second leg in the same way =)
Beak and tail:
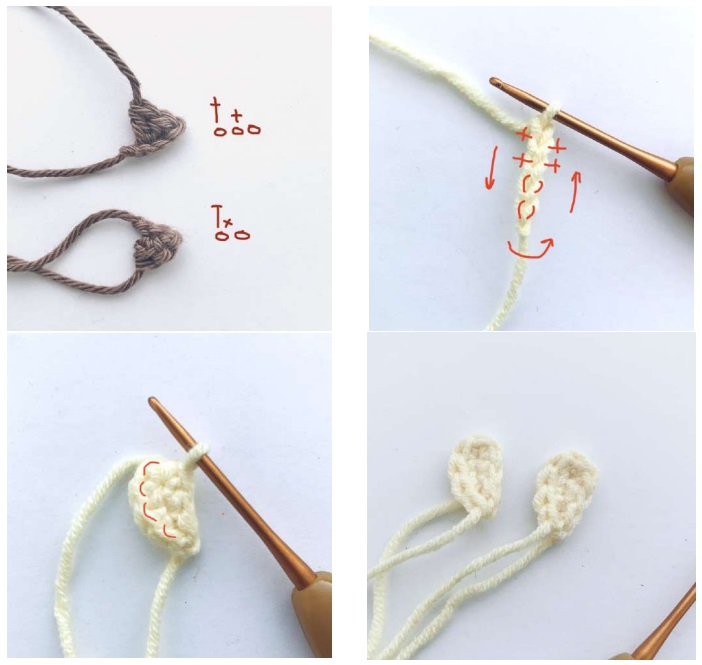
The chick’s beak consists of two parts, which are knitted and sewn separately.
Top: Cast on a 3ch chain, knit 1 sc behind the second half loop from the hook, then 1dc on the next. Cut the thread, leaving a small tail for sewing to the head.
Bottom: cast on a chain of 2ch, in the first loop knit 1 sc, 1 hdc.
Tail
The tail consists of two feathers, which are knitted according to the scheme:
We put on a chain of 5ch, in the second loop from the hook we knit: 1inc, 1sc, 2slst (go to the other side of the chain), 2slst, 2sc . Then knit another 4slst .
The tail is ready!
Comb
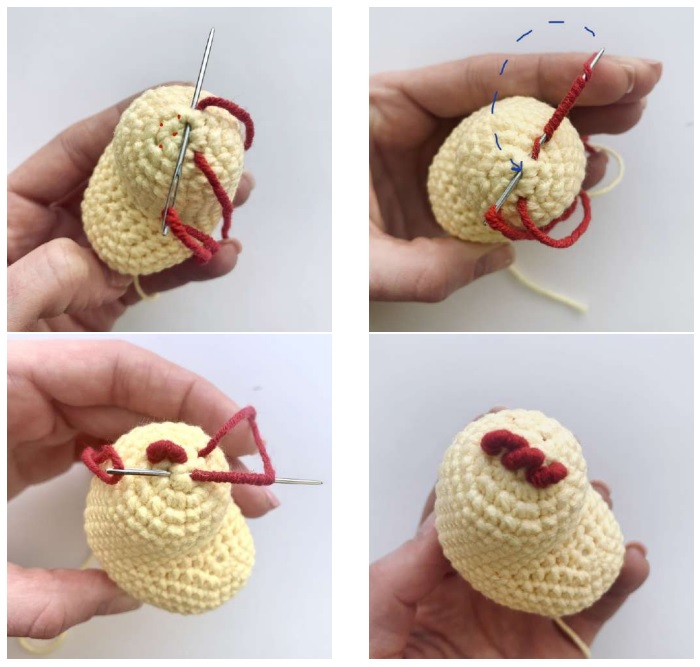
In order to make a comb, we need a needle and a piece of cherry (or other red) yarn.
We will embroider it like a French knot, the comb will consist of 3 elements.
First, outline the location of your parts . Insert the needle as shown in photo 1 and wrap it with yarn 10 times . Then carefully pull the needle through the wound loops and insert it into the place where the needle end in photo 2 is.
Do the same for the remaining 2 pieces of the comb.
We collect:
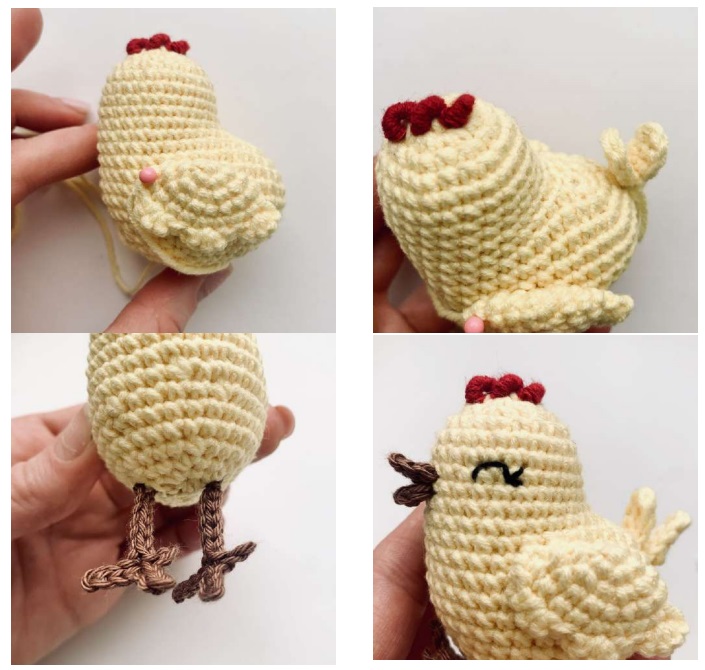
Sew the wings in the area of the 5th row of the body as shown in photo 1.
Sew the tail to the 3rd row of the body (in the area of the ch chain ).
Sew the legs symmetrically on both sides at the bottom of the body in the area of the penultimate row.
Sew the upper part of the beak between 7 and 8 rows of the head, the lower part under it between 8 and 9 rows.
Using a needle and black yarn (mule thread), embroider the chicken’s eyes.
