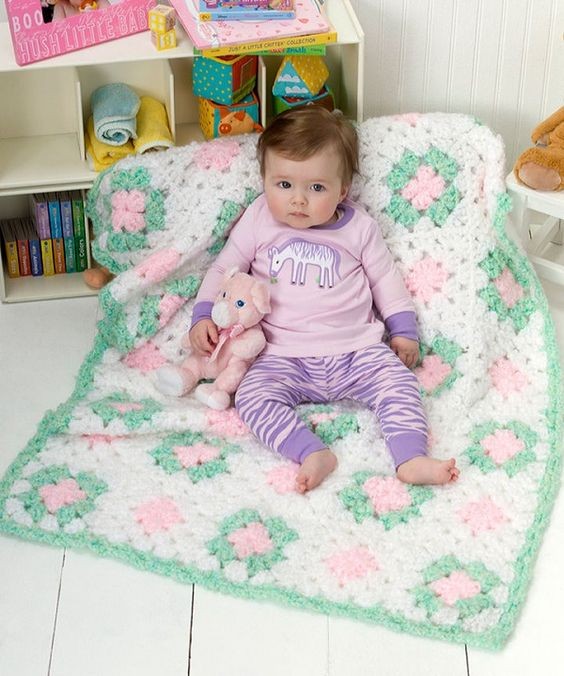
Imagine creating a beautiful floral design using the art of crochet. The Crochet Flower in the Dell Baby Afghan is a stunning piece that combines intricate crochet techniques with delicate flower motifs. Each flower is carefully crafted and stitched together to form a lovely pattern that will surely catch the eye. The soft colors and cozy texture of the afghan make it the perfect addition to any nursery or baby's room. The Crochet Flower in the Dell Baby Afghan is not only a lovely decorative piece, but it also serves a functional purpose by providing warmth and comfort to a little one. Whether you are an experienced crocheter looking for a new challenge or a beginner wanting to try your hand at something special, this afghan is a wonderful project to work on. Let your creativity bloom as you crochet each flower and watch as the design comes together to create a truly enchanting piece.
Skill Level Easy
Required Supplies:
- RED HEART Baby Clouds: 1 skein 9724 Pink Lemonade A, 2 skeins 9517 Seaspray B and 4 skeins 9311 Cloud C (E710 Baby Clouds is discontinued)
- Crochet Hook: U.S. Size N-15 [10mm]
- Yarn needle
GAUGE: Square measures 6″ x 6″. CHECK YOUR GAUGE. Use any size hook to obtain the gauge given.
Blanket measures approximately 32” x 44”.
BLANKET
Square A (Make 18)
With A, ch 4; join with a slip st to form a ring.
Round 1: Ch 5 (counts as a dc and a ch-2 space), [3 dc in ring, ch 2] 3 times, 2 dc in ring; join with a slip st in 3rd ch of ch-5. Fasten off.
Round 2: Join B in any ch-2 space. Ch 5, 3 dc in same space, ch 1, [(3 dc, ch 2, 3 dc) all in next ch-2 space for corner, ch 1] 3 times, 2 dc in first space; join to 3rd ch of ch-5. Fasten off.
Round 3: Join C in any corner ch-2 space. Ch 5, 3 dc in same space, ch 1, 3 dc in next ch-1 space, ch 1, [(3 dc, ch 2, 3 dc) all in corner ch-2 space, ch 1, 3 dc in next ch-1 sp, ch 1] 3 times, 2 dc in first space; join. Fasten off.
Square B (Make 17)
Round 1: Work same as Square A.
Round 2: Join C in any ch-2 space. Ch 5, 3 dc in same space, ch 1, [(3 dc, ch 2, 3 dc) all in next ch-2 space for corner, ch 1] 3 times, 2 dc in first space; join to 3rd ch of ch-5.
Round 3: Slip st into first space. Ch 3, (2 dc, ch 2, 3 dc) all in first space, ch 1, 3 dc in next ch-1 space, ch 1, [(3 dc, ch 2, 3 dc) all in corner ch-2 space, ch 1, 3 dc in next ch-1 space, ch 1] 3 times; join. Fasten off.
FINISHING
Edging
Sew squares together following diagram on next page. With right side facing, join B in any corner ch-2 space.
Round 1: Ch 1, ** (sc, ch 3, sc) all in corner space, ch 3, * sc in next space, ch 3; repeat from * to next corner; repeat from ** around; join with a slip st to first sc.
Round 2: Slip st into first space, ch 1, ** (sc, ch 3, sc) all in corner space, ch 3, * sc in next space, ch 3; repeat from * to next corner; repeat from ** around; join. Fasten off.

ABBREVIATIONS:
A, B, C = Color A, B C; ch = chain; Slip st = Slip Stitch; [ ] = work directions in brackets the number of times specified.


