Other hand-made
Create topic
Nice Colar with Beads
You'll need: Replaceable placket; Big and small beads of any colors you like; Needle for beads; Threads; Scissors. Instructions Take a 20-30-centimeter thread and tie a knot at the end that is sufficient so that the beads do not slip. Using a needle, string as many beads as possible. Remove the needle and fasten the beads with one more knot. There will be several such threads, depending on the size of your collar. Place the thread with the strung beads on the collar, not filling those pla...
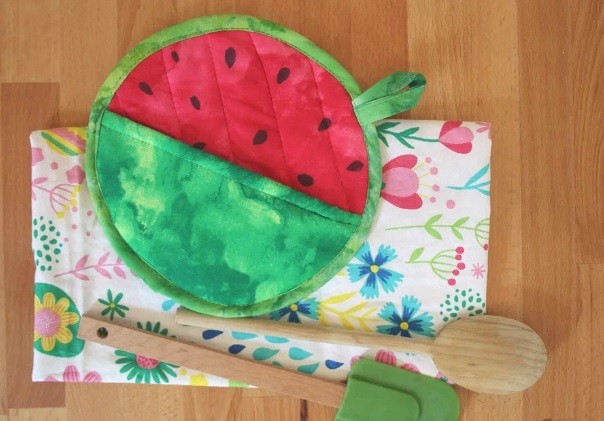
Watermelon Oven Cloth
You'll need: Green and red fabric; Sintepon (bed); Plate; Dress-making scissors; Vanishing marker for fabric; Black permanent marker for fabric; Ruler; Pins; Sewing machine; Threads. Instructions Using a plate or something similar as a pattern, cut out the same round details: - 2 of red fabric; - 1 of green fabric; - 3 from synthetic winterizer. Assemble the main part of the tack: a piece of red fabric with the wrong side up, two parts of synthetic winterizer, a part of red fabric ...
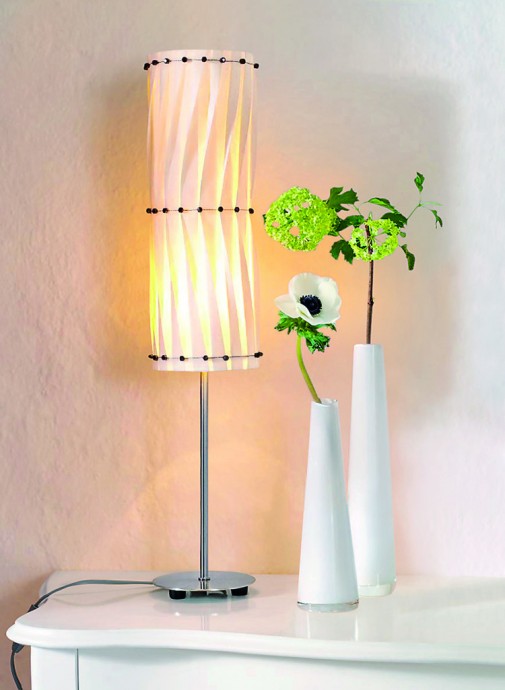
Hand-Made Standard Lamp
You'll need: Standard lamp carcass; Tyvek packing; Glass beads; Glue gun. Instructions Cut a rectangle from tyvek: the length is 4 circles of the lampshade, the width is the height of the frame plus 4 cm. Fold the tyvek with one-sided folds 2 cm deep with an interval of 4 cm. Sew in the middle on a typewriter. On the upper and lower edges, fold the folds in the opposite direction, draw lines with a pencil and sew. Use a glue gun to decorate all seams with colored beads. Then attach the lampsha...
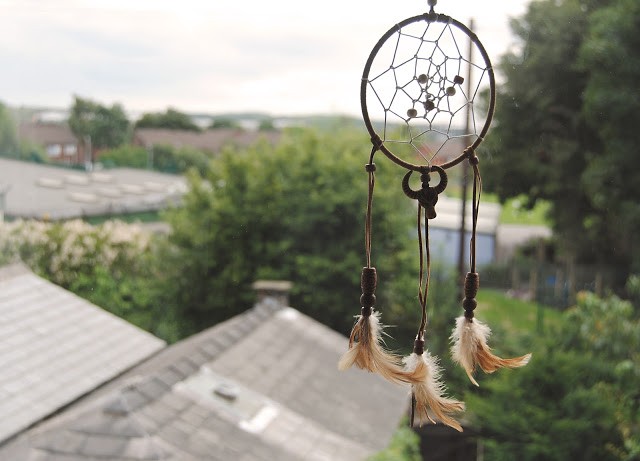
Dream Catcher
You'll need: Metal or wooden ring (about 12 cm diameter); Suede ribbon (at least 2,5 m); Threads (at least 2,5 m); Feathers; Beads; Glue; Scissors. Instructions Fix the end of the suede ribbon with glue and start braiding your ring. Having reached the end, fix the end with glue. From the remaining ribbon, make a loop on which your catcher will hang. If desired, you can decorate it with a pair of beads. Now we proceed to the creation of the web itself. Secure the thread with a knot. Th...
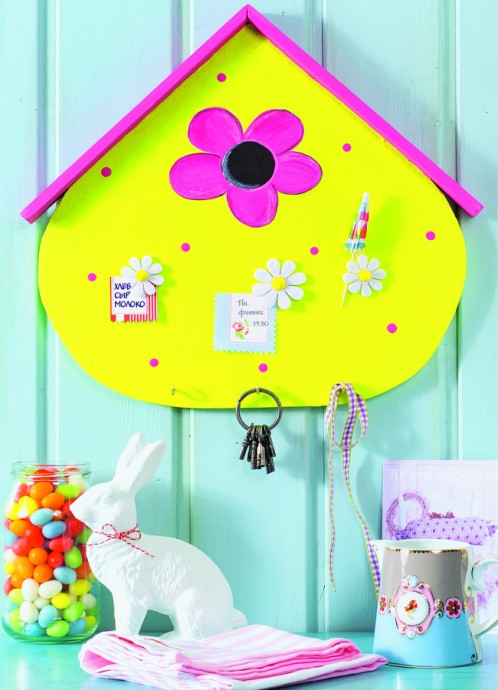
Magnet Board
You'll need: Plywood sheet 12 mm wide, 40 x 40 cm; Pine strip of board 10 mm wide, 30 x 70 cm; Carbon paper; White, purple-pink, lemon-yellow and black acrylic paint; Magnetic ink; 2 white felt flowers 3,5 cm diameter and 1 flower 4,5 cm diameter; 3 very powerful magnets 11 mm diameter; 2 yellow wooden beads 10 mm diameter and 1 bead 12 mm diameter; 4 short nails; Folding hinge for hanging on a nail; 3 small screw hooks; Wood glue; Fret-saw for decoupage; Glass-paper; Invisible glue; Hamm...
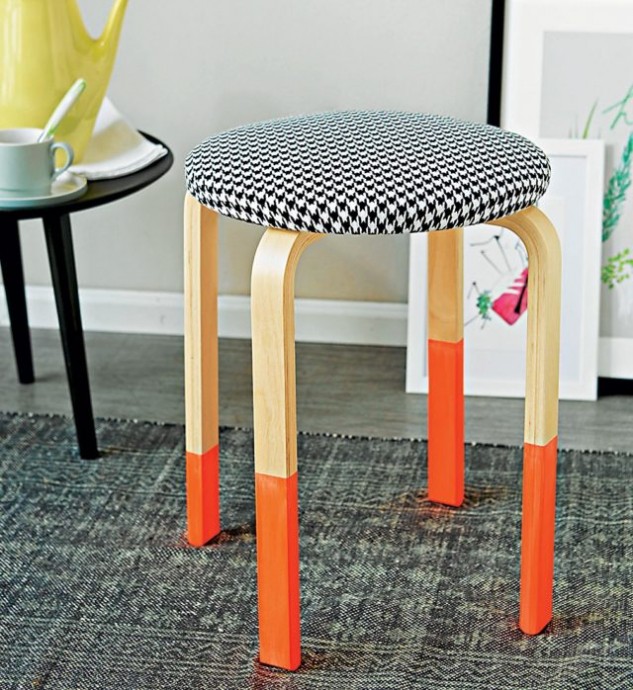
Modernize Your Old Stool
You'll need: Wooden stool; Red acrylic paint; Wide furniture tape; Thick fabric for cover (tapestry or chenille); Stuffing. Instructions Unscrew the legs, each 2/3 of the top wind with tape. From the bottom, paint the legs with paint. Take off the tape. Put the seat on the stuffing, draw a pencil around the contour. Cut successively 2 circles. Lay the seat on the cover, cut a circle from it, adding 5 cm to the hem along the entire circumference. Put 2 circles of stuffing and a seat on th...
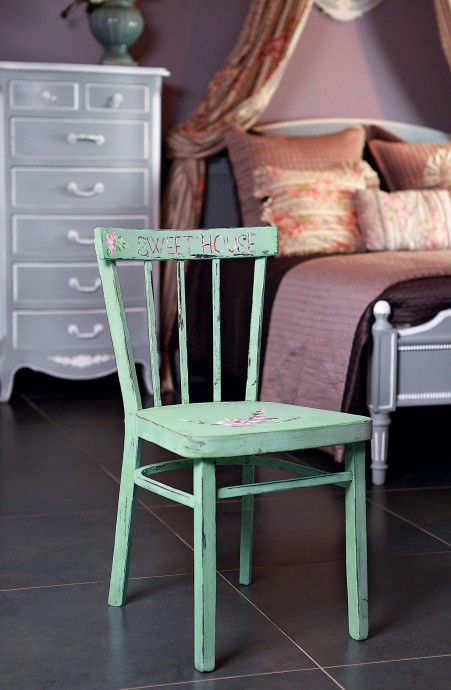
Vintage Chair with Your Hands
You'll need: Wooden chair; Acrylic paints - dark-brown, light-green, white and pink; Paraffin candle; Acrylic varnish; Glass-paper; Brushes. Instructions Sand the surface of the chair with sandpaper. Paint it with dark brown paint and let it dry for an hour. Coat the surface of the chair with varnish and let it dry. Spread the places where you want to make chips, with a candle. Color the chair with light green paint. Thanks to the varnish coating, it does not mix with brown. After the paint ...
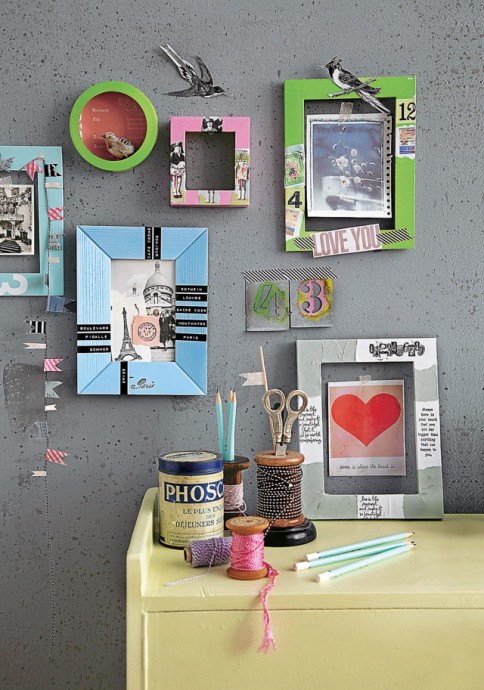
Photo Frame Decoration
You'll need: Wooden frames; Acryl paint in sprinkler; Photos, colorful cuts from magazines; Rolling stamp. Instructions Disassemble the frame by separating the back wall. Stick a photo or colored paper with a pattern on it. Cover the frame with acrylic paint from a sprinkler. Allow to dry completely. Make clippings from photos and pictures. Collect collages from various images, individual letters, numbers and stick them on the frame. The frame can also be decorated with a rolling stamp. Ty...
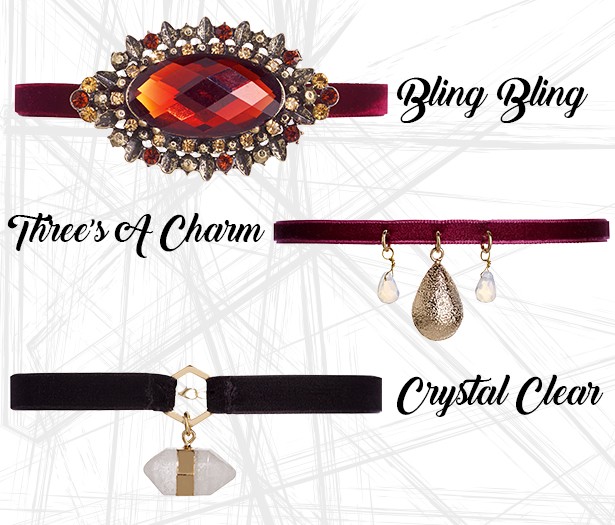
Velvet Hand-Made Chocker
You'll need: Velvet ribbon (30 cm); Pendant; Ringlets for imitation jewelry; Chain fastener for imitation jewelry; Pliers. Instructions Measure neck circumference. Cut the velvet ribbon to the desired length and cut it into two equal parts. Using pins, fasten the ribbons to the ringlet and sew them. Use a pair of pliers to attach the pendant to a separate ringlet, and then fasten it to the main ring of the choker. Insert the ends of the ribbon into the fastener holders and clamp with plie...
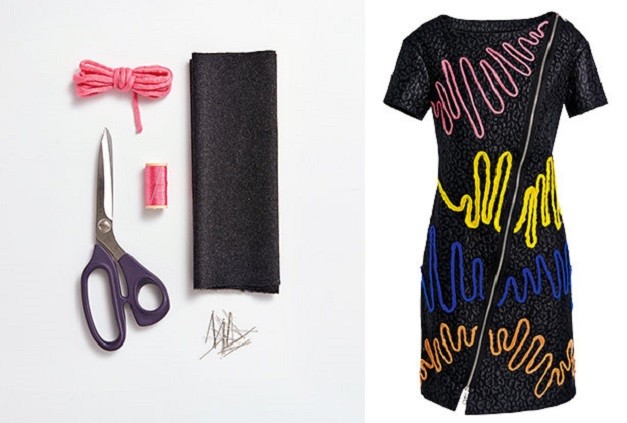
How to Decorate Your Clothes with Yarn
You'll need: Detail of unfinished cloth (dress, skirt, etc); Thick yarn; Pins; Threads the same color as yarn; Scissors. Instructions Use the pins to fix the yarn, creating curved fancy lines. Manually fasten the yarn with several stitches here and there to securely fasten it. Set the zigzag stitch and stitch the yarn. You can decorate the finished product, but it will be much easier to do this at the sewing stage.
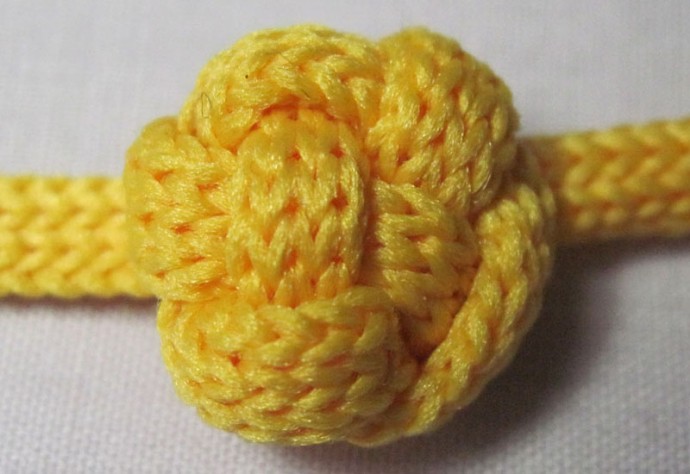
Buttons from Yarn
You'll need: Cord or yarn; Bead; Needle. Instructions Pin the cord to the substrate with a pin and loop (pic. 1). Run the second loop over the first, passing the end of the loop under the cord at the pin (pic. 2). Run the third loop, passing the end of the cord through both previous loops (pic. 3). Do not twist the cord! Gently pull the cord, giving the button the shape of a ball and putting inside its corresponding sized round bead (pic. 4). The ends of the cord can be cut off, tucked an...
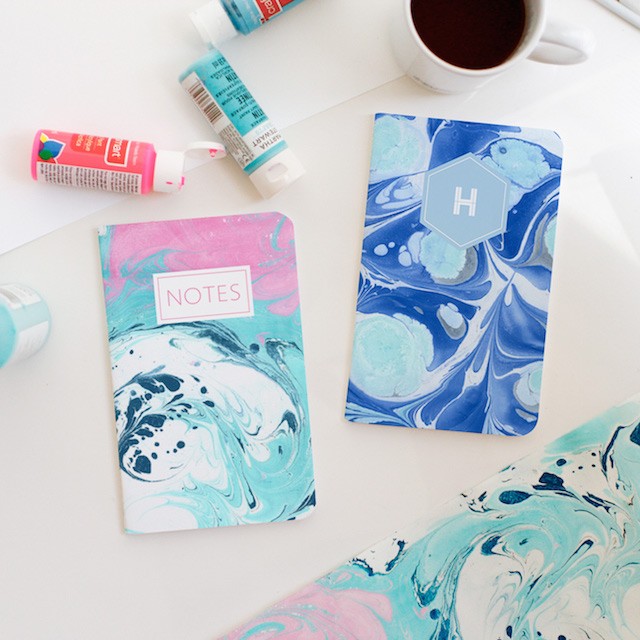
Marble Paper
You'll need: 100% cotton paper (it's very important, as another content won't suit); Alum; Cellulose ester Methocel; Ammonia; Sprinkler; Dosing spoons; Utility whisk; Liquid soap; Deep tray of bigger size,than your paper sheets; Big bowl; Acrylic paints; Clothes line. Instructions First, prepare the paper. Fill the spray bottle with warm water and add two tablespoons of alum to it, mix. Let the liquid cool and then spray on one side of your sheet. Leave to dry, but do not forget to m...
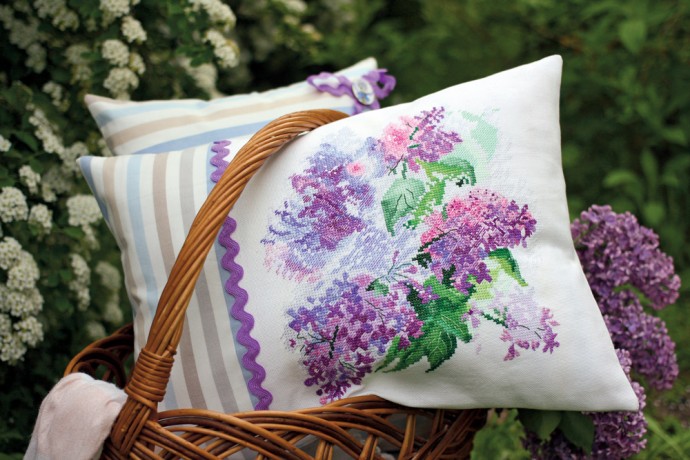
Aroma Pillow
You'll need: Canvas with embroidery 35 x 40 cm; Fabric for patchwork: 45 x 35 cm piece for back, 20 x 35 cm for front; Ric rac lace. Instructions Prepare the materials and embroider the front of the pillow according to the pattern. The planned pillow size is 40 x 30 cm. Cut the fabrics according to the list of materials. Fold the embroidered element and the fabric in a strip face to face, align it to the left edge (on the front side) and sew to make a single canvas for the front side of the ...
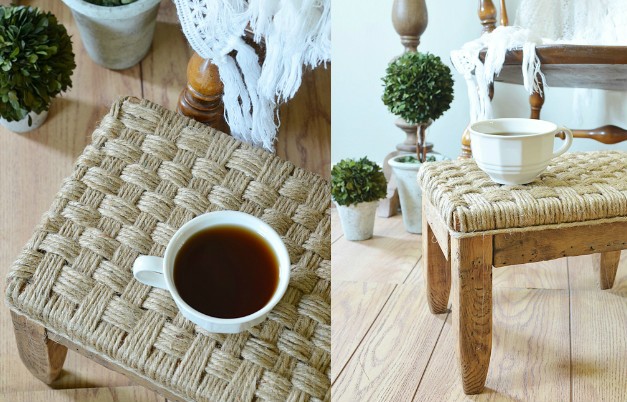
Whipcord Seat for Wooden Stool
You'll need: Wooden stool; Whipcord; Staple gun. Instructions If necessary, sand the surface of the stool. Disassemble it into parts, we will only work with the seat. Use a staple gun to lock the end of the whipcord. Start tightly winding the whipcord so that there are no gaps. Having reached the end, fix the end with a staple gun. Start twisting the threads in the transverse direction. It is more convenient to do this by folding the working thread in half - so you thread two threads at o...
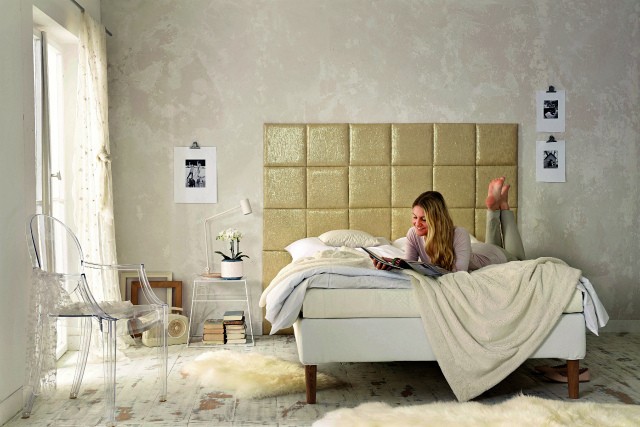
Bed Head with Your Hands
For bed width 140 cm. You'll need: 30 plywood squares (gauge - 10 mm, width and length - 30 cm); 30 foam plastic squares (gauge - 19 mm, width and length - 31 cm); Plywood sheet (height - 150 cm, width - 180 cm); Glue; 4 m of fabric; Screws and dowels; Scissors; Staple gun; Tape. Instructions Cover the work surface with film or paper. Cut out all the necessary details. Glue the foam plastic to the squares of plywood, bending the edges (allowances are already taken into account). Lay ...

