Crochet Granny Square Gloves


Crochet granny square gloves are not only super cozy but also add a touch of vintage charm to your winter outfits. These handmade accessories are perfect for keeping your hands warm in style. Choose your favorite colors and yarns to create a unique pair that reflects your personality. Whether you're a crochet enthusiast or just looking for a fun DIY project, these gloves are a delightful way to stay fashionable and toasty during the colder months.
Materials Needed & Measurements:
- Suggested Yarn: Cascade 220 (100% highland Peruvian wool) or any worsted/Aran weight yarn.
- Suggested alternatives Yarns:
- Knit Picks Wool of the Andes Worsted
- Lion Brand Heartland Yarn
- Lion Brand Vanna’s Choice
- Cascade 220 Superwash
- Hook: 5.5mm (US I/9)
- Other Supplies:
- Scissors
- Tapestry needle (for weaving in ends)
Measurements:
- Width: Approximately 3.5 inches when folded in half
- Length: Approximately 6.75 inches when seamed
Stitching Instructions for Making the Granny Square Gloves Pattern:
Make 2 Granny Squares:
- Round 1 (R1):
- Ch4, join with a sl st to the first ch to form a ring.
- Ch3 (counts as the first dc), 2dc into the ring, ch2. (Corner 1 created)
- (3dc, ch2) 3 more times into the ring, creating the remaining 3 corners.
- Join with a sl st to the top of the starting ch3.
- Sl st into the first ch2 corner space.
- Fasten off and turn your work over.
- You now have a small square with four clusters of 3dc and 4 ch2 spaces (one at each corner).
- Round 2 (R2):
- Join the yarn in any ch2 corner space, ch3 (counts as the first dc).
- (2dc, ch2, 3dc) in the same ch2 corner space. (Corner made)
- In the next 3 ch2 spaces, work (3dc, ch2, 3dc).
- Join with a sl st to the top of the starting ch3.
- Sl st into the next ch2 space.
- Fasten off and turn.
- You now have a larger square with 8 clusters of 3dc separated by ch2 corners.
- Round 3 (R3):
- Join the yarn in any ch2 corner space, ch3.
- (2dc, ch2, 3dc) in the same ch2 corner space. (Corner made)
- 3dc in the next space between corner clusters. (This is the first side cluster.)
- Repeat the pattern: (3dc, ch2, 3dc) in each corner, and 3dc in each side space between corners.
- Join with a sl st to the top of the starting ch3.
- Sl st into the next ch2 space.
- Fasten off and turn.
- At this point, your square should have 4 corners and 4 side clusters.
Rounds 4-8 (or until the square measures approximately 6.75 inches):
- Repeat the same pattern, increasing the number of 3dc clusters on the sides as the square grows:
- Work (3dc, ch2, 3dc) in each ch2 corner space.
- Work 3dc in each space along the sides between corners.
- The number of side clusters will increase with each round:
- Round 4: 2 clusters per side.
- Round 5: 3 clusters per side.
- Round 6: 4 clusters per side, and so on.
- After the last round, do not fasten off immediately; check the size by folding the square.
Adjust the Square Size (Optional):
- If the square feels slightly too small, you can crochet one additional round.
- To fine-tune the size, consider adding a single round of sc or hdc around the edges, working 2 stitches per side cluster and 3 stitches into each corner ch2 space.
Seaming the Gloves:
- Fold the Granny Square:
- Fold each completed square in half with the wrong side facing out.
- Ensure the corners align neatly along the edges.
- Seam the Edges:
- Using the long yarn tail or a new piece of yarn, seam the edges together using a whip stitch or slip stitch:
- Seam the top edge for about 2 inches from the fold downward (this will close the glove’s top).
- Leave a 2-inch gap for the thumb opening.
- Seam the remaining bottom edge upward for about 2.25 inches.
- Using the long yarn tail or a new piece of yarn, seam the edges together using a whip stitch or slip stitch:
- Finishing Touches:
- Weave in all loose ends using the tapestry needle.
- Turn the glove right side out.
- Repeat: Follow the same steps to create and seam the second glove.
These granny square gloves are customizable, feel free to add a decorative edging or embellishments for a personal touch!
- Recipes
-
 Tuxedo Cake
-
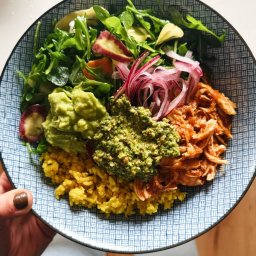 Crockpot Chicken Bowls with Yellow Rice and Cilantro Pesto
-
 Fresh Turmeric Tea
- Funny Pictures
-
 Funny Pictures to Brighten Up Your Day
-
 Hilariously Spot-on Tweets About Life With Cats and Dogs
-
 Hilarious Memes for Usual Scrolling
- Crochet Ideas
-
 Crochet Easter Sheep and Duck Egg Bags
-
 Crochet Summer Top
-
 Crochet Crown Ear Warmer
- Lifehacks
-
 Flower With Stem Stitch Photo Tutorial
-
 How to Crochet the Slanted Clusters Stitch Photo Tutorial
-
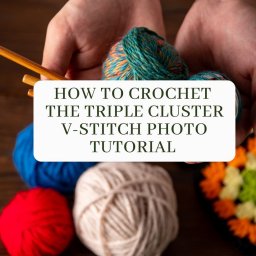 How to Crochet the Triple Cluster V-Stitch Photo Tutorial
- DIY
-
 Crochet Smiling Flowers
-
 Crochet Summit Scarf
-
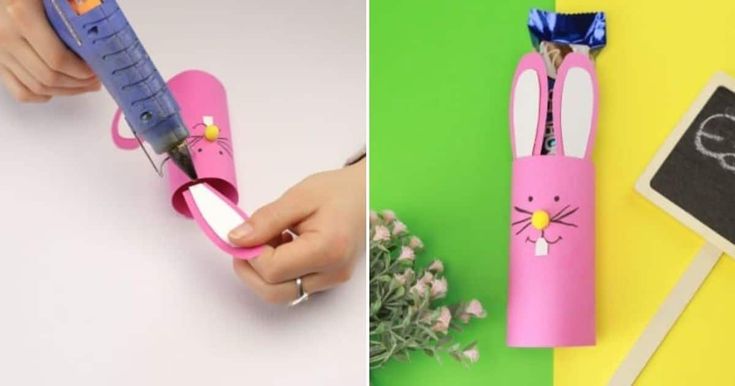 Paper Easter Bunny Candy Holder
- Knitting Ideas
-
 Knitted Bunny Hat and Booties
-
 Knitted Clove Dishcloth
-
 Knitted Waffle Headband
The picture and the directions do not match!