Crochet Ear Muffs Cover


Crochet ear muffs covers are a charming way to add a touch of coziness and style to your winter wardrobe! These handmade creations are not only perfect for keeping your ears warm and toasty but also serve as a fun fashion accessory. Their unique and intricate designs can be personalized to match your personality or outfit, making them a delightful addition to any cold-weather ensemble.
Ear Muffs Cover Pattern
Materials
Yarn – Any Worsted weight yarn of choice.
Stylecraft Special Aran, #4 (100% Acrylic, 116 yards/106 m per 1.8 oz/50g Skein)
Estimated Yardage
60 yards
Hook and other materials
- 4 mm Crochet Hook
- Yarn needle
- Ready form for ear muffs
- OR headphones
- Optional Polyfiber
Gauge
14 sts over 9 rows = 10 cm square/4” made in dc
Pattern Notes
- Please kindly read through the pattern before starting.
- Any #4 weight of yarns can be substituted.
- Chains at the beginning of Rounds do not count as a stitch.
Skill Level – Easy
Terms – US Terminology
Stitch Abbreviations
Chain(s) – ch(s)
Single Crochet – sc
Double Crochet – dc
Space – sp
Repeat – Rep
How to Crochet Ear Muffs Cover
Make 4 pieces – 2 per ear muff.
Round 1: In a MR, ch 3(counts as the first st, here and throughout), 11 dc in the MR, join with a sl st to the beginning chain. 12 dc
Round 2: Ch 3, dc in same st as ch sp, 2 dc in each st around, join with a sl st to the beginning chain. 24 dc
Round 3: Ch 3, *2 dc in next st, dc in next st, -rep from * around, join with a sl st to the beginning chain. 36 dc
Round 4: Ch 3, *dc in next 2 sts, 2 dc in next st, rep from * around, join with a sl st to the beginning chain. 48 dc
Round 5: Ch 1 (counts as the first st), sc in next st, (hdc, dc) in same st, 2 dc in next 5 sts, dc in next 2 sts, hdc in next 2 sts, sc in next 8 sts, hdc in next 2 sts, dc in next 2 sts, 3 dc in next st, dc in next 2 sts, hdc in next 2 sts, sc in next 8 sts, hdc in next 2 sts, dc in next 2 sts, 2 dc in next 5 sts, (dc, hdc) in same st, sc in last st, join with a sl st to the beginning ch sp. 62 sts
Round 6: Ch 1, sl st in next st, sc in next st, (hdc, dc) in next st, 2 dc in next 6 sts, dc in next 3 sts, hdc in next 2 sts, sc in next 15 sts, (sc, ch 2, sc) in next st, sc in next 15 sts, hdc in next 3 sts, dc in next 3 sts, 2 dc in next 6 sts, (hdc, dc) in next st, sc in last st, join with a sl st to the beginning ch sp.
Fasten off
Joining
Step 1: Pick two pieces and place each over, with the wrong side facing out.
Step 2: Using either a darning needle or a hook, join/sew the two sides together, leaving about 12 sts unjoined.
Step 3: Turn the panel to the right side.
Step 4: Pass the earmuff through the unjoined space, ensuring the heart’s upper part is positioned next to the headband.
Optional – Add some polyfibers for extra cushioning.
Step 5: Join the remaining stitches.
Fasten off.
Repeat for the second ear muff.
Section 2: Band
Adjust the number of chains to match the length of the solid part across the ear muffler.
Row 1: Chain 51, sc in 2nd ch from the hook and in each ch across, turn. 50 sc
Rows 2 – 8: Ch 1, sc in each st across, turn. 50 sc
Increase or decrease the repeats until you have a width wide enough to wrap around the headband.
Do not fasten off.
Pick up the earmuff
Place the band just made across the
Using either a darning needle or a hook, join/sew the two sides together, leaving about 12 sts unjoined.
- Recipes
-
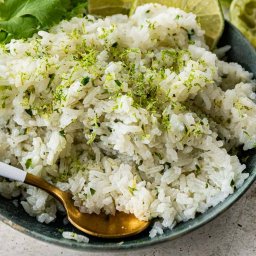 Cilantro Lime Rice
-
 Sweet Potato Soup with Roasted Cauliflower Crumbles
-
 Americano Cocktail
- Funny Pictures
-
 Incredible Animal Pics to Have Some Good Time
-
 Totally Wholesome Doggo Memes
-
 Cute and Adorable Animals for You
- Crochet Ideas
-
 Crochet Crop Top
-
 Crochet Easter Sheep and Duck Egg Bags
-
 Crochet Summer Top
- Lifehacks
-
 How to Crochet the Plaid Stitch Photo Tutorial
-
 How To Crochet The 3-Colored Crosshatch Stitch Tutorial
-
 Flower With Stem Stitch Photo Tutorial
- DIY
-
 DIY Seashell Hair Pins
-
 Crochet Smiling Flowers
-
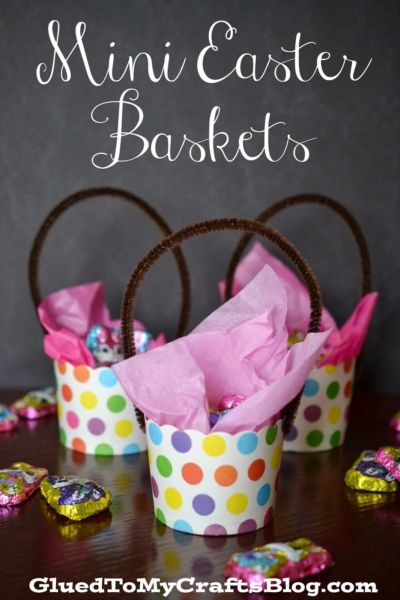 Paper Cup Mini Easter Basket Gifts
- Knitting Ideas
-
 Knitted Twist and Shout Hat
-
 Knitted Pom-Pom Booties
-
 Knitted Rabbit Dolls