Crochet Santa Jingle Bell Ornament
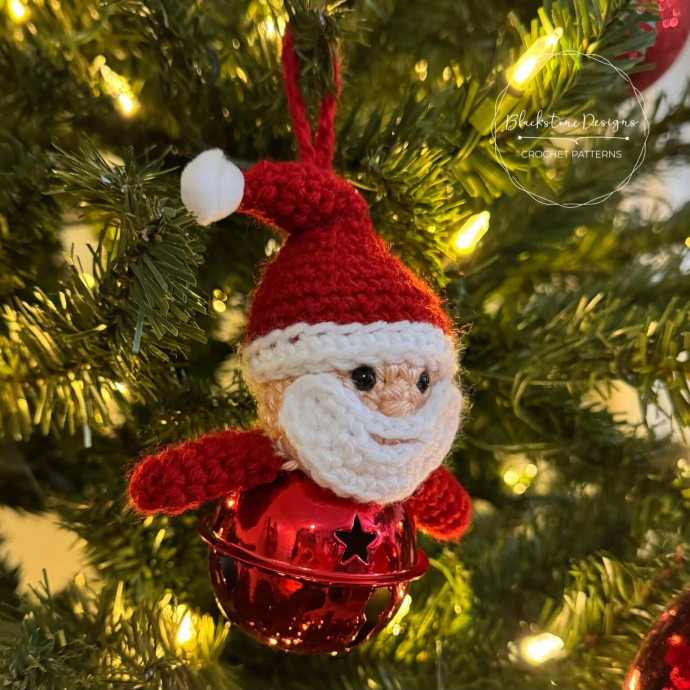
Looking for a festive touch for your holiday decorations? Look no further than the crochet Santa jingle bell ornament! This charming ornament combines the cozy vibes of crochet with the cheerful jingle of bells, making it the perfect addition to your Christmas tree or gift wrapping. Handcrafted with love and attention to detail, this cute Santa ornament will bring joy and a touch of whimsy to your seasonal celebrations.
Materials
Worsted Weight Yarn (#4)
- Skin Tone – 25 yards
- Red – 75 yards
- White – 25 yards
G/6/4.00mm Hook
6mm Black Safety Eyes
12mm Pom Pom
2.5” Jingle Bell
Fiberfill Stuffing
Yarn Needle
Scissors
Hot Glue Gun/Sticks
Gauge
Not important for this project
Finished Measurements
2.25” tall without hat; 2.75” with hat.
Stitch Guide
arnd = around
ch = chain
FLO = front loop only
sc = single crochet
sl st(s) = slip stitch(es)
st(s) = stitch(es)
Skill Level
Easy
Written in U.S. Terms
Notes
- Beginning chains do not count as stitches
- Where asterisks appear, repeat the instructions between them.
- This pattern starts at the top of the head and works down; the head and arms are one piece, with the hat and beard added on after.
Instructions
HEAD
With Skin Tone,
R1. Make a magic ring, ch 1, 6 sc in ring (6)
R2. 2sc arnd (12)
R3. *2sc, sc* arnd (18)
R4. *2 sc, sc x 2* arnd (24)
R5-10. sc arnd (24)
R11. *dec, sc x 2* arnd (18)
With Red,
R12. FLO sc x 4, ch 4, join to form a ring (4 sc, 4 ch) <1st Arm Created>
R13-18. sc arnd (8)
R19. dec arnd; Cut yarn, weave tail through sts, cinch to close; Fasten. (4)Skip 5 sts on head, attach yarn to FLO of 6th st and repeat R12-19. <2nd Arm Created>
HAT
With Red,
R1. Ch 26, join to form a ring, sc in each ch arnd (26)
R2. skip 1 sc, sc arnd (25)
R3. skip 1 sc, sc arnd (24)
R4. *dec, sc x 2* arnd (18)
R5. sc arnd (18)
R6. *dec, sc* arnd (12)
R7. sc arnd (12)
R8. *dec, sc* arnd (8)
R9-13. sc arnd (8)
R14. dec arnd; Fasten. (4)
With White,
R15. Attach yarn to R1: sl st in each st arnd (26)
R16. BLO sc arnd; Fasten. (26)
BEARD
With White,
Ch 11, sc in 2nd ch from hook and in the next 2 sts, 2 sc, sc x 2, 2 sc, sc x 3; do not turn, but work around the outer edge: end of last sc created, sc x 3 (in opposite side of next 3 scs), ch 3, skip 4 sc, sc x 3, sc in the end of the 1st sc created ; Fasten.
HANGER
With Red,
Ch 15; Fasten.
Finishing
- Insert eye on front center of face between R6 & 7, 2 stitches apart.
- Stuff head firmly (do not over stuff).
- Attach head/arms to top center of jingle bell.
- Attach hat to head, so the edge of the brim lines up with the top of the eyes.
- Fold tip of hat between R8&9 and fasten into place (I used hot glue).
- Attach pom pom to tip of hat.
- Stitch a nose onto the front center of face, working from side to side over 1 stitch on R8 (should be centered between eyes).
- Attach beard to front center of face so the top edges of beard meet the hat, leaving a half a stitch between beard and eyes, and so the mustache is under the nose.
- Attach hanger to back of hat as desired.
- Hide all strings.

