Crochet Bell Flower

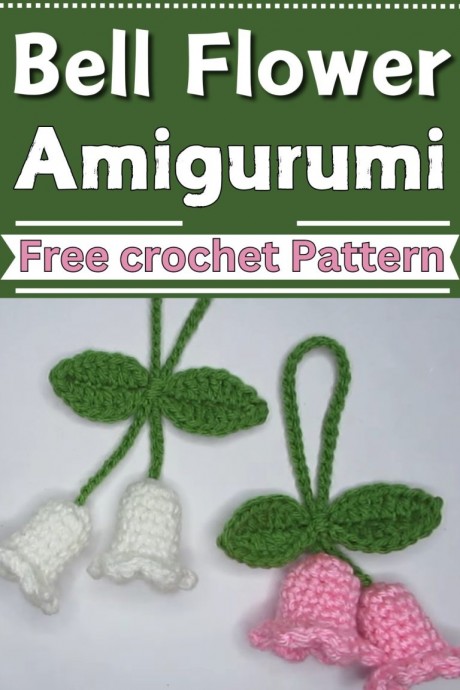
Crochet bell flowers are not just delightful decorations; they are a charming way to add a touch of whimsy to any project! These dainty floral motifs bring a sense of beauty and elegance to your crochet creations. With their intricate petal designs and lovely bell shape, crochet bell flowers are a fun and rewarding project for crafters of all skill levels. Whether you're embellishing a hat, scarf, or blanket, these versatile flowers are sure to add a special touch. So grab your yarn and hook, and let's spread some floral joy with these adorable crochet bell flowers!
Supplies:
- Yarn: Choose a colour and weight according to your project needs. Lighter weights make smaller flowers; heavier weights make larger flowers.
- Crochet Hook: Matched to your yarn weight according to the yarn label recommendations.
- Scissors
- Yarn needle for weaving in ends
- Stitch Marker: Useful for keeping track of rounds, especially in continuous rounds.
Creating the Magic Circle:
- Form a Loop: Lay yarn across your hand with the tail hanging down, and wrap it around your fingers to form an X.
- Prepare for Stitches: Slide your hook under the first loop on your palm, hook the second loop, and pull it back under the first loop.
- Secure Circle: Yarn over (wrap the yarn over your hook from back to front) and pull through the loop to secure a circle. This is the magic circle you will work your stitches into.
Step by step Pattern
Round 1: Base of the Flower
- Start by chaining one (ch 1), then work eight single crochets (sc) into the magic circle.
- Gently pull the tail of your magic circle to tighten, but not all the way – leave a small gap for a natural flower curve.
Round 2: Increase
- Work in continuous rounds without joining. This round will increase your stitch count to shape the flower.
- Pattern: [1 sc in the next stitch, 2 sc in the following stitch (increase)] Repeat around.
- You should have 12 stitches at the end of this round.
Rounds 3-7: Building the Flower Cup
- Sc in each stitch around, maintaining 12 stitches per round.
- These rounds build up the sides of your bell flower.
Round 8: Scalloped Edge
To create a decorative scalloped edge to simulate petals:
- In one stitch, work [1 sc, 2 double crochets (dc), 1 sc]. This forms one "scallop."
- Skip the next stitch to create space between scallops.
- Repeat around the entire edge of the flower, creating a total of six scallops.
Crocheting the Leaf:
- Begin with a chain (ch) of 16.
- Starting from the second ch from the hook, work 1 sc, followed by 1 half-double crochet (hdc) in the next, then 1 double crochet (dc) in the next.
- In the central chain stitches, work increases by placing two dc in the same stitch for the leaf's wider center.
- Mirror the pattern on the other side of the chain to complete the symmetrical leaf shape.
- Finish with a slip stitch (sl st) to join and fasten off.
Assembling Your Flower:
- You can use the starting or finishing tails of your yarn to stitch the leaf to your flower at the base.
- Create a loop or chain if you wish to hang or attach your flower to other objects.
General Advice:
- Tension: Keep your tension consistent for uniform stitch size.
- Stitch Marker: Use it to mark the beginning of rounds in your flower and leaf.
- Finishing: Weave in all ends with a yarn needle for a neat finish.
No comments
Write a comment


