Crochet Mushroom Amigurumi
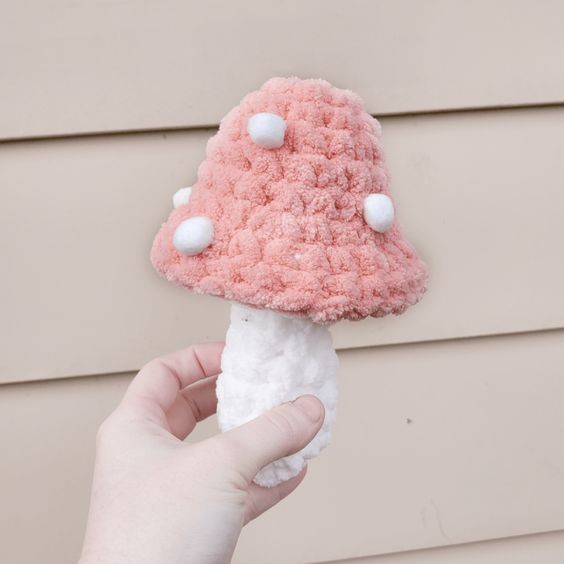
The Crochet Mushroom Amigurumi is a delightful and charming project that lets you bring a touch of whimsy to your crafting endeavors. These adorable little mushrooms can be crafted in a variety of colors and sizes, making them a fun and creative addition to your amigurumi collection. Whether you're a seasoned crocheter or a beginner looking for a new project to tackle, making Crochet Mushroom Amigurumi is a wonderful way to flex your creative muscles and create something truly unique.
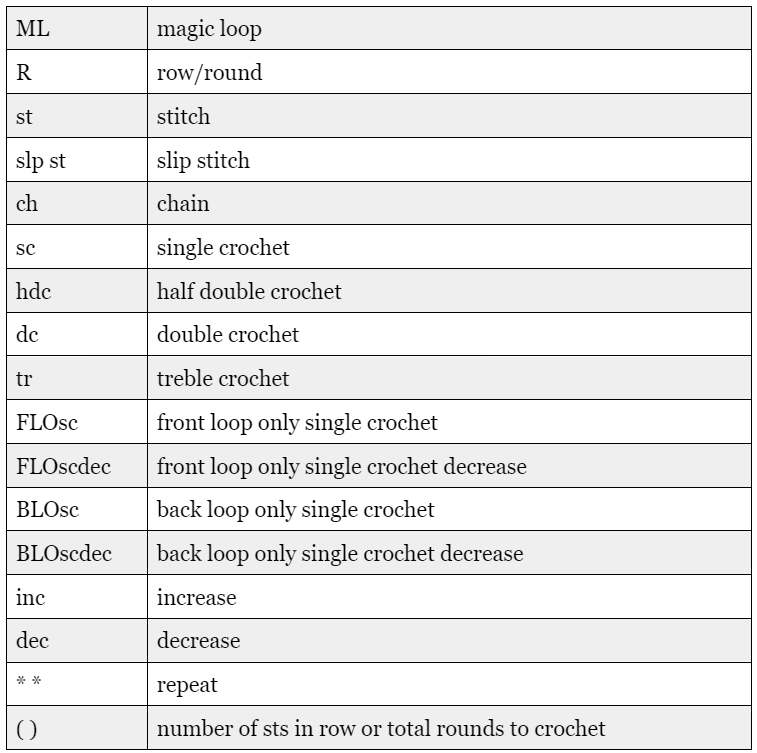
Ingredients
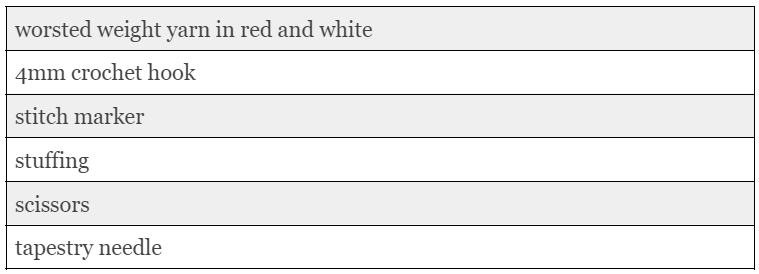
Abbreviations
Some of these may not be used in the pattern – these are the stitches that I use most frequently! If you see an abbreviation that you are unfamiliar with, please refer back to this chart.
Cap, Part 1
Start in red yarn (or whatever color you’re using as your main color)
R1: ML 6
R2: inc in each st (12)
R3: sc around
R4: *sc, inc* around (18)
R5-R6: sc around (2 rows total)
R7: *2sc, inc* (24)
Change colors, keeping the main color attached and pulled to the front of your work
Stem
Continuing in white
R8: in BLO, *2sc, dec* around (18)
R9: *sc, dec* around (12)
Stuff mushroom cap here!
R10: dec in each st
R11: in BLO, 6sc (6)
R12: sc, inc, 2sc, inc, 3sc, inc (9)
R13-R17ish: continue working around, making the stem of the mushroom. This is up to you – you can make your mushroom stem as long or short as you wish. Be sure to stuff the stem as you go!
Last Row: *sc, dec*
Fasten off, leaving a long tail for sewing both the mushroom closed and the polka dots. We need to finish the cap before we sew the polka dots.
Cap, Part 2
Now that we’ve finished the stem, we need to add the “skirt” of the mushroom. To do that, grab the still attached main color of the cap, and work 2 rows of single crochet around. The first row is worked in the loops left behind by R8 of the stem and a bit of the work of R8. Once you’ve worked two rows, fasten off by slip stitching to the next stitch and cutting your yarn. Weave the tail end in.
Polka Dots
Thread your tapestry needle with the white left on the stem, and sew through each remaining stitch to close the bottom of the mushroom. Next, weave the tail up towards the cap of the mushroom.
Make each polka dot by tying a French Knot where you’d like the polka dot to be. Once finished, weave in the tail!


