Crochet Snowball Microwave Mitts
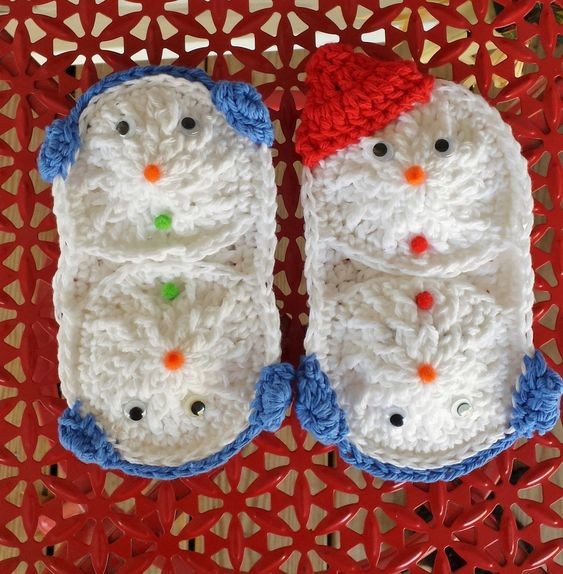
Create your very own pair of cozy winter mittens with this unique crochet pattern for Snowball Microwave Mitts. These mittens are not only stylish but also functional, as they are designed to keep your hands warm and toasty during the cold winter months. The snowball design adds a fun and festive touch to your winter wardrobe, making these mittens a must-have accessory for the season.
St(s)=Stitch(es) Lps=Loops Fpdc=Front Post dc
Hdc=Half double crochet
Bottom:
Base: W/A,
Rnd 1: Ch16, 4dc in 4th ch from hook, dc in next 11chs, 5dc in last ch, working on opposite side of ch, dc in next 11chs, join in first st. (32dc)
Rnd 2: Ch3, fpdc in same st. (Dc, fpdc in next st)4x. [ (Dc in next st, fpdc in next st)5x, dc in next st]. (Dc, fpdc in next st)5x. Repeat [ ] once, join. (42dc)
Rnd 3: Ch3, fpdc in same st. [Dc in next st, (dc, fpdc in next st)]4x, dc in next st. *(Fpdc in next st, dc in next st)5x, fpdc in next st.* (Dc, fpdc in next st), [Dc in next dc, (dc, fpdc in next st)]4x, dc in next st. Repeat *to* once, join to ch3 (52dc)
Rnd 4: Ch1, sc in same st, sc in next 3sts, mark this st, sc in next 10sts, mark this st, sc in next 16sts, mark this st, sc in next 10sts, mark this st, sc in last 12sts. Join. (52dc) Fasten off & weave in ends.
Top Circles (make 2) W/A,
Rnd 1: Ch4, work 9dc in 4th ch from hook, join. (10dc)
Rnd 2: Ch3, fpdc in same st. (Dc,fpdc in ea st) around. Join. (20dc)
Rnd 3: Ch3, fpdc in same st. [Dc in next st, (dc, fpdc in next st)] Repeat around ending w/dc in last st, join. (30dc)
Rnd 4: Ch1, sc in same st, sc in next 10sts, mark this st, sc in next 10sts, mark this st, sc in last 9sts, join. (30sc) Fasten off & weave in ends
Assembly: (see pics below) W/base right side up, take circles and match marked sts, use circle marker to replace the base markers making sure to keep same sts marked.
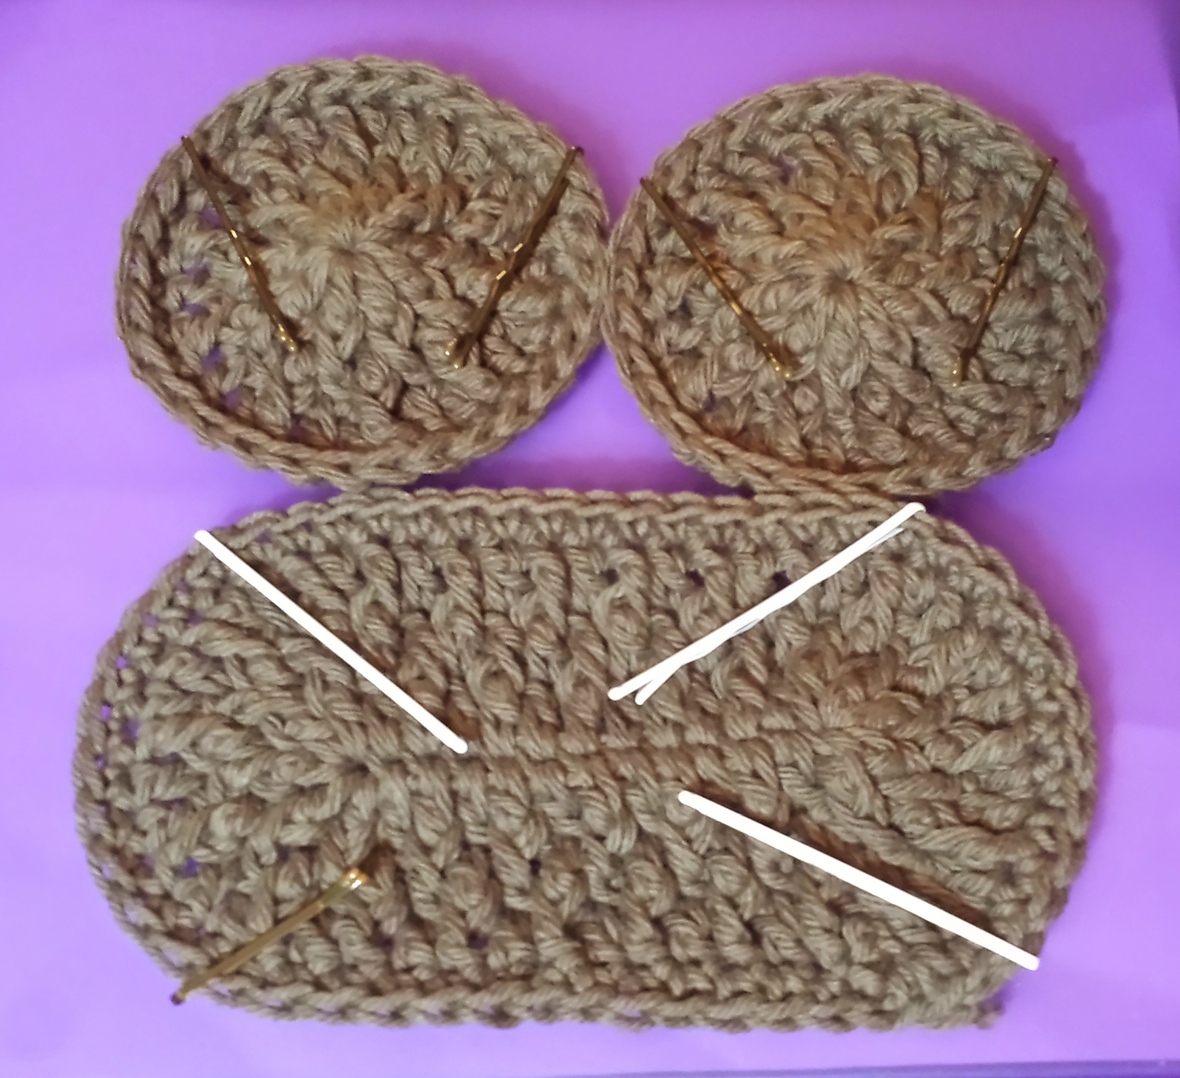
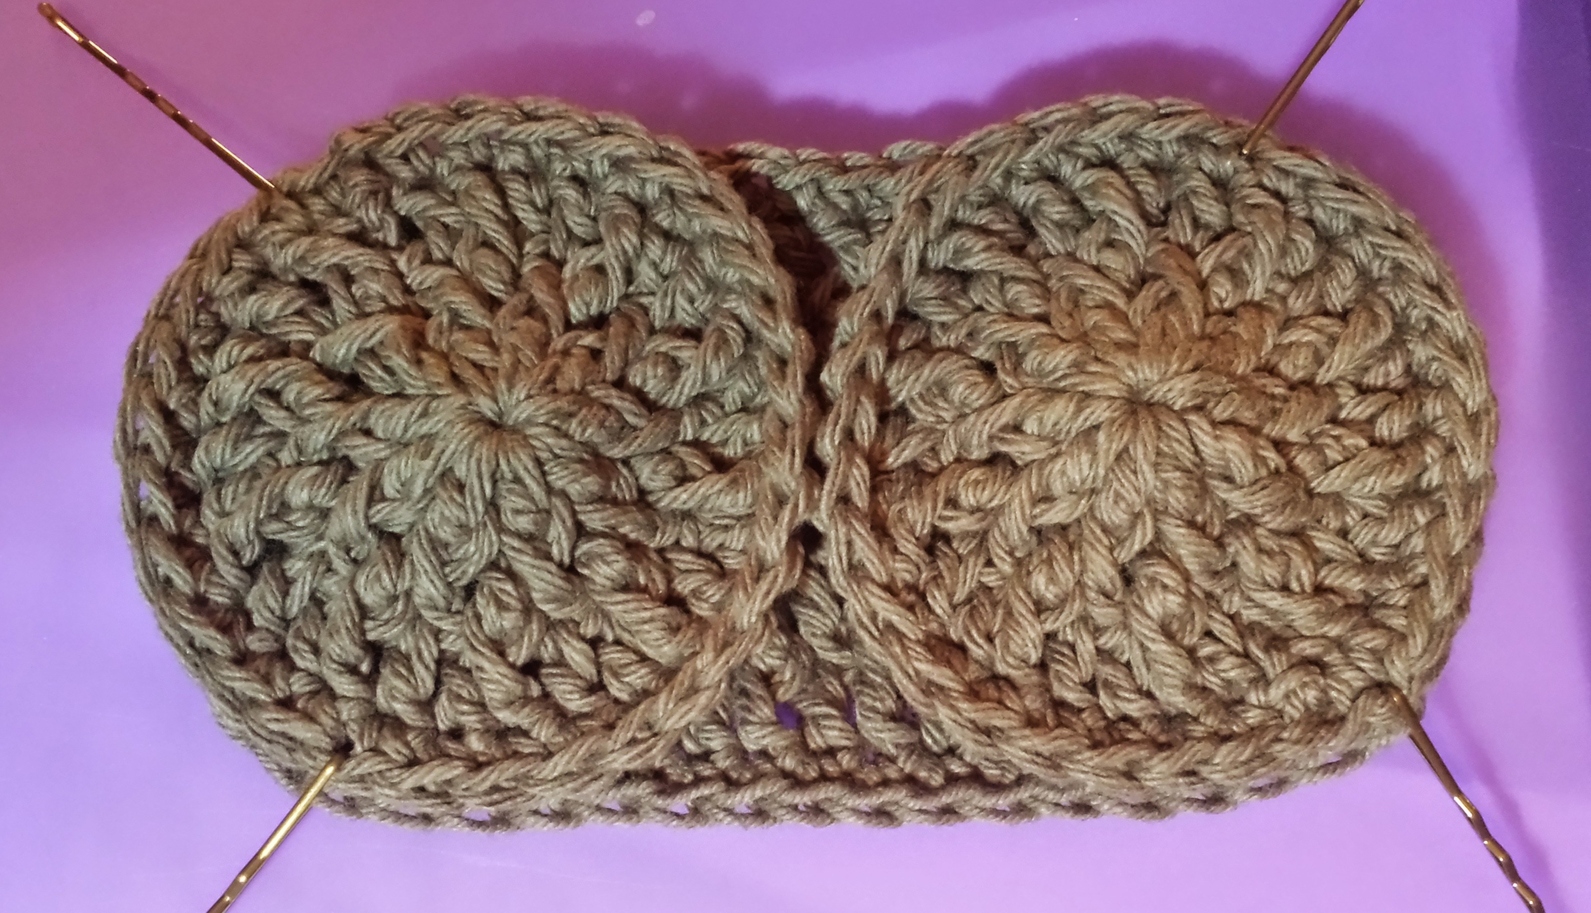
Move markers up as you work.
Rnd 5: W/A, join w/slst in top right marked st, working in both pieces, ch1, sc in same st & next 6sts of both pieces, sc in next 3sts of base, sc in next 23sts of both pieces, sc in next 3sts of base, sc in next 16sts of both pieces, join. Fasten off , weave in ends. (52sc)
Decide if you want to use ear muffs, or a hat, or do one of each!
Ear Muffs: Make enough to use for each circle.
Row 1: W/B, (start with a long tail for sewing), work 10hdc in a magic circle, join to first hdc. Ch17, work 10hdc in 3rd ch from hook, join to first hdc in circle, fasten off.
Attach your ear muffs, using your markers as reference. Sew across head and repeat for other side.
Hat: Make enough to use for each circle.
Rnd 1: W/B, Ch4, 4dc in 4th ch from hook, join. (5dc)
Rnd 2: Ch3, dc in same st, 2dc in each st around, join. (10dc)
Rnd 3: Ch3, dc in same st, 2dc in each st around, join. (20dc)
Row 4: Ch1, fpsc in same st, fpsc in next 9sts, slst to next st, and leave remaining sts unworked. Fasten off, leaving long tail.
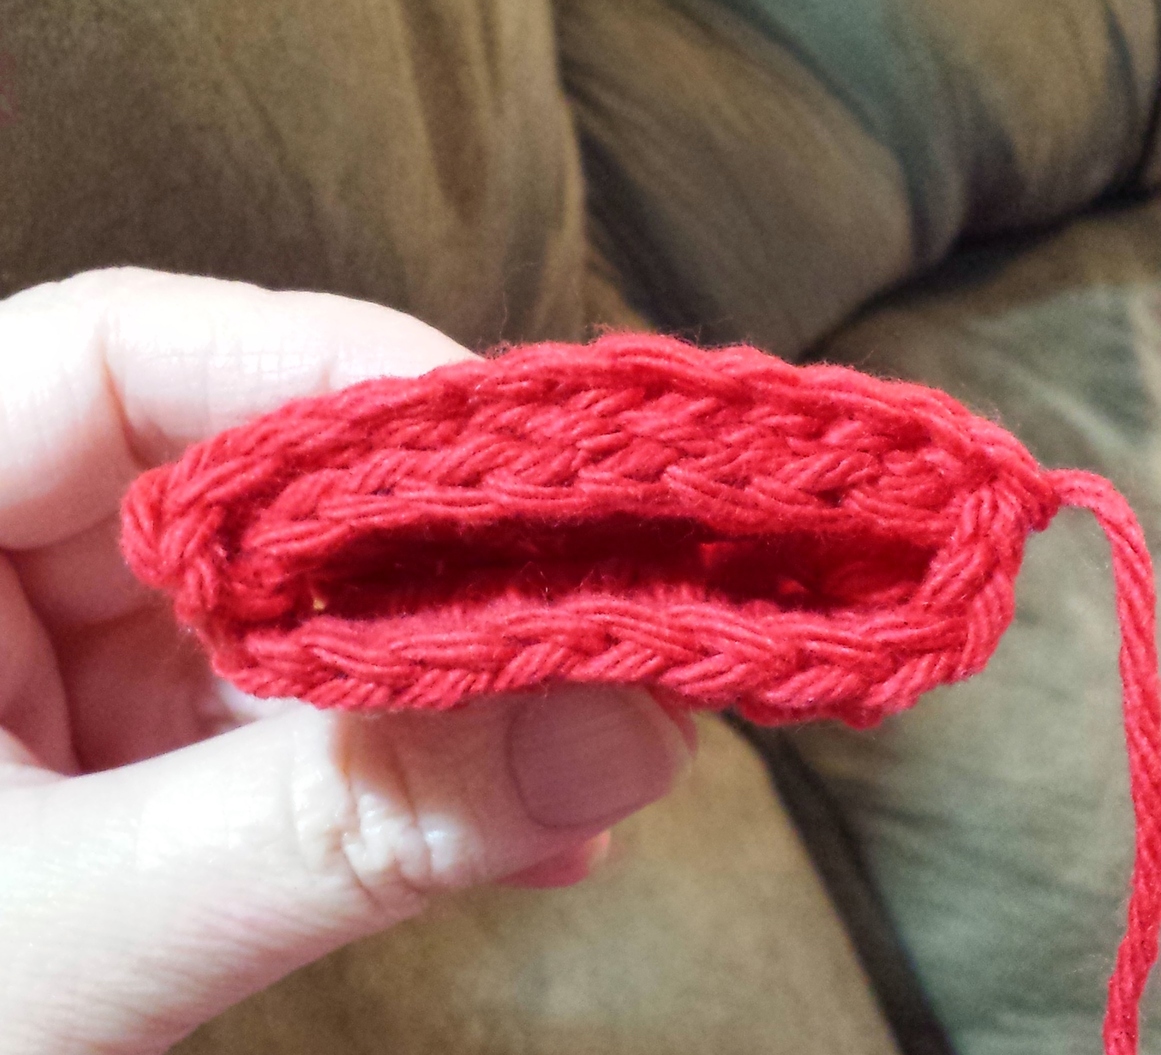
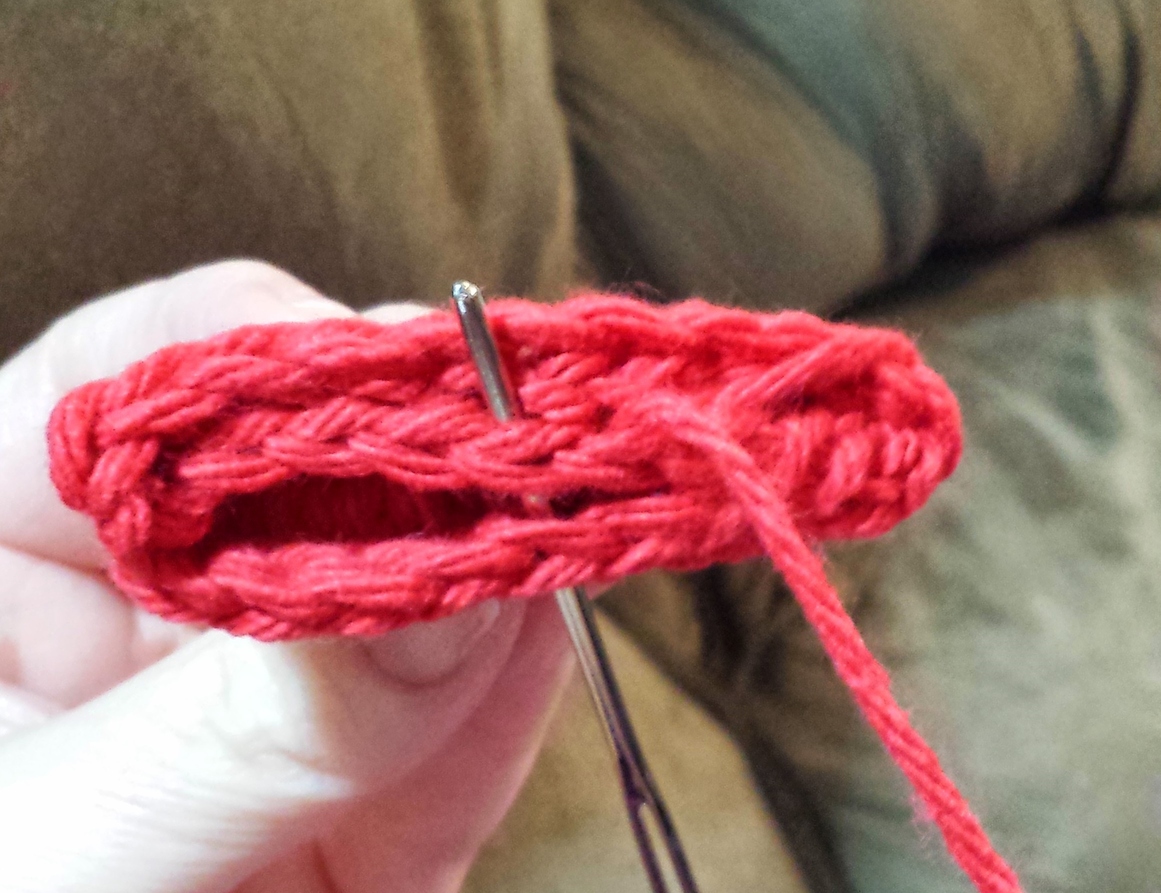
Pic on left shows (Second Pic) what it should look like, fpsts are on the top, use tail to sew closed following the picture on the right. Position on your snowman at an angle, don’t go up too high over the base as you don’t want them to interfere wtih picking up your hot dishes from the microwave.

