Crochet Bunny Reusable Scrubbie
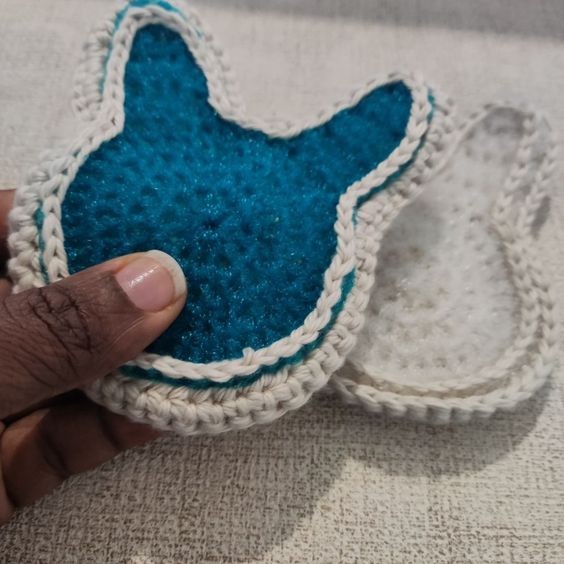
Introducing the adorable Crochet Bunny Reusable Scrubbie! This charming little scrubber is not only cute but also practical for everyday use. Made from soft, durable yarn, this bunny-shaped scrubber is perfect for gently exfoliating your skin or scrubbing dishes clean. Its reusable design means you can simply toss it in the washing machine when it needs a refresh, making it an eco-friendly alternative to disposable scrubbers.
Materials needed for the Bunny Scrubbie
Scrub Yarn – Stitch Soak Scrub – Worsted weight, #4 (100% Nylon, 92 yd/84m per 1.4 oz/40g Ball)
Estimated Yardage = 15 yards
24/7 Cotton – Worsted weight, #4 lightweight (100% Cotton, 186 yd/170 m per 3.5 oz/100g skein)
Estimated Yardage = 15 yards
Crochet Hook = 5 mm
Gauge – Not crucial to this project
Pattern Notes
- Please kindly read through the pattern before starting.
- Any other weight of #4 weight yarn can be substituted.
Difficulty Level – Easy
Terms – US Terminology
Stitches Abbreviations
Chain/chains – ch/chs
Single Crochet – sc
Half double crochet – hdc
Single Crochet two stitches together – sc2tog
Finished Measurement – 5” X 4”
How to Crochet the Crochet Scrubbie Pattern
Make one with the scrubbie yarn and another in the cotton yarn
Round 1: In a magic ring, ch 1, 10 hdc, close the magic ring tightly, join with a sl st to the beginning chain – 10 hdc
Round 2: 2 hdc around, do not join, place stitch marker and move after each round – 20 hdc
Round 3: * hdc in next st, 2 hdc in next st, rep from * around – 30 hdc
Round 4: * hdc in next 2 sts, 2 hdc in next st, rep from * around – 40 hdc
sl st into the next 2 sts to close the height difference.
Do not fasten off
Ears
Row 1: Ch 1, hdc in next 4 sts, turn. 4 hdc
Row 2 – 5: Ch 1, hdc in each st across, turn. 4 hdc
Row 6: Ch 1, hdc2tog twice, turn – 2 hdc
Row 7: Ch 1, hdc in each st – 2 hdc
Crocheting down the side of the ear, sc in each edge/st across until you get to the base made in section 1 above.
Row 1: Hdc in the next 8 sts on the main body, leaving the remaining sts unworked. Turn.
Row 2: Ch 1, hdc in first 4 sts, leave the remaining sts unworked, turn – 4 hdc
Rows 3 – 5: Ch 1, hdc in each st across, turn – 4 hdc
Row 6: Ch 1, hdc2tog twice – 2 hdc, turn
Row 7: Ch 1, hdc in each st – 2 hdc.
Edging
Crocheting around the whole panel—down the side of the ears to the body, up across the next ears, and to the STS/edges between the ears until you get to the beginning Ch.
Round 1: Ch 1, sc in each edge/st across until you get to the base made in section 1 above. Into the 4 sts between the two ears, sc2tog twice, sc in the remaining sts across the inner side of the bunny ears, join with a sl st to the beginning chain.
Fasten off and sew in al ends.
Optional
Place the two on each other and sew the two together using either of the following options:
Option 1: Using the BLO of both pieces, crochet around all the stitches in the last round and sl st over both.
Option 2: Surface sc over both panels, fasten off.
Weave in the ends.

