Crochet Farmhouse Granny Square Pattern
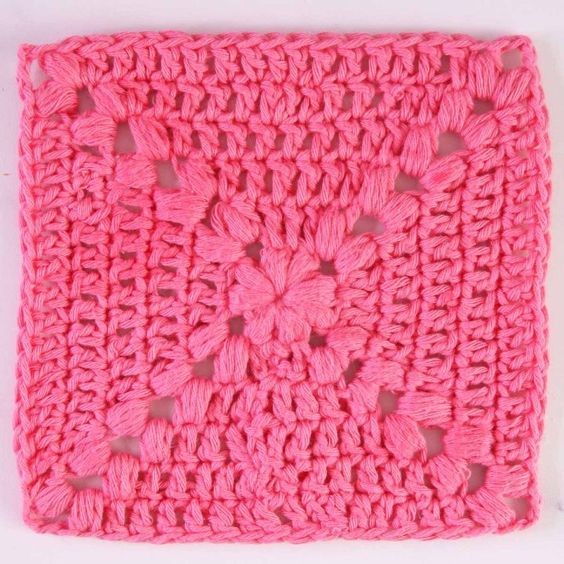
Discover the charm of the Crochet Farmhouse Granny Square, a delightful pattern that brings a touch of rustic elegance to your crochet projects. This unique design combines the traditional granny square motif with a farmhouse twist, resulting in a versatile and visually appealing square that can be used in a variety of ways. Whether you use the Crochet Farmhouse Granny Square to create a cozy blanket, a decorative pillow, or even a stylish tote bag, this pattern is sure to add a touch of farmhouse charm to your crochet projects. The square's versatility allows you to experiment with different color combinations and yarn weights, giving you endless possibilities to customize your creations. So grab your crochet hook and get ready to embark on a crochet journey that combines the timeless appeal of the granny square with the rustic beauty of farmhouse style.
Supplies
- Yarn of your choice. Be warned, this square is a yarn gobbler! The corner puff stitches use a lot of yarn for each stitch. Best for DK or worsted weight yarn.
- Crochet hook suitable for your yarn.
- Scissors.
- Yarn needle for weaving in ends.
Dimensions
For this sample, I used a worsted weight (10 ply) cotton yarn from Paintbox Yarns with a 4mm hook. The finished 6-round square measured 6 inches (15cm), or 5 rounds is 5 inches (13cm).
Skill Level
This one is ideal for those who are fairly new to crochet and granny squares. It is fairly basic, with just a simple puff stitch added into the corners for extra appeal.
Abbreviations
All instructions are written in US terminology.
- ch = chain stitch
- sc = single crochet
- dc = double crochet stitch
- sp = space
- rep = repeat
- sl st = slip stitch
- sk = skip
- YO = yarn over
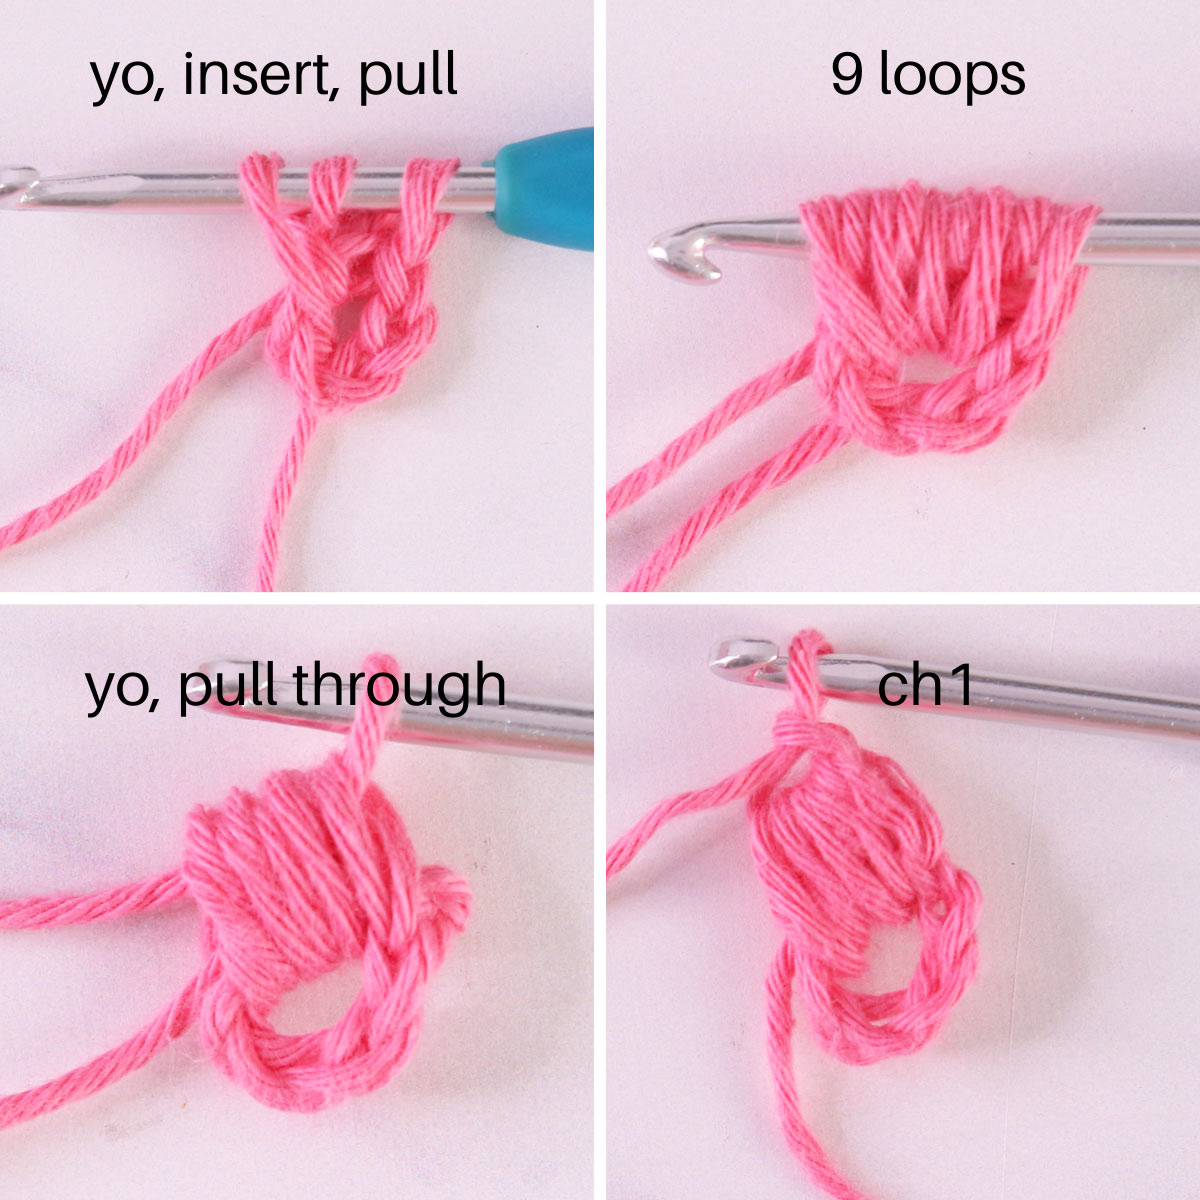
Special Stitch: Puff Stitch
- YO, insert your hook into the next stitch (or space), pull up a long, loose loop.
- Repeat this 3 more times. (9 loops on the hook) You must work loosely, or it will be difficult to pull through at the end.
- YO, and pull through all the loops at once. Try to keep all the loops parallel; don't let them cross over each other!
- Ch 1 to finish off the st.
Here is the free crochet pattern for the farmhouse square.
Rounds Instructions
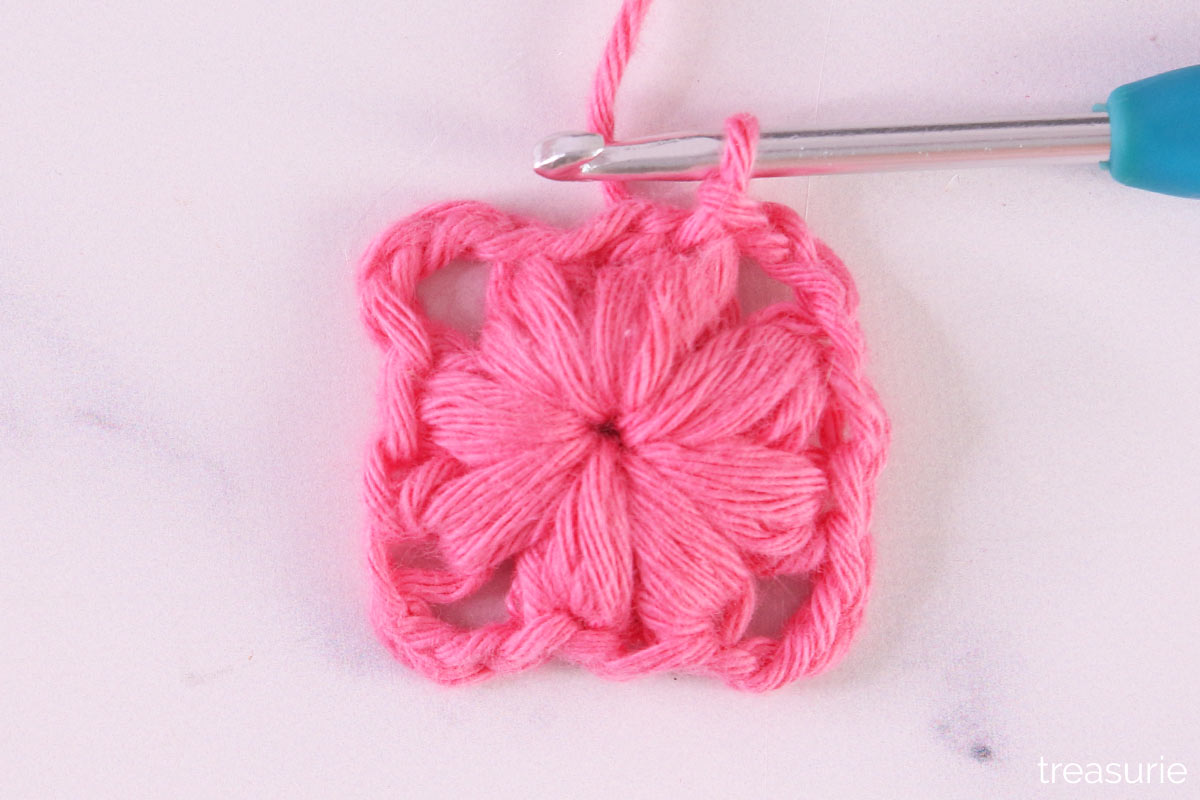
Round 1:
- Start with a magic ring or ch5, sl st into the first ch to create a ring.
- *Puff st twice into the ring, ch2.
- Rep this 3 more times. You may have to slide your sts along the ring to fit all those loops in!
- Join onto the first puff st, using a sl st.
You will have a square with 8 puff stitches and 4 corners made from the chain 2 spaces.
Round 2:
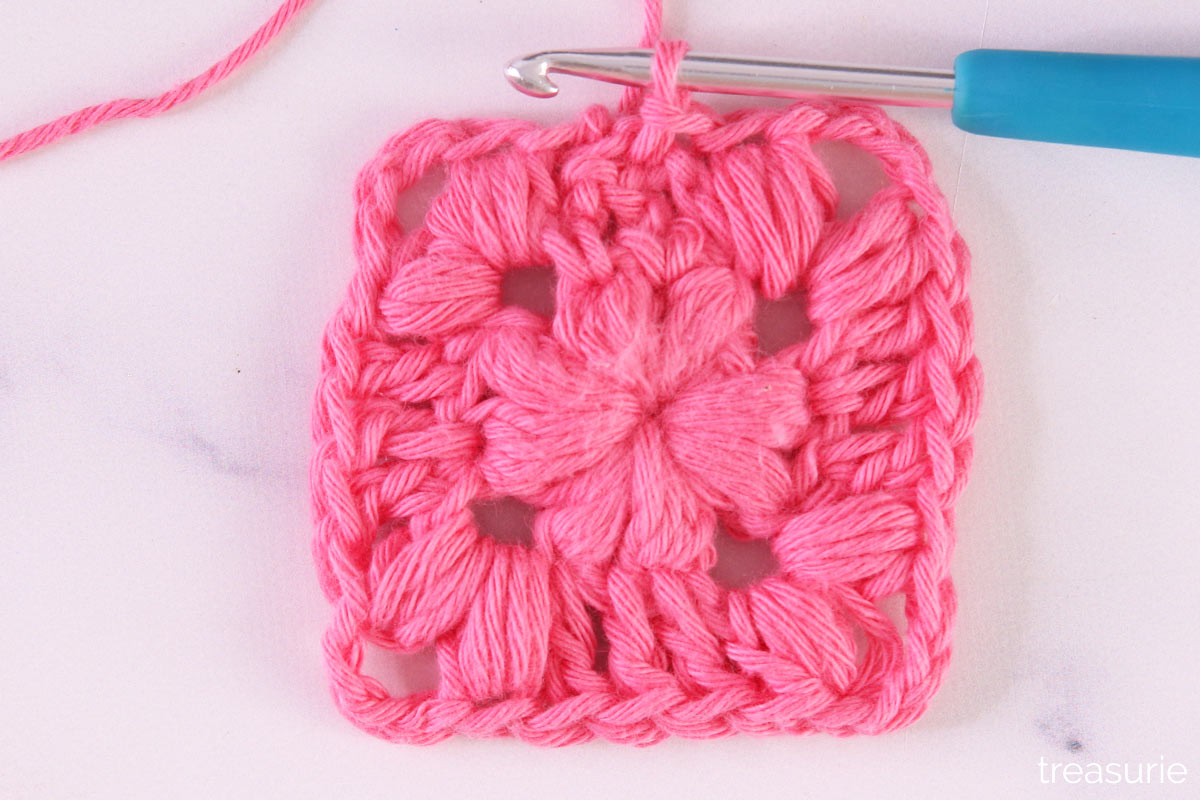
- Ch2 (counts as dc).
- Dc into the 2 sts after your ch sp. (i.e., the tops of your puff sts).
- Puff st into corner sp, ch2, and puff st again into the same sp. (first corner)
- *1 dc into top of next puff st, 1 dc into ch1, 1 dc into top of next puff st. Puff st into corner sp. Ch2, puff st into same sp.
- Rep from * 2 more times. Join the round with a sl st into top of starting ch.
Now your farmhouse granny square will have a puff st in the corner, 3 dc along the side, then another puff stitch in the corner, with the 2 chains forming the corner spaces.
Round 3:
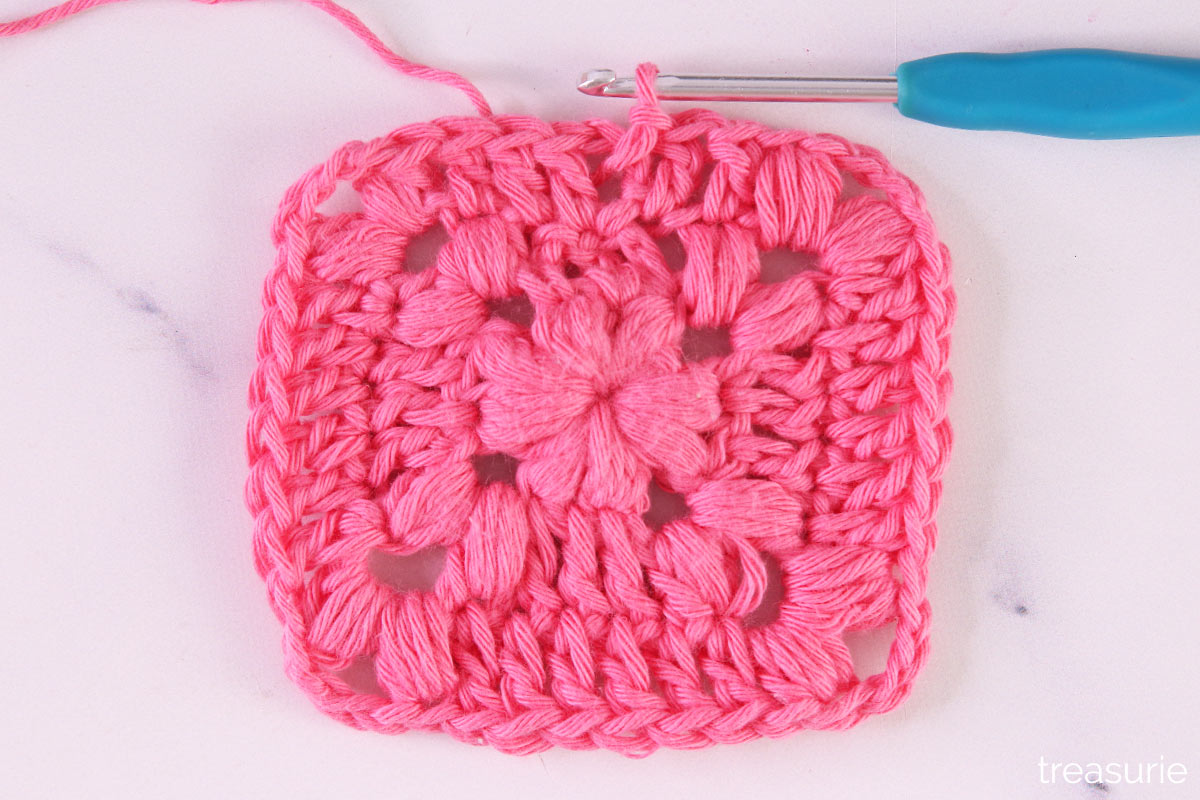
- Ch 2. (counts as first dc)
- Dc into each st along the side. (4 dc)
- [Puff st, ch2, puff st] into corner.
- * Dc into each st along the side (6 dc), [puff st, ch2, puff st] into the corner space made from the 2 chains.
- Repeat from * all the way around.
- Complete by working 2 dc into the first side, then join with a sl st into the top of the starting ch.
Round 4:
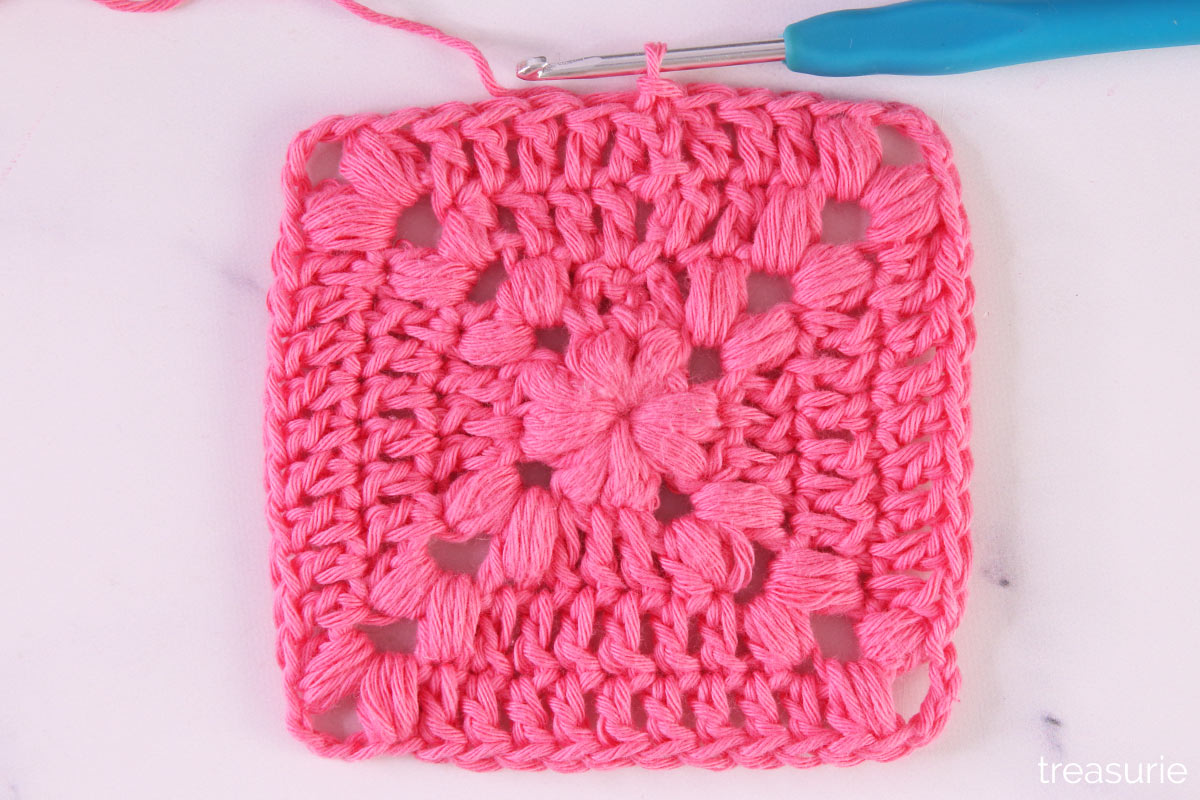
- Ch2 (counts as the first dc)
- Dc into each st until you reach the corner. (5 dc)
- Puff st, ch2, and puff st into the corner.
- *Dc into each st along the side, (9 dc) puff st, ch 2, puff st into corner.
- Repeat from * all the way around.
- When you get back to the first round, dc into the remaining sts on this side (4 dc) and then join with a sl st into the top of the initial ch.
Round 5:
- Ch2 (1st dc), dc into each st down the side.
- Work 1 puff st, ch2, 1 puff st into the corner.
- * Dc into each st along the side, puff st, ch2, puff st into the corner.
- Rep from * all the way around.
- When you are back at the first round, dc into the remaining sts and sl st to close the round into the top of the initial ch.
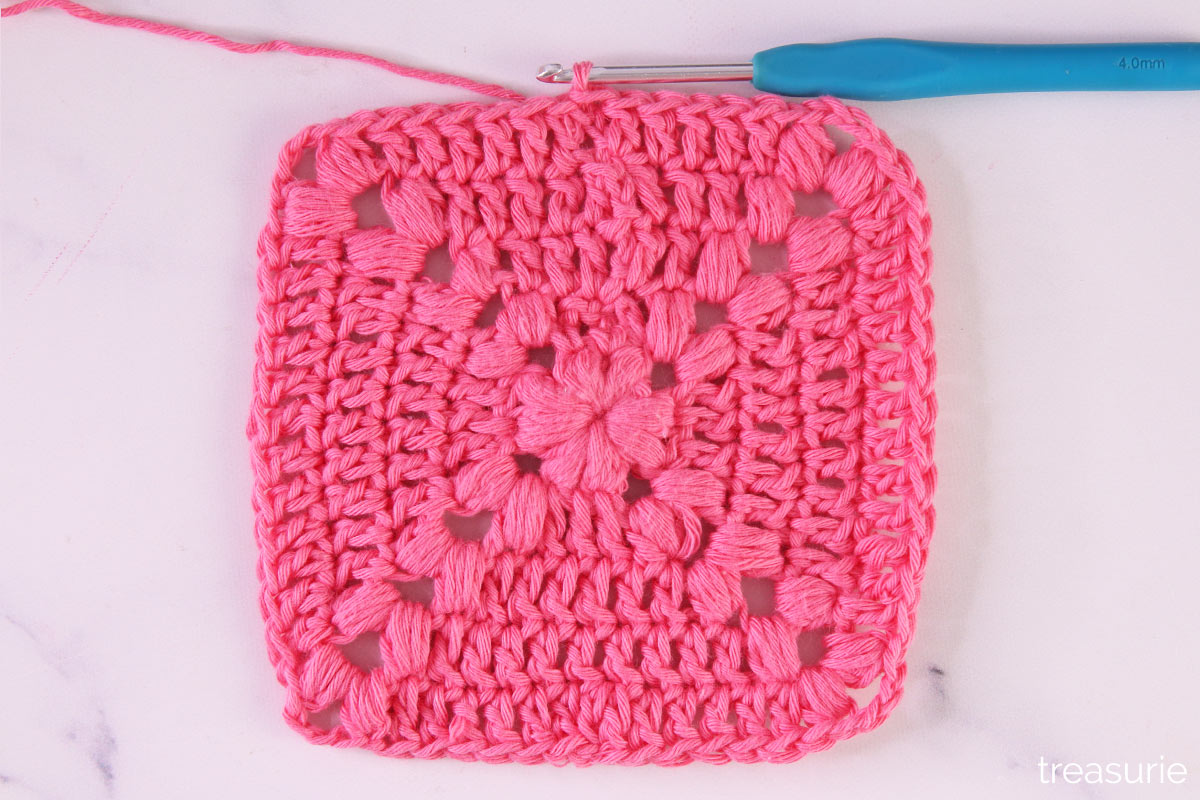
Round 6:
- Ch2 (1st dc), dc into each st along this side.
- Puff st, ch 2, puff st into corner sp.
- *Dc into each st along the side, puff st, ch 2, puff st into corner sp.
- Rep from * all the way around.
- When you are back at the first round, dc into the remaining sts and sl st to close the round into the top of the initial ch.
By this round of the farmhouse granny square, each side should have 15 dc along the sides, and 2 puff stitches in the corner with the chain 2 making the corner space.
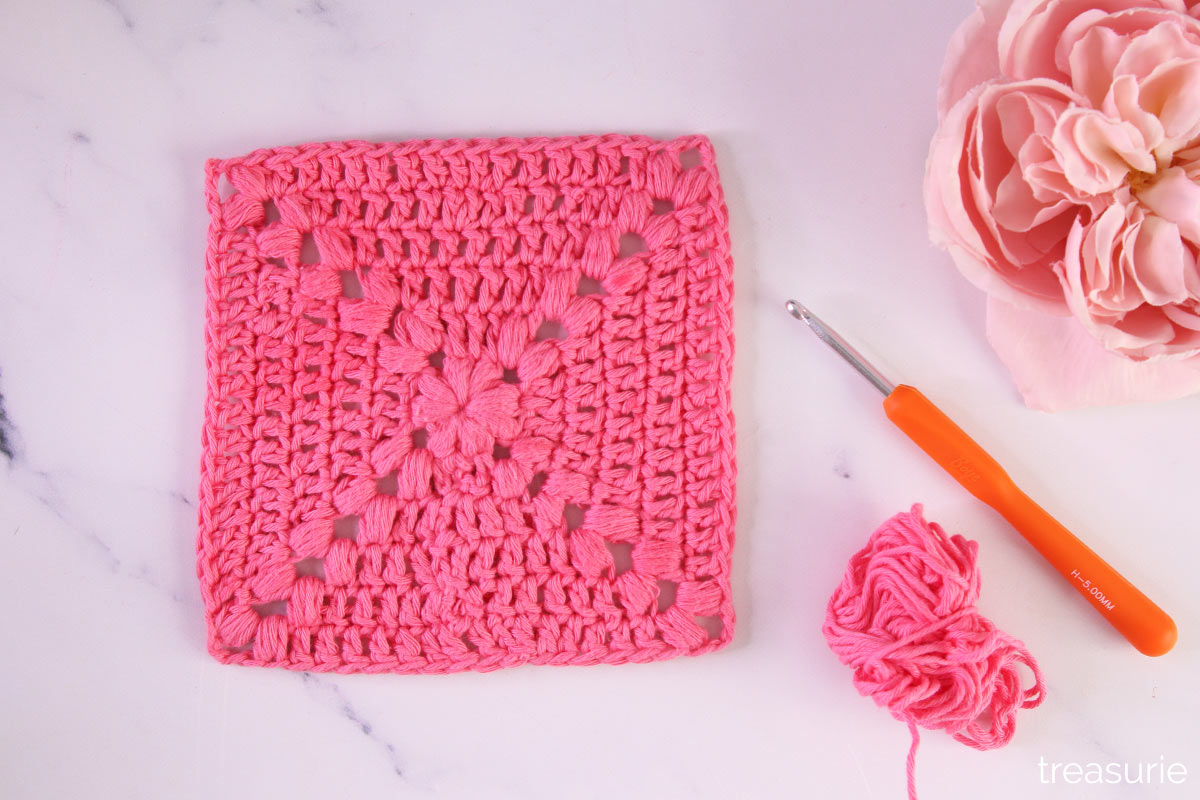
Bind off your yarn, and your square is complete! Weave in any loose ends.


