Crochet Easter Egg Coaster - Free Pattern
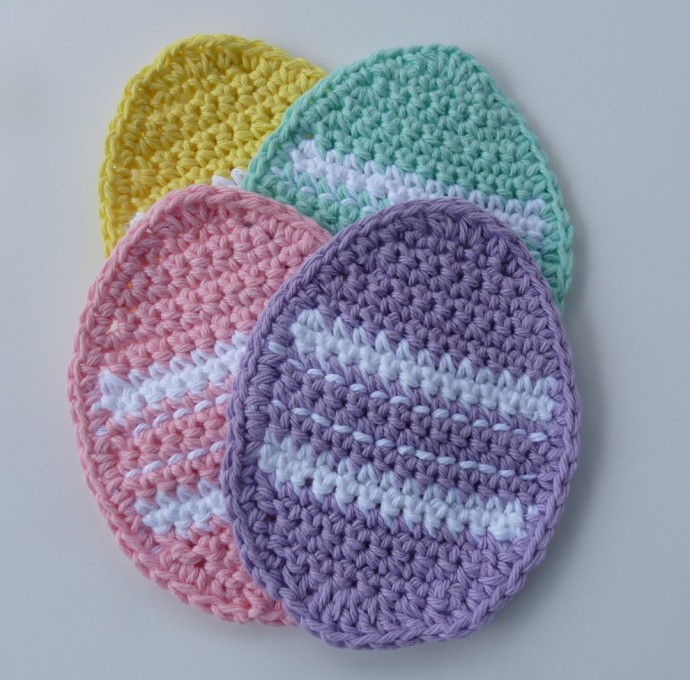
Introducing the Easter Egg Coaster, a delightful crochet creation that adds a touch of charm and festivity to your home decor. This unique coaster is designed to resemble a colorful Easter egg, making it the perfect accessory for your Easter celebrations or simply to brighten up your space. Handcrafted with love and attention to detail, each coaster is made using high-quality yarn in a variety of vibrant colors, ensuring that no two coasters are exactly alike.
Materials needed for one coaster:
Sugar 'n Cream Worsted Weight Cotton Yarn (or any worsted weight cotton yarn)
- 13 yards MC
- 6 yards White
Size G (4.25mm) Crochet Hook
Yarn Needle
Finished Size: 4 1/4" across x 5 3/4" tall
Pattern Notes:
Sc 2 sts tog – to single crochet two stitches together (decrease), insert hook into 1st stitch, yarn over and draw up loop, then insert hook into next (2nd) st, yarn over and draw up loop. You will now have 3 loops on the hook. Yarn over and draw thru all 3 loops.
Row 2) 2 sc in first st, sc in next 4 sts, 2 sc in last st, ch 1, turn. (8 sc)
Row 3) 2 sc in first st, sc in next 6 sts, 2 sc in last st, ch 1, turn. (10 sc)
Row 4) sc in each st across, ch 1, turn. (10 sc)
Row 5) 2 sc in first st, sc in next 8 sts, 2 sc in last st, ch 1, turn. (12 sc)
Row 6) sc in each st across, changing to white on last st, ch 1, turn. (12 sc)
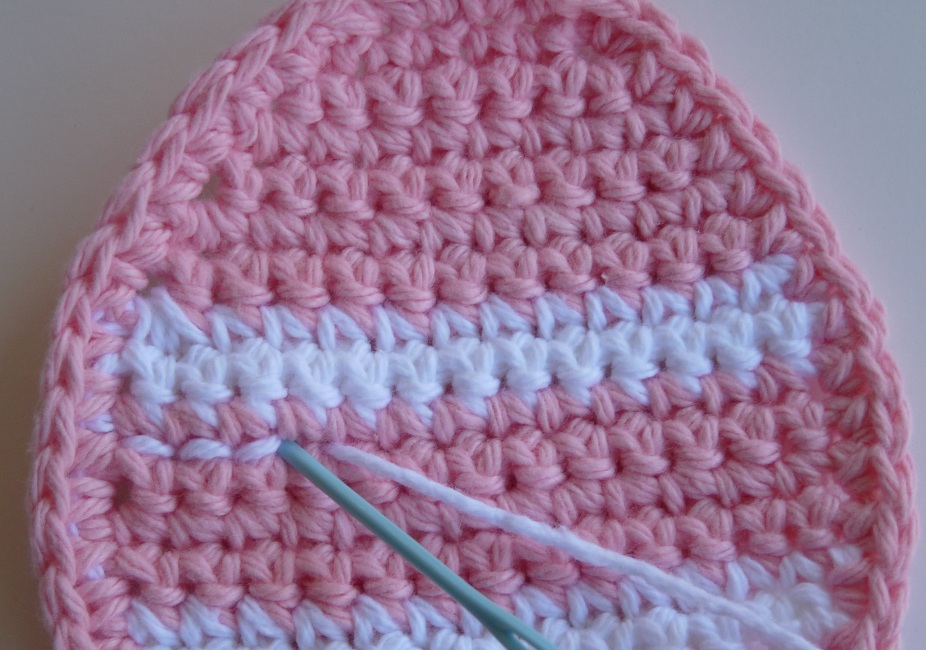
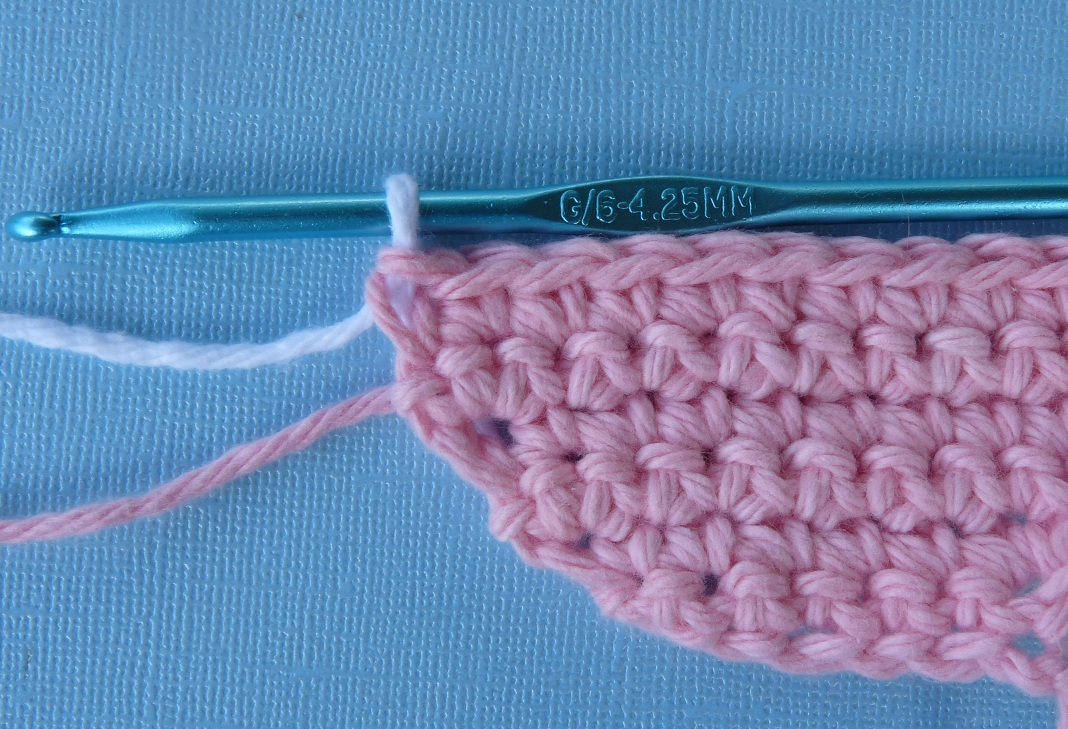
When you're making the last sc on row 6, insert hook and draw up loop as seen in photo below. You will have 2 loops on the hook.
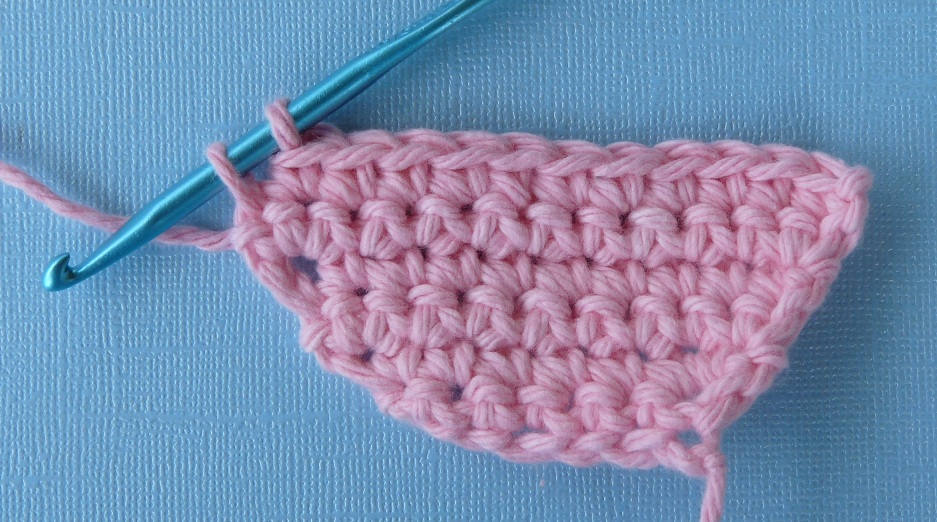
Next, drop the strand of the MC and let it hang (do not cut, you will be using it again later), Then bring in the white yarn, holding it behind your work. Use your hook to grab the white yarn.
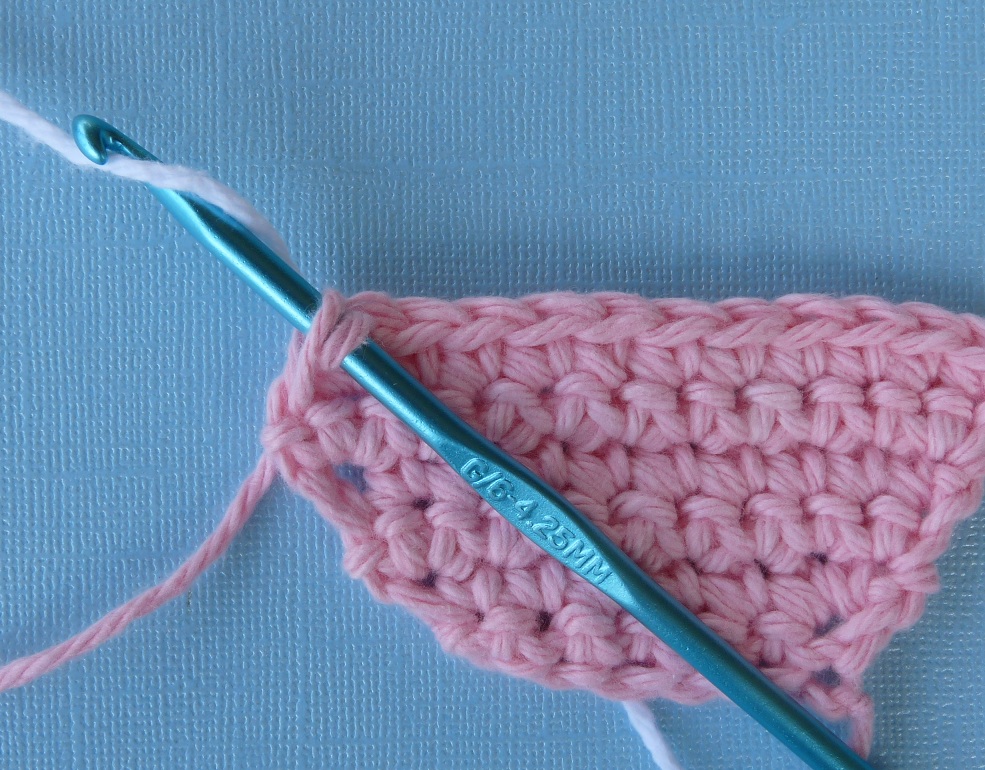
Pull the white yarn through the two loops remaining on the hook. You now have the white yarn on the hook and ready to stitch the next row. Ch 1, turn and go on to Row 7.
Row 7) 2 sc in first st, sc in next 10 sts, 2 sc in last st, ch 1, turn. (14 sc)
Row 8) sc in each st across, changing back to MC on last st, ch 1, turn. (14 sc)
As before, when you are working the last sc of row 8, insert hook and draw up a loop. You now have 2 loops on the hook.
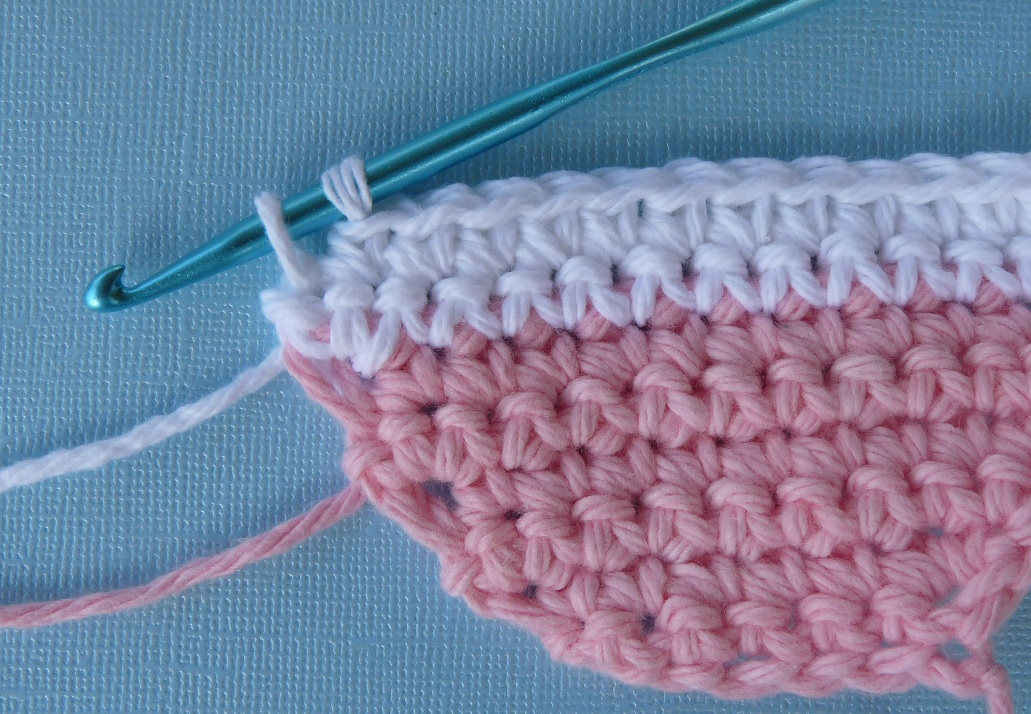
Next, drop the strand of white yarn and let it hang (again, do not cut, you will be using it again later), Then pick up the strand of MC that was left hanging at the end of row 6. Use your hook to grab the strand of MC.
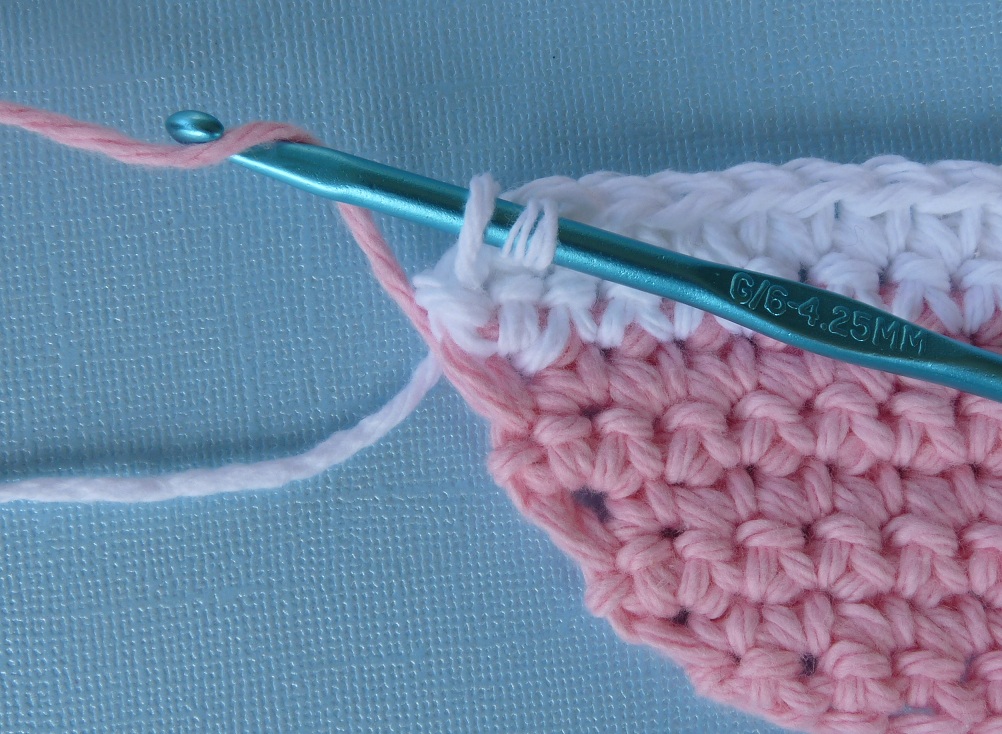
Pull the MC strand through the two loops remaining on the hook. You now have the MC back on the hook and are ready to stitch the next row. Ch 1, turn and continue to Row 9.
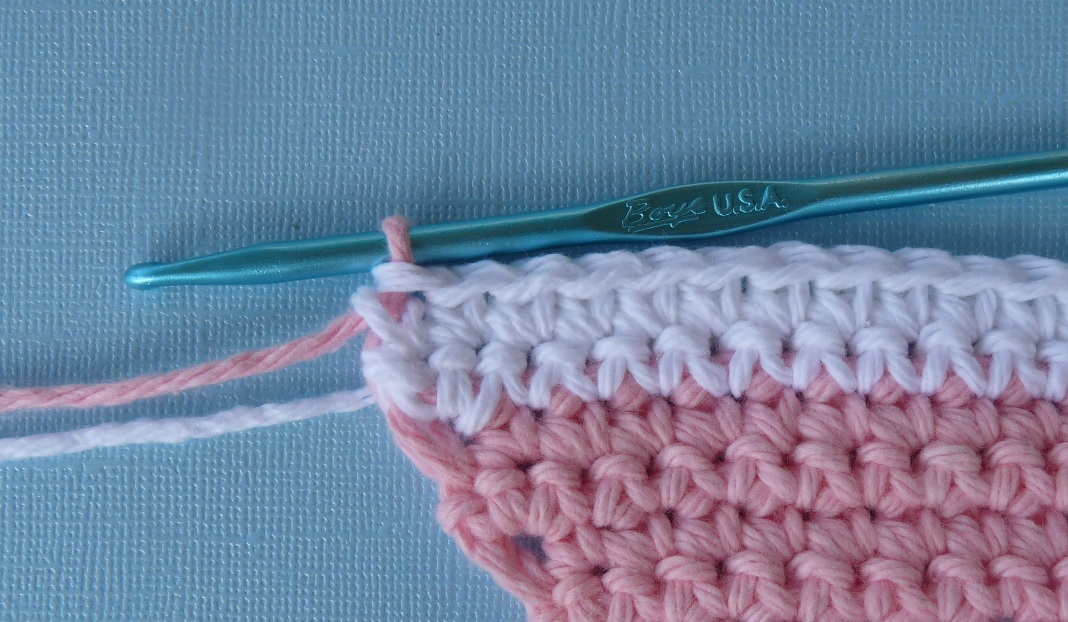
Rows 9 - 11) sc in each st across, ch 1, turn. (14 sc)
Row 12) sc in each st across, changing back to white on the last stitch, ch 1, turn. (14 sc) (you will follow same steps from above, dropping the strand of MC, and picking up the strand of white that was left hanging at the end of Row 8).
Row 13) sc in each st across, ch 1, turn. (14 sc)
Row 14) sc first 2 sts tog, sc in each remaining st across, changing back to MC on the last st, ch 1, turn. (13 sc)
(you will follow the same steps from above, dropping the strand of white, and picking up the strand of MC that was left hanging at the end of row 12. You can now cut the white yarn, you will not be using it any longer.)
Row 15) sc first 2 sts tog, sc in each remaining st across, ch 1, turn. (12 sc)
Row 16) sc first 2 sts tog, sc in next 8 sts, sc last 2 sts tog, ch 1, turn. (10 sc)
Row 17) sc in each st across, ch 1, turn. (10 sc)
Row 18) sc first 2 sts tog, sc in next 6 sts, sc last 2 sts tog, ch 1, turn. (8 sc)
Row 19) sc first 2 sts tog, dc in next st, 2 dc in next st, 2 dc in next st, dc in next st, sc last 2 sts tog.
(2 sc, 6 dc) (this row creates the bottom edge of the egg.)
Do not ch 1, and do not turn, continue to border instructions.
Border:
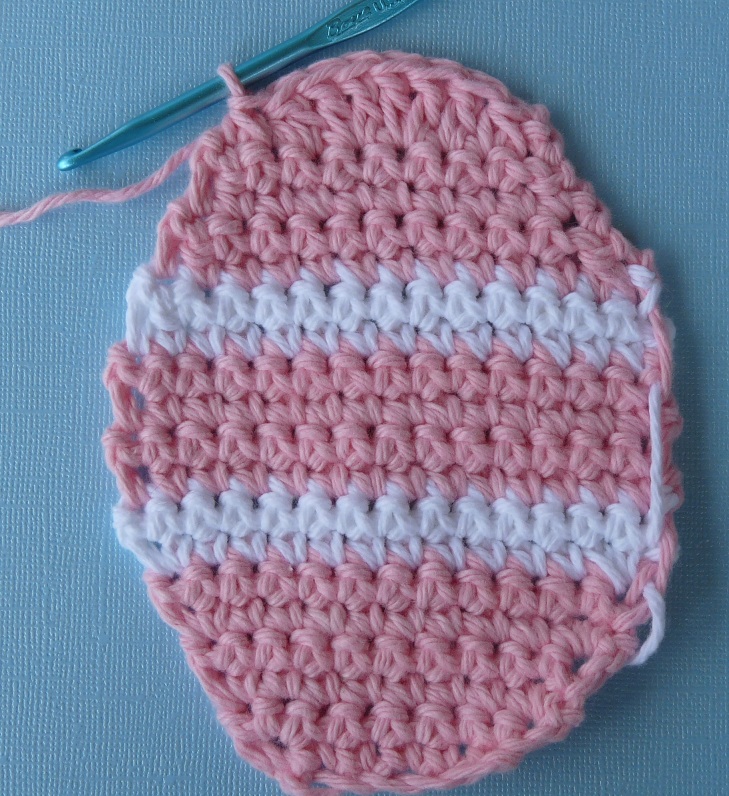
The picture below shows what the egg looks like at the end of row 19. Next, a border will be worked around the remaining 3 sides of the egg. Notice the strands on the right side where the yarn was carried up. These will be covered up by stitching over them when stitching the border.
Start by working down the left edge, and sc in the end of each row. Next, working in the ch sts from row 1,
sc first 2 sts tog, 2 hdc in next st, 2 hdc in next st, sc last 2 sts tog (this creates the top point of the egg). Then,working up the right edge, sc in the end of each row, stitching over the strands that were carried up when changing colors. End by joining with a sl st to the beg sc on row 19. End off, weave in all ends.
Decorative Stitching (optional):
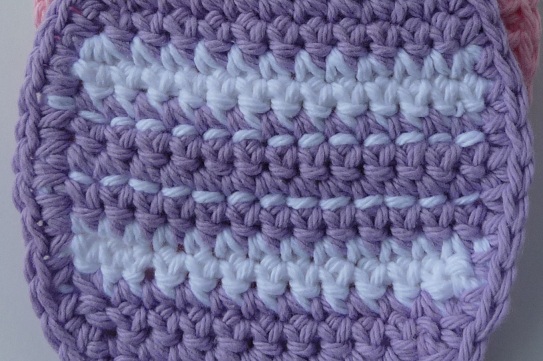
With a strand of white yarn on the yarn needle, make small stitches across the row that is one row below the top stripe and across the row that is one row above the bottom stripe, as seen in the photos below. Weave in ends.
