Crochet Amigurumi Queen Bee
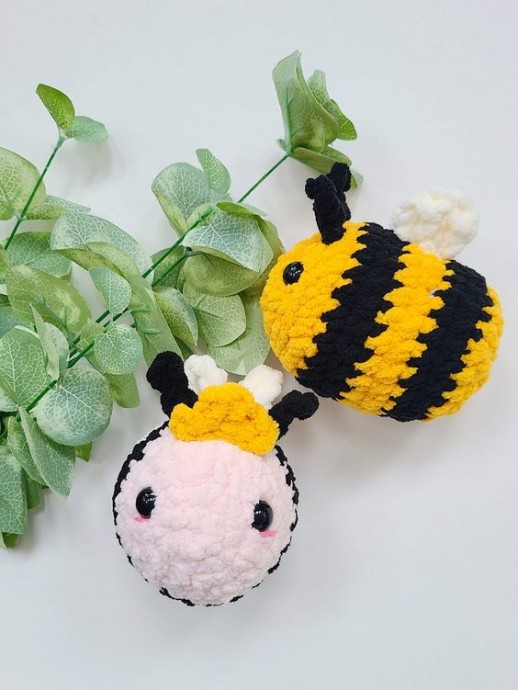
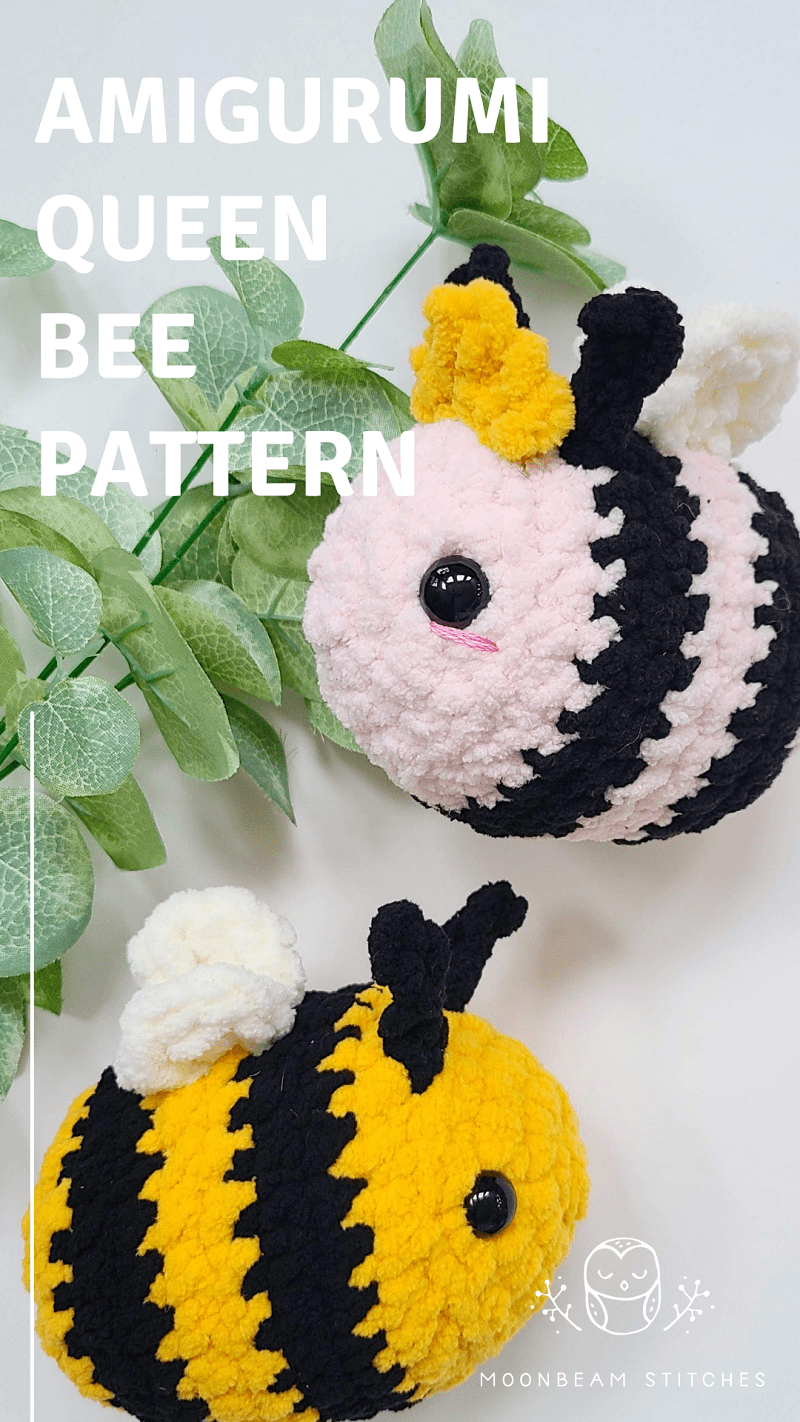
Behold the magnificent creation of the Crochet Amigurumi Queen Bee! This adorable little creature is the epitome of cuteness and craftsmanship. With its vibrant colors and intricate details, it is sure to capture the hearts of anyone who lays eyes on it. The Queen Bee is meticulously handcrafted using the art of crochet, making it a truly unique and special piece.
Materials Needed
- Crochet hook: 7.0mm
- Bernat Blanket Big Ball Yarn
- For regular bee, I used Sunsoaked, Vintage White and Coal
- For queen bee, I used Blush Pink, Sunsoaked, Vintage White and Coal
- Tapestry needle to weave in ends and embroider
- Pink embroidery floss to embroider cheeks on queen bee if desired
- Polyfill stuffing
- 12mm safety eyes
- Stitch markers to mark the beginning/end of each round if desired
Skills Needed
- chain (ch)
- slip stitch (sl st)
- single crochet (sc)
- adjustable magic circle (mc)
- working continuously in the round
- working in rows
- increases
- invisible decreases
Gauge
Use a small enough hook with your yarn to make tight stitches that keep the stuffing in.
Bee Body
Start in Sunsoaked for regular bee or Blush Pink for queen bee
Start with a magic circle (MC).
Rnd 1. 6 sc in MC (6)
Rnd 2. 6 inc (12)
Rnd 3. *1 sc, inc* 6 times (18)
Rnd 4. *2 sc, inc* 6 times (24)
Rnd 5. In BLO, sc in every stitch around. Change to Coal before completing last stitch. (24)
Rnds 6-7. Sc in every stitch around. Change back to Sunsoaked or Blush Pink before completing last stitch. (24)
Insert the safety eyes between Rnds 3-4 with about 5 stitches between them. Pay attention to the color change seam – I try to keep that at the bottom of the bee. If making a queen bee, embroider a pink line underneath the eyes, extending about a stitch’s width past the eyes.
Rnds 8-9. Sc in every stitch around. Change back to Coal before completing last stitch. (24)
Rnds 10-11. Sc in every stitch around. Change back to Sunsoaked or Blush Pink before completing last stitch. (24)
Rnd 12. *2 sc, dec* 6 times (18)
Start stuffing the bee and continue stuffing as you go. I stuff less at the end to keep the bee’s rear flat.
Rnd 13. *1 sc, dec* 6 times (12)
Rnd 14. 6 dec (6)
Antennae for Regular Bee – Make 2
Make in Coal
(Find the antennae instructions for the queen bee further below)
Pull up a loop between rows 4-5 about one stitch from the center of the bee. You want two stitches in between the antennae.
Ch 4. In the second loop from the hook, make a slip stitch. Cut your yarn and pull it through. Using a tapestry needle, weave the end down the chain and into the bee’s body. Be careful not to pull too tight as you weave down the chain or the antennae won’t be straight.
Repeat for the second antennae: start two stitches away from the antennae you just made. Weave in your ends.
Wings – Make 2
Make in Vintage White
Find the approximate center of your bee’s back (use the eye placement to guide you). Pull up a loop between rows 7-8. Ch 3. Make 2 tr stitches into the stitch behind, between rows 8-9. Cut your yarn and pull it through the last stitch, then weave it down through the stitch and into the bee’s body. Repeat for the second wing.
Crown for queen bee
Make in Sunsoaked
Pull up a loop between rows 4-5 about two stitches to the right from the center of the bee. Ch 2. Sc into the stitch to the left in the same row. Ch 4. Sc into the stitch to the left in the same row. Ch 2. Slip stitch into the same stitch. Cut yarn and weave in the ends.
Antennae for queen bee – make 2
Make in Coal
Pull up a loop behind the far right edge of the crown between rows 5-6.
Ch 4. In the second loop from the hook, make a slip stitch. Cut your yarn and pull it through. Using a tapestry needle, weave the end down the chain and into the bee’s body. Be careful not to pull too tight as you weave down the chain or the antennae won’t be straight.
Repeat for the second antennae: pull up your loop behind the far left edge of the crown between rows 5-6. Weave in your ends.
