Create Your Own Adorable Crocheted Bees: A Fun and Easy Guide
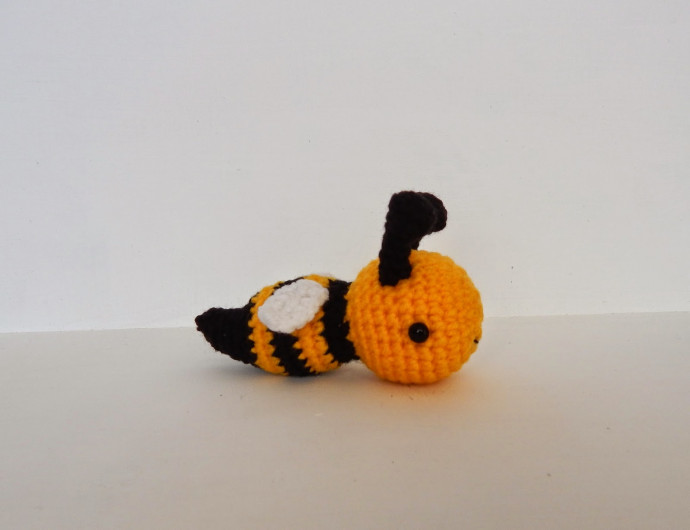
Crocheting adorable bees can be such a fun and rewarding project! The vibrant yellow yarn and black stripes come together to create a cute little buzzing bee that is sure to bring a smile to anyone's face. Whether you're a beginner or a seasoned crocheter, this project is a delightful way to spend an afternoon crafting.
Supplies
- 2.75mm Crochet Hook
- Red Heart Super Saver Yarn in Yellow, Black, and White
- 7.5mm Safety Eyes
- Polyester Stuffing
- Black Crochet Thread for the mouth
- Scissors
- Needle
Abbreviations
- Ch - Chain
- Sc - Single Crochet
- Inc - Increase
- Dec - Decrease
- Fo - Fasten Off
Finished Size
5.5 inches
Head and Body
- Rd1: Starting at the front of your bee's face with yellow yarn sc x 7 in an adjustable ring (7)
- Rd2: Inc x 7 (14)
- Rd3: Sc x 14 (14)
- Rd4: Inc x 14 (28)
- Rd5-6: Sc x 28 (28)
- Rd7: You will be marking in this round where to place the eyes, sc x 10, place a stitch marker in the last stitch you just did, sc x 14, place a stitch marker in the last stitch you just did, sc x 4 (28)
- Rd8-9: Sc x 28 (28)
- Rd10: [Sc x 7, dec] x 3, sc (25)
- Rd11-12: Sc x 25 (25)
- Rd13: Sc, dec x 12 (13)
- Rd14: Dec, change to black and [sc x 2, inc] x 3, sc, inc (16)
- Rd15: Insert safety eyes between Rd7 and Rd8 where you placed the stitch markers, sc x 16, stuff your bee firmly as you work from this point on (16)
- Rd16: Sc, change to yellow and [sc, inc] x 7, sc (23)
- Rd17: Sc x 23 (23)
- Rd18: Sc, change to black and sc x 22 (23)
- Rd19: Sc x 23 (23)
- Rd20: Sc x 2, change to yellow and sc x 21 (23)
- Rd21: [Sc x 3, dec] x 4, sc x 3 (19)
- Rd22: Sc x 2, change to black and sc x 17 (19)
- Rd23: Dec x 9, sc (10)
- Rd24-26: Sc x 10 (10)
- Rd27: Dec x 2, sc x 6 (8)
- Rd28: Sc x 8 (8)
- Rd29: Dec x 4 (4)
- Rd30: Dec x 2, fo (2)
Wing (Make 2)
- Row1: Starting at the bottom of the wing with white yarn ch x 3 (3)
- Row2: Turn, sc x 2 (2)
- Row3-5: Turn, ch, sc x 2 (2)
- Row6: Turn, ch, dec (1)
- Rd7: Sc around the entire wing, fo
Antenna (Make 2)
- Rd1: Starting at the top of the antenna with black yarn sc x 6 in an adjustable ring (6)
- Rd2: [Inc, sc] x 3 (9)
- Rd3: Sc x 9 (9)
- Rd4: Dec x 4, sc (5)
- Rd5-8: Sc x 5, fo at the end of Rd8 (5)
Assembly
Attach the antenna on your bee's head. Embroider on a little smile onto your bee. Sew the wings onto your bee's back. Weave in all ends and trim them.
No comments
Write a comment


