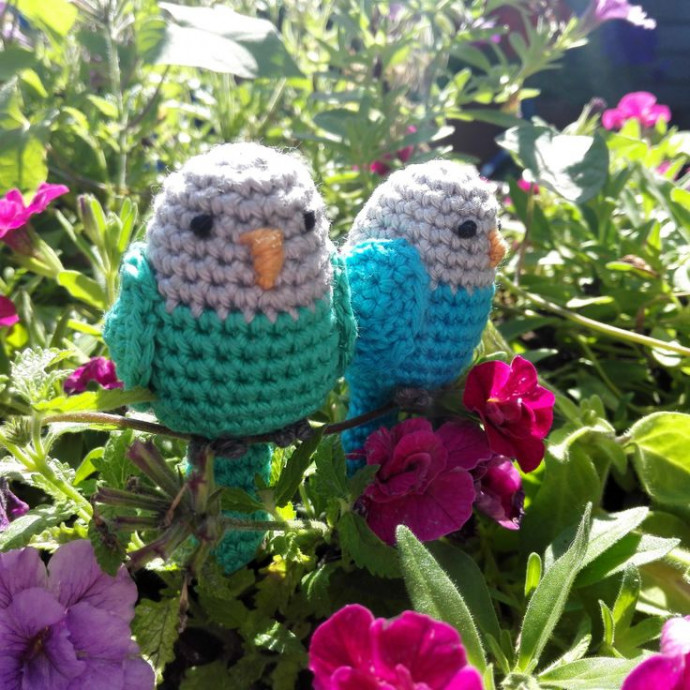
How to Crochet a Beautiful Parrot

Crocheting Experience
Crocheting a beautiful parrot can be such a delightful and rewarding experience! Choosing vibrant colors to bring your creation to life, carefully crafting each stitch, and watching the colorful feathers come together can truly spark joy. Not only does it showcase your creativity and talent, but it also adds a unique touch of charm to your space. Whether you are a seasoned crocheter or new to the craft, creating a crochet parrot is a fun project that is sure to bring a smile to your face.
Materials
I made a blue and a green quaker parrot, so I used these colors, but you can use different colors to make other kinds of birds:
- Head-color: light grey
- Body-color: blue or green
- Eye-color: black
- Beak-color: orange
- Feet-color: dark grey
Abbreviations
- sc – single crochet
- inc – increase (sc2 in one stitch)
- dinc – double increase (sc3 in one stitch)
- dec – decrease (go from 2 stitches to one)
Pattern
Body
Start with head-color
- 6sc in ring (6)
- inc6 (12)
- [inc, sc]6x (18)
- 4-5. sc18 (18)
- [inc, sc5]3x (21)
- sc21 (21)
- [inc, sc6]3x (24)
Change to body-color
- sc24 (24)
- [dec, sc]6x, sc6 (18)
- dec 6x, sc 6x (12)
- Fill your parrot
- [dec, sc2]3x (9)
- 18-23. sc9 (9)
- [dec, sc]3x (6)
- Finish off
Wings (Make 2)
Make in body color
- sc4 in ring (4)
- [sc, dinc]2x (8)
- [sc2, dinc, sc]2x (12)
- [sc3, dinc, sc2]2x (16)
Feet (Make 2)
Chain 3, slst in 2nd, ch1.
Assembly Instructions
Sew on the wings with the top of the wings on row 7 of the body. I try to sew them so they cover up my color change. Sew on feet between row 15 and 17. Embroider eyes (I used french knots) on row 5, and the beak between row 5 and 8.

