Crochet Rippled Cosmetic Bag Tutorial

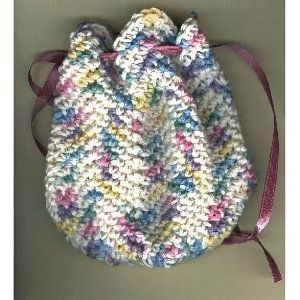
The Crochet Rippled Cosmetic Bag is not just a stylish accessory, but a practical solution for keeping your essentials organized and easily accessible. With its charming ripple design and versatile size, this bag is perfect for storing makeup, toiletries, or even small craft supplies. Whether you're on-the-go or just looking to add a pop of color to your vanity, this crochet bag is a must-have. Handmade with care and attention to detail, it also makes for a thoughtful gift for friends or family who appreciate handmade treasures. Upgrade your everyday routine with this adorable and functional accessory that combines style and functionality in one delightful package.
Materials Needed
- 1 ball cotton worsted weight yarn
- Size H or 8 aluminum crochet hook
- 1 yard 3/8" wide satin ribbon of desired color
Gauge
- 4 sc = 1"
- Yarn Thickness: 3mm
- Finished Size: 6"x5"
Skill Level
Beginner
Instructions
Starting the Project
RND 1: Leaving an 18" end (this will be used to sew up the bottom), ch66. Join with slst to first ch to form a big ring!
Creating the Ripple Design
RND 2: Ch1, *sc in each of the next 4 chs. 3sc in next ch. Sc in each of the next 4 chs. Sk next 2 chs. Rep from * around. When you get to the end, it may look like you have 3 or 4 sts left. That is ok. What you have is the last two sts undone, then the joining slst and the ch1. So what you want to do is sk2 chs, then the slst and the ch1 and then slst in the first sc. This is the way it will be from here throughout.
RND 3: Ch1. *Sc in each of the next 4 sc. 3sc in next sc (which is actually the 2nd sc in the stitch that you did 3 sc in on the previous rnd). Sc in each of the next 4 sc. Sk next 2 sc. Rep from * around. Join with slst to first sc.
Continuing the Pattern
RND 4-19: Rep RND 3. At the end of rnd 19, fasten off and weave the finishing all ends into work.
Use the starting end to sew up the bottom closed. Sew up the bottom closed using an overhand stitch. Line up one point to the next point wrong sides facing and sew closed. You will need to weave yarn back to the point to sew up each point to the next one. Once you have all of the edges sewn up, you will end up with a hole that may be big enough to put your finger through. Weave the yarn around this hole to draw it up so that the hole is smaller but do not make it so small that the bottom starts to pucker. You will be covering it with the base.
Base Circle
RND 1: Ch2, work 6 sc in 2nd ch from hook. Join with slst to first sc.
RND 2: Ch1, work 2 sc in each of the 6 sts around. Join.
RND 3: Ch1. *Sc in next st. 2sc in next st. Rep from * around. Join.
RND 4: Ch1. *Sc in each of the next 2 sts. 2sc in next st. Rep from * around. Join. Fasten off leaving a long end about 18". Sew the base to the bottom covering the hole in the center.
Additional Tips
Tip: Place the bag over a canning jar bottom to give yourself a firm surface to work on. I did this and it worked great!