Crochet Cupcake Box Tutorial

The Crochet Cupcake Box is a delightful and charming project that adds a touch of sweetness to your home decor or gift-giving. This creative creation allows you to crochet a cute and practical box in the shape of a delicious cupcake, perfect for storing small trinkets, jewelry, or even as a decorative piece on its own. With its intricate detailing and pastel colors, the Crochet Cupcake Box brings a whimsical and inviting vibe to any space. It's a fun and lovely way to showcase your crochet skills while also adding a dash of personality to your room. Give it a try and bring a sprinkle of sweetness into your crafting adventures!
Materials Needed
You will need:
- 3.5 mm crochet hook
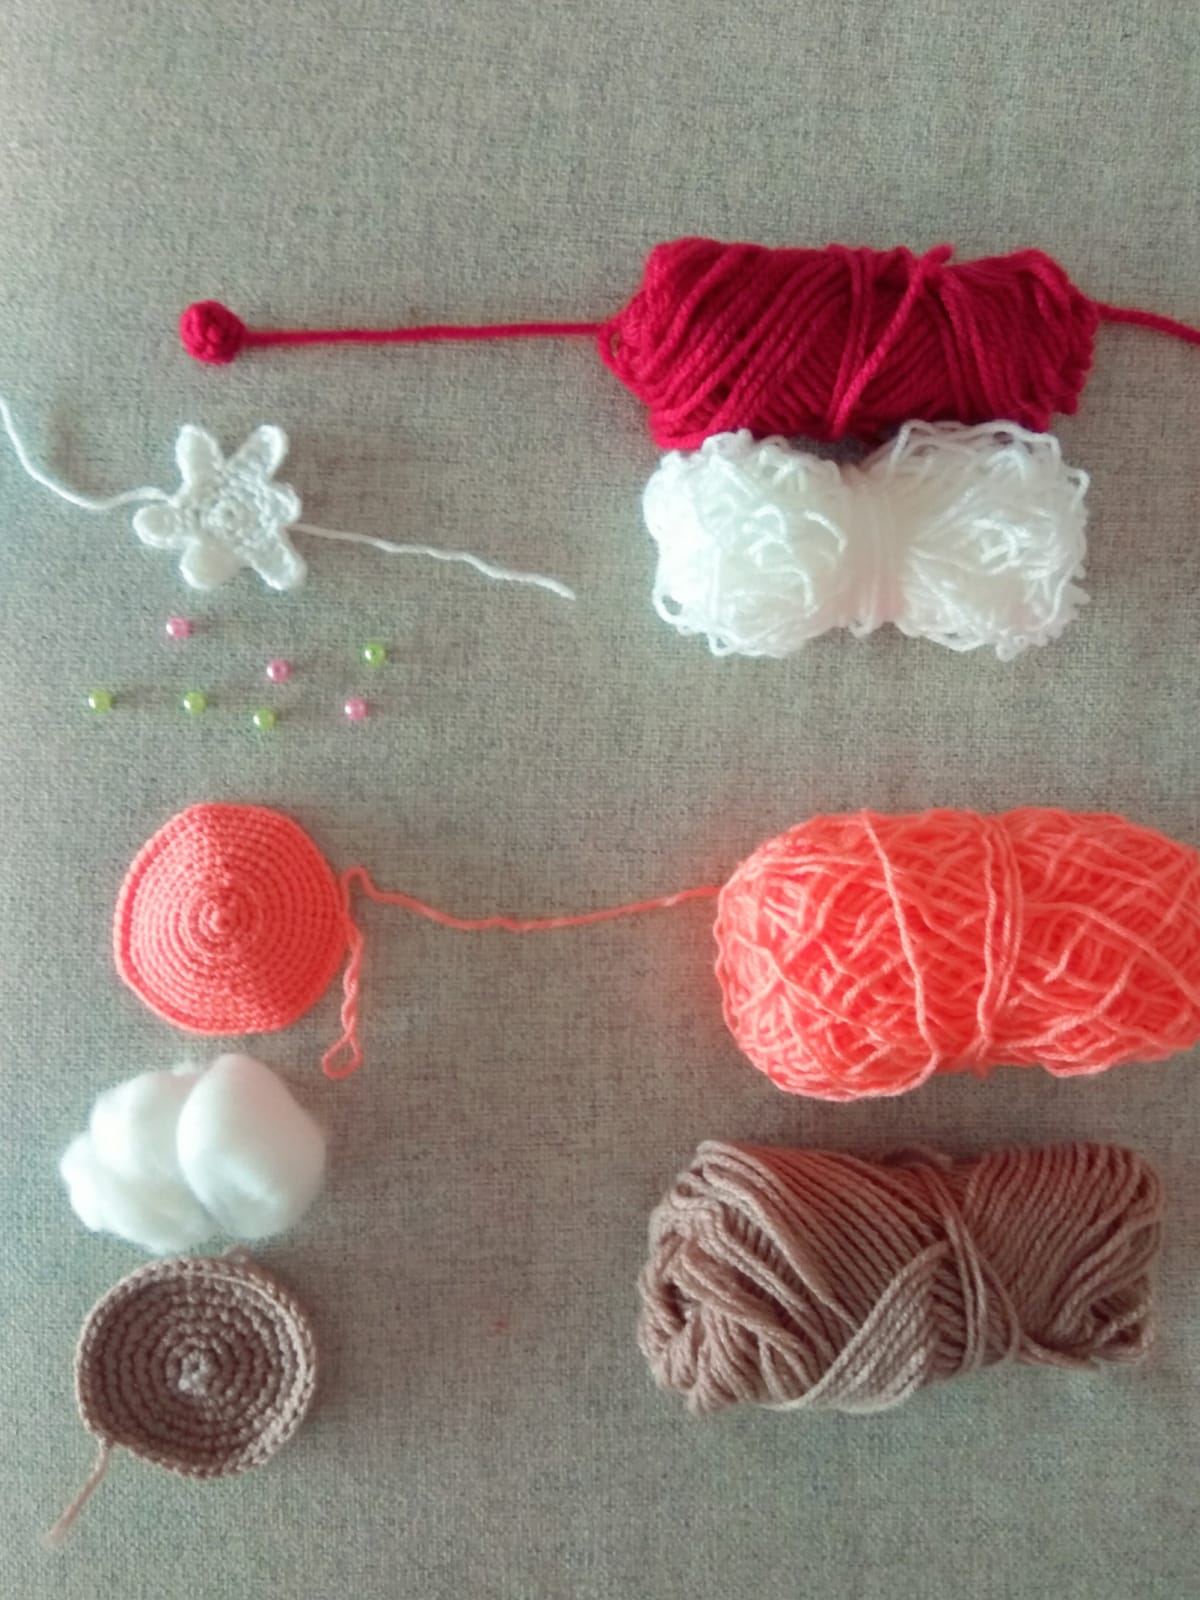
- White, light pink, brown, red yarn (do not get confused by my pictures, I have used two shades of brown, because I used some leftovers and did not have enough dark brown yarn!)
- Pearls (I had 3 green and 4 pink ones)
- Sewing needle
- Scissors
- Fiberfill
Abbreviations
- ch – chain
- st – stitch
- sl st – slip stitch
- sc – single crochet
- dc – double crochet
- inc – 2 sc in one st (used to increase the number of stitches)
- FPdc – front post double crochet
- BPdc – back post double crochet
- X N – repeat N times
- At the end of every round total number of stitches is shown
Box Cap
The cap consists of two parts: top and bottom, it will be stuffed with fiberfill. On the top of it, I place “cream”, a “berry” and some pearls.

Top Berry (Use Red Yarn)
Round 1: 6 sc in magic ring (6)
Rounds 2-3: sc in all st (6)
Do not fasten off, cut the yarn leaving a (longer) tail for sewing. Sew the last round.
Top Cream (Use White Yarn)
Round 1: 6 sc in magic ring (6)
Round 2: inc X 6 (12)
Round 3, drops of cream: sc in next st, 5 ch, insert the hook in the third ch from the hook, make dc in next 4 st (3 of them are ch and the last one is a side of sc), skip one st of the Round 2, sc in next st of the Round 2,
4 ch, insert the hook in the third ch from the hook, make dc in next 3 st (2 of them are ch and the last one is a side of sc), skip one st of the Round 2, sc in next st of the Round 2,
5 ch, insert the hook in the third ch from the hook, make dc in next 4 st (3 of them are ch and the last one is a side of sc), skip one st of the Round 2, sc in next st of the Round 2,
3 ch, insert the hook in the third ch from the hook, make dc in next 2 st (1 of them is ch and the other one is a side of sc), skip one st of the Round 2, sc in next st of the Round 2,
5 ch, insert the hook in the third ch from the hook, make dc in next 4 st (3 of them are ch and the last one is a side of sc), skip one st of the Round 2, sc in next st of the Round 2,
4 ch, insert the hook in the third ch from the hook, make dc in next 3 st (2 of them are ch and the last one is a side of sc), skip one st of the Round 2, sl st to the first st of the Round 3
Cap: Bottom Part (Use Any Colour You Want)
Round 1: 6 sc in magic ring (6)
Round 2: inc X 6 (12)
Round 3: (sc in next st, inc) X 6 (18)
Round 4: (sc in next 2 st, inc) X 6 (24)
Round 5: (sc in next 3 st, inc) X 6 (30)
Round 6: (sc in next 4 st, inc) X 6 (36)
Round 7: (sc in next 5 st, inc) X 6 (42)
Cap: Upper Part (Use Light Pink Yarn)
Round 1: 6 sc in magic ring (6)
Round 2: inc X 6 (12)
Round 3: (sc in next st, inc) X 6 (18)
Round 4: (sc in next 2 st, inc) X 6 (24)
Round 5: (sc in next 3 st, inc) X 6 (30)
Round 6: (sc in next 5 st, inc) X 5 (35)
Round 7: (sc in next 6 st, inc) X 5 (40)
Round 8: (sc in next 19 st, inc) X 2 (42)
Round 9: sc in all st (42)
Do not cut the yarn!
Now sew the berry to the cream and then cream to the upper part of the cap. If you want, you can decorate the cap with some pearls.
Now we continue crocheting the two parts of the cap together. Just make this round to both parts together: (sc in next 6 st, inc) X 6 (48) After completing 3/4 of the round, stuff the cap with fiberfill.

The Box (Bottom + Sides, Use Brown Yarn)
Round 1: 6 sc in magic ring (6)
Round 2: inc X 6 (12)
Round 3: (sc in next st, inc) X 6 (18)
Round 4: (sc in next 2 st, inc) X 6 (24)
Round 5: (sc in next 3 st, inc) X 6 (30)
Round 6: (sc in next 4 st, inc) X 6 (36)
Side part of the box: from now on at the end of every round we join it with a sl st, make turning 3 ch and turn the crocheting. 3 turning st counts as one dc.
Round 7: dc in back loops of all st (36)
Round 8: ((FPdc in next st, BPdc in next st) X 8, 3 FPdc together in next st) X 4 (44)
Rounds 9-10: (FPdc in next st, BPdc in next st) X 22 (44)
If you want to have a deeper box, you can add a couple of rounds more here (the same as Rounds 9-10)
Cream Around the Basket (Change to White Yarn)
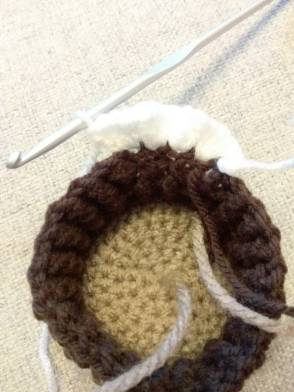
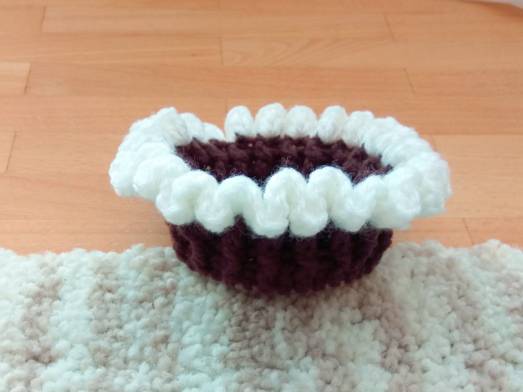
Round 11: 3 ch as a beginning of the round, hold crocheting in the way that the front side is the inside of the basket (picture below), crochet 4 dc together in every st. Fasten off, cut the yarn and weave in all ends.


The box is ready!

