CrochetMenScarvesHatsGlovesSweatersCardigansSocksOther clothingWomenScarvesHatsGlovesShawls and cover upSweatersCardigansSocksSlippersBagsOther clothingChildrenScarvesHatsGlovesSweatersCardigansSocksSlippersOther clothingHomeBlankets and plaidsRugsHome decorationsPetsSchemesKnittingOther hand-madeChat
Crochet Your Own Golden Beret: Stylish and Fun Fashion Accessory

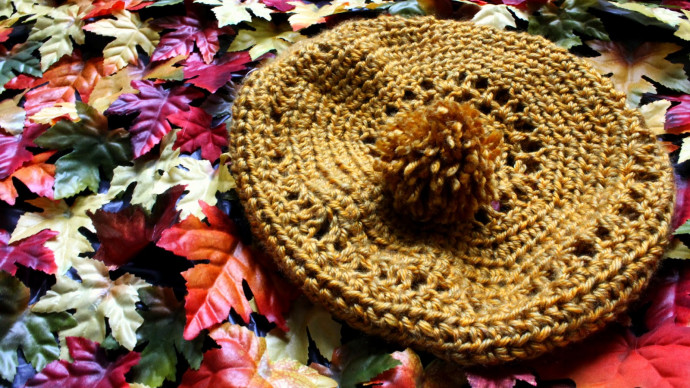
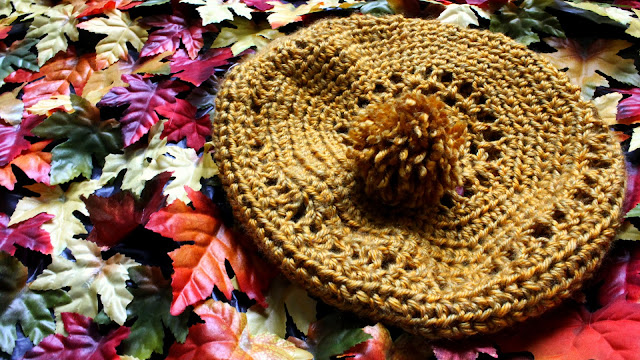
The crochet golden beret is a stylish and fun accessory to add some flair to your outfit! The warm, golden hue brings a touch of sunshine to any look, making it perfect for brightening up gloomy days. Whether you're heading out for a casual coffee date or a cozy evening stroll, this beret is sure to be your go-to accessory for a touch of whimsical charm.
Its soft texture and effortless style make it a versatile piece that can be paired with both casual and dressy outfits. So go ahead, embrace your inner fashionista and sparkle with this adorable crochet golden beret!Ingredients for Your Crochet Golden Beret
Ingredients:
Crochet Hook >> H/8-5.50MM
Craft Scissors
Yarn Sewing Needle
Scrap Yarn used >> Heartland
Pom Pom Maker
Stitch Guide
HDC= half double crochet // SC= single crochet // DC= double crochet // SS= slip stitch // ST(S)= stitch(es) // CH= chain RND[number]= Round
Step-by-Step Crochet Instructions
Beginning Your Beret

CH 3
Connect the last ST to the very first ST by SS.
RND1: HDC two times into All of the STS, 6 STS total; at the end of the last ST connect to the very first ST.
RND2: HDC two times into the first ST, HDC into the following ST one time, HDC two times into the first ST, HDC into the following ST one time, HDC two times into the first ST, HDC into the following ST one time, 9 STS total; at the end of the last ST connect to the very first ST.
Creating the Body of the Beret
RND3: DC one time into the first ST, CH 1, DC again into the same first ST, **CH 1, DC into the following skipped ST, CH 1, DC one time into the following ST, CH 1, DC again into the same ST... [**Repeat alternating method until the end of the Row, at the end of the last ST connect to the very first ST.]
RND4: DC one time into the first open space, CH 1, DC again into the same first ST, **CH 1, DC into the following skipped open space, CH 1, DC into the following skipped open space, CH 1, DC one time into the following open space, CH 1, DC again into the same ST... [**Repeat alternating method until the end of the Row, at the end of the last ST connect to the very first ST.]
Continuing the Pattern

RND5-RND6: HDC into the first 4 STS, into the 5th ST, **HDC [two times] HDC into the first 4 STS, into the 5th ST, HDC [two times]...[**Repeat alternating method until the end of the Row, at the end of the last ST connect to the very first ST.
RND7: HDC into the first 6 STS, into the 7th ST, **HDC [two times] HDC into the first 6 STS, into the 7th ST, HDC [two times]...[**Repeat alternating method until the end of the Row, at the end of the last ST connect to the very first ST.
Finishing Touches
RND8: DC one time into the first ST, CH 1, DC again into the same first ST, **CH 1, DC into the following skipped ST, CH 1, DC one time into the following ST, CH 1, DC again into the same ST... [**Repeat alternating method until the end of the Row, at the end of the last ST connect to the very first ST.]
RND9-RND15: HDC into All of the STS, at the end of the last ST connect to the very first ST after every Round, at the last ST, SS to complete final work.
Optional Pom Pom Decoration
Pom Pom [Optional]
I used a pom pom maker to create the pom pom.
Once complete, using your yarn sewing needle/tapestry needle and a strand of yarn, sew the pom pom unto the very top of the hat, through the inside and through the pom pom several times for security.

No comments
Write a comment
