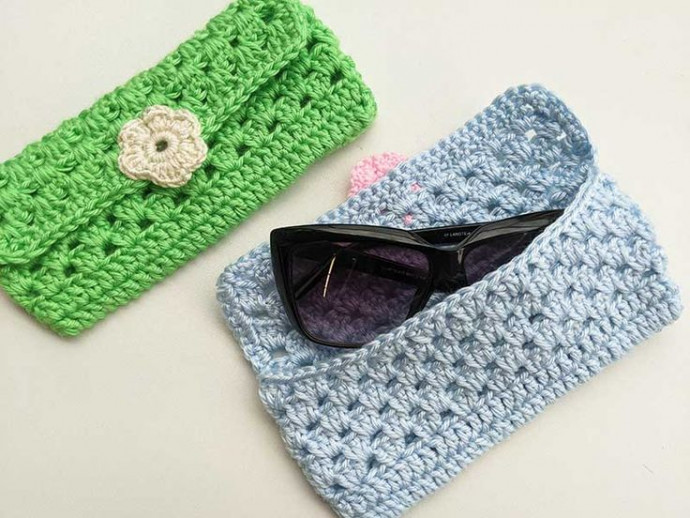
Crochet Eyeglasses (Sunglasses) Holder

Crochet eyeglasses (sunglasses) holders are not just practical but also super cute! These handy accessories keep your glasses safe and easy to find when you're not wearing them. Whether you hang them around your neck or attach them to your bag, they add a touch of style to your everyday look. Plus, the possibilities are endless with different colors, patterns, and designs to match your unique personality.
So, say goodbye to constantly searching for your glasses and hello to your new favorite fashion statement!Crochet materials and tools:
<> Crochet hook 3.5 mm
<> Caron, Simply Soft –100% acrylic.
<> Magnetic snap or button
Common abbreviations of crochet stitches (US):
ch – chain
SC – single crochet
sl st – slip stitch
DC – double crochet
st(s) – stitch(es)
Eyeglasses (sunglasses) holder crochet pattern:
Crochet holder case:
Ch 31.
Round 1: DC in the 3rd chain from the hook and in each chain across. In the last chain, make 3 DC. Turn your work to continue on the opposite side of the starting chain. DC in each chain across this side, then make one more DC in the last chain. Join with a sl st to the first DC. (60 DC)
Round 2: Ch 2, DC in the same st as the join, then DC in each st around. Join with a sl st to the first DC. (60 DC)
Round 3: Ch 3 (counts as a DC), skip the join st. [Skip the next 2 sts, work 3 DC in the following st] – repeat around. At the end of the round, skip the last 2 sts, then work 2 DC in the join stitch (together with the starting ch-3, this forms a group of 3 DC). Join with a sl st to the top of the starting ch-3.
Round 4: Ch 3. Work 2 DC in the same st as the join. [Skip the next 3 DC from the previous round, and work 3 DC in the space between the next two groups of 3 DC from the previous round] – repeat from * to * around. Join with a sl st to the top of the starting ch-3.
Repeat Rounds 3 and 4 three more times, or continue repeating until you reach the desired size.
Crochet holder flap:
Row 1: sl st in next st, ch 3, 3 DC in the space between the next two groups of 3 DC from the previous round, [skip the next 3 DC, 3 DC in the space between the next two groups of 3 DC] – repeat 8 times. DC into the central DC of the next group. Turn.
Row 2: Ch 3, work 2 DC into the space between the DC and the group of DC from the previous row, [skip the next 3 DC, 3 DC in the space between the next two groups of 3 DC] – repeat 8 times. Skip the next 3 DC, 3 DC in ch-3 space, DC in the 2nd ch of the ch-3. Turn.
Row 3 : sl st in next st, ch 3, 3 DC in the space between the next two groups of 3 DC from the previous round, [skip the next 3 DC, 3 DC in the space between the next two groups of 3 DC] – repeat 8 times. DC into the top of the ch-3. Turn.
Row 4: Repeat Row 2.
Row 5: Repeat Row 3. Cut the yarn.
Attach the yarn and work across the holder flap with SC. Space the SC as desired—neither too close nor too wide. Check the video tutorial for further instructions. Sew on the magnetic button. If you’d like to decorate the holder as I did, check out my crochet mini flower pattern.
