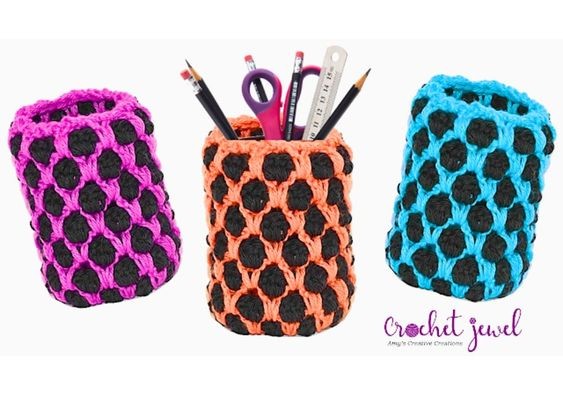
How to Crochet a Colorful Pencil Holder

Today, let's dive into the wonderful world of crocheting a pencil holder! This fun and creative project is perfect for adding a personal touch to your desk or gifting to a friend. To get started, you'll need some colorful yarn, a crochet hook, and a bit of patience. Begin by crocheting a simple cylinder shape in your favorite stitch pattern, making sure to leave an opening at the top for easy access to your pencils. Feel free to get creative with different colors and embellishments to make your pencil holder uniquely yours. Before you know it, you'll have a handmade pencil holder that not only looks adorable but also brings a touch of warmth and charm to your workspace. So grab your supplies, put on some calming music, and let's get crocheting!
Abbreviations
ch = chain
dc = double crochet
sl st = slip stitch
sc = single crochet
H hook
Getting Started
Rnd 1: Chain 5, sl st to create a ring.
Rnd 2: Ch 3, work 15 dc into the ring. sl st on top of chain 3
Building the Cylinder
Rnd 3: Ch 3, work dc in the same stitch, work 2 dc in each stitch around, the last stitch gets 3 dc, sl st on top of chain 3 ‑33 dc
Rnd 4: Ch 1, loop up your old color, sl st into the new color next to the stitch with the loop. Ch 3, work 2 dc in the same stitch, skip two dc, *work 3 dc in the next stitch, skip 2 dc,* Repeat around, sl st on top of chain 3
Rnd 5: Ch 1, now take old color that is looped up and sl st, ch 2 in between the 3 dc, work dc in the same space, skip 3 dc, *work dc, ch 1, dc, in between the 3 dc,* Repeat around, sl st on top of chain 3
Rnd 6: Ch 1, pull up your yarn, work with your other color of yarn, pull your other color of yarn through the ch 1, ch 2, work 2 dc in the chain 1 space, *work 3 dc in the next ch 1 space,* Repeat around, sl st on top of chain 3
Rnd 7: Ch 1, now take the old color that is looped up and sl st, ch 2 in between the 3 dc, work dc in the same space, skip 3 dc, *work dc, ch 1, dc, in between the 3 dc,* Repeat around, sl st on top of chain 3
Finishing Touches
Repeat alternate with Rnd 6 and Rnd 7 until the desired height.
In the end, work sc around the top after the round 7 round, sl st in beg stitch, fasten off, and weave in ends. I hope you enjoy this crochet pencil holder!
