
Crochet Mini Pumpkin Amigurumi Tutorial

If you're looking to add a touch of handmade charm to your autumn decor, consider trying your hand at making Crochet Mini Pumpkin Amigurumi! These adorable little pumpkins are perfect for embellishing your shelves, tables, or even using as cute keychains. With their soft texture and cute design, they are sure to bring a smile to your face every time you see them. You can customize them with different yarn colors to match your home decor or get creative with embellishments like tiny felt leaves or a cute smiley face. Crocheting these mini pumpkins is a fun and rewarding project that will not only add a festive touch to your home but also make great gifts for friends and family. So grab your crochet hook, some yarn, and let's create some cozy fall vibes together!
Materials
| 4.25mm crochet hook |
| worsted weight yarn in orange and green (you can also use whatever colors you’d like!) |
| tapestry needle |
| poly-fil stuffing |
| 6mm safety eyes |
| black embroidery thread |
Main Body
In orange (or whatever color you’re making your pumpkin in), ML 6.
R1: increase in each stitch (12)
R2: *sc, inc* around (18)
R3: *2sc, inc* around (24)
R4 – R8: sc around (5 rows total!)
R9: *2sc, dec* around (18)
R10: *1sc, dec* around (12)
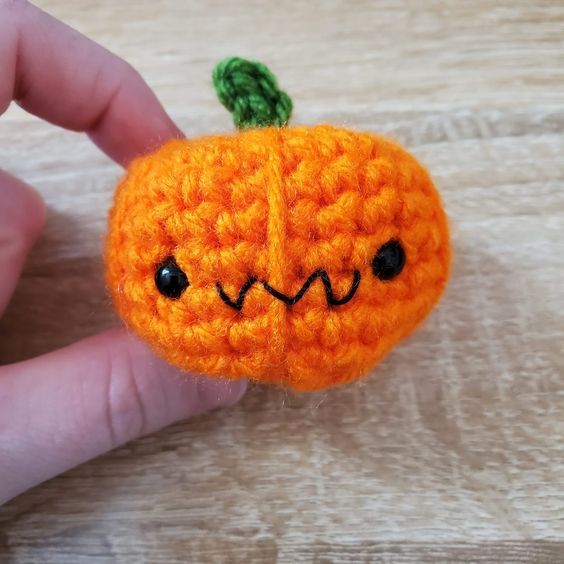
Here’s where I add the eyes – we need to be a little careful about where we place them, as we’ll be sewing long straight stitches along the places that we’ve increased in the first few rounds. We don’t want the eyes to be in the way of these stitches!
Place your eyes in-between rows 6 & 7 and about 4 stitches apart. I like to line up where they’re going by visualizing where the straight stitch will be and lining it up.
Once you’ve added the eyes, stuff the body here!
R11: decrease in each stitch (6)
Fasten off, leaving a long tail for sewing. And when I say long, I mean it! You’ll want about 30 inches of extra tail, as we’ll use this to add the pumpkin segments. Sew through each of the remaining 6 stitches and pull tight to close.
To add the segments, send the tail of the yarn straight up through the body of the pumpkin, then send a long straight stitch down where the increases and decreases fall. Sew straight back up through the body, rotate the pumpkin, and do the same thing. You’ll want 5 or six segments – I chose to only do five for this little pumpkin. Again, for a more detailed explanation of this process, see my earlier pumpkin post. I did a pretty good job laying it all out!
Stem
In green, chain 5.
R1: slp st down the chain
Fasten off, and leave a long tail for sewing! We’ll attach this last, so set aside for now.
With black embroidery thread and tapestry needle, embroider the face on. You can make a zig-zag like I did, or choose any mouth shape you’d like!
Using the tail from the stem, attach it directly to the top of the pumpkin. Weave in all ends inside the pumpkin’s body.