Crochet Women's Quick Chunky Cat Hat: A Cozy Winter Accessory

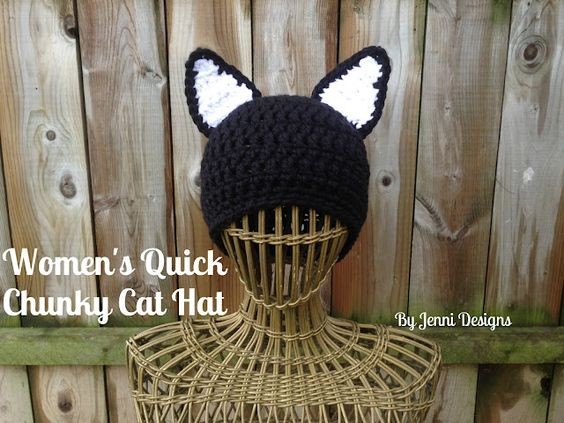
Looking for a cute and cozy accessory that will keep you stylishly warm this winter? Look no further than the Crochet Women's Quick Chunky Cat Hat! This adorable hat is not only quick to make but also features a chunky design that adds a touch of charm to any outfit. Whether you're heading out for a casual day or a fun night with friends, this hat is sure to be a purr-fect addition to your wardrobe. Handmade with love and attention to detail, this hat is a must-have for any cat lover looking to stay cozy and fashionable during the colder months. So, why not treat yourself (or a friend) to this delightful hat and embrace the whimsical charm it brings to your winter ensemble!
Difficulty Level
Easy
Size
Teen/Women’s
Supplies
- Bernat Softee Chunky Yarn, Super Bulky (6) - 100-125 yards for hat & outside of ears
- 10 yards for inside of ears
- Size N (9.0 mm) Crochet Hook
- Tapestry Needle
- Scissors
Abbreviations (US Terms)
- Ch – Chain
- Dc – Double Crochet
- Hdc – Half Double Crochet
- Hdc2tog - Half Double Crochet 2 Together
- Sc – Single Crochet
- Sk – Skip
- Sl St – Slip Stitch
Pattern for Gauge
Row 1: Ch 11, dc in 3rd ch from hook and in each across.
Row 2: Ch 2, turn. Dc in same and in each across.
Piece should measure approximately 4” x 2” for gauge. If not, please adjust your tension or hook size to get gauge. Gauge is important for this hat pattern.
Important Notes
- Ch 2's & ch 1's do not count as stitch and are not included in the stitch count at the end of each row.
- Joins are made with sl st to the first dc, do not join to the ch 2.
Hat
Rows 1-2
Row 1: Magic circle, ch 2, 10 dc in circle. Join & pull circle tight. (10)
Row 2: Ch 1, 2 hdc in same and in each around. Join. (20)
Rows 3-14
Row 3: Ch 2, dc in same, 2 dc in next. *Dc in next, 2 dc in next.* Repeat *to* around. Join. (30)
Row 4: Ch 1, 2 hdc in same, hdc in 2. *2 hdc in next, hdc in 2.* Repeat *to* around. Join. (40)
Your circle should measure approx. 5.5” across the center.
Row 5: Ch 2, 2 dc in same, dc in next and in each around. Join. (41)
Row 6: Ch 1, 2 hdc in same, hdc in next and in each around. Join. (42)
Row 7: Ch 2, dc in same and in each around. Join. (42)
Row 8: Ch 1, hdc in same and in each around. Join. (42)
Row 9: Ch 2, dc in same and in each around. Join. (42)
Row 10: Ch 1, hdc in same and in each around. Join. (42)
Row 11: Ch 2, dc in same and in each around. Join. (42)
Row 12: Ch 1, hdc in same and in each around. Join. (42)
Row 13-14: Ch 1, sc in same and in each around. Join. (42)
Fasten off and sew in ends.
Ears
Rows 1-6
Row 1: Ch 7, hdc in 2nd ch from hook and in each across. Ch 1, turn. (6)
Row 2: Hdc2tog, hdc in 2, hdc2tog. Ch 1, turn. (4)
Row 3: Hdc in each across. Ch 1, turn. (4)
Row 4: Hdc2tog, hdc2tog. Ch 1, turn. (2)
Row 5: Hdc in each across. Ch 1, turn. (2)
Row 6: Hdc2tog. Fasten off. (1)
Fasten off.
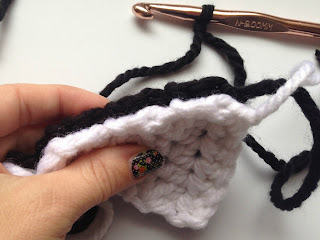
Assembling the Ears
To complete the ears you now need to hold together one outside ear to one inside ear, like so:
Using the outside ear color, join with a sl st in the lower right corner of the ear, ch 1. Work a sc in the same space as the ch 1.
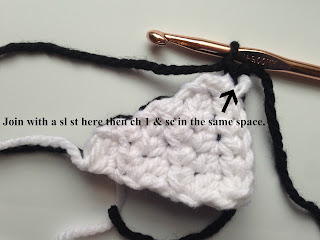
Continue to sc across this side of the ear until you reach the point of the ear. When you reach the point, work all of the following stitches into the same space: [sc, ch 2, sc]. Then proceed to sc down the left side of the ear. There is no need to sc along the bottom of the ear. Fasten off leaving a long end for sewing.

Sew ears onto hat and sew in all your ends and you're done!