Crochet Amigurumi Farmer Bunny Guide

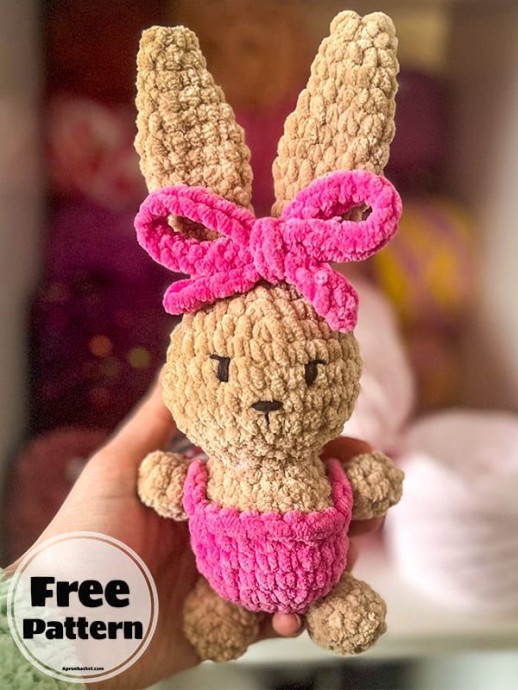
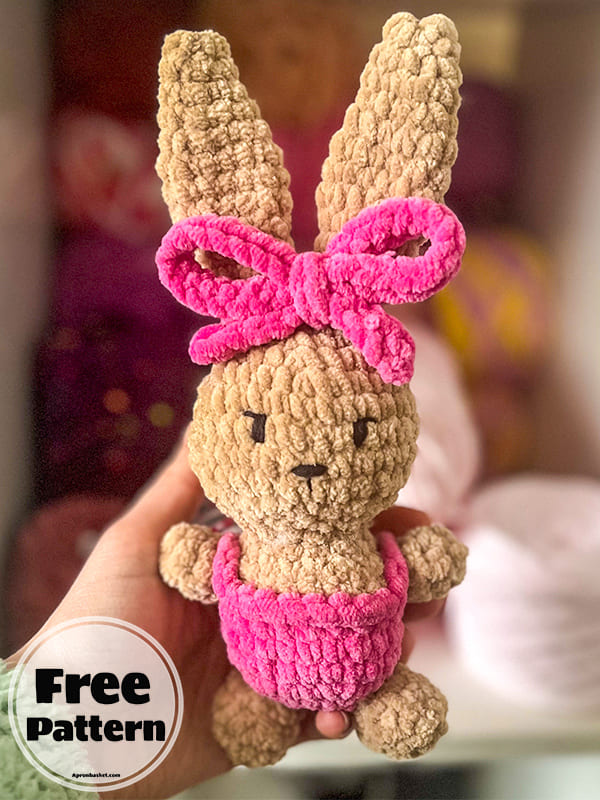
The Crochet Amigurumi Farmer Bunny is an adorable handmade toy that will steal your heart with its charm. This sweet little bunny is dressed in tiny overalls, holding a miniature garden hat, and exudes a cozy countryside vibe. The intricate crochet work gives it a unique and lovable appearance, making it a perfect addition to any collection of cute plushies. Whether you're a seasoned crochet enthusiast or just starting out, creating your own Farmer Bunny can be a fun and rewarding project that will surely bring a smile to your face every time you see it. So grab your yarn and hook, and let your imagination run wild as you craft your very own cuddly companion!
Abbreviations
Ch: Chain
MR: Magic ring
Sc: Single crochet
BLO: Back loop only
FLO: Front loop only
FO: Fasten off
Inc: Increase
Dec: Decrease
Materials
Yarn (I use chenille)
Stitch marker
Scissors
Crochet hook suitable for yarn size.
Sewing needle
Acrylic yarn for the mouth
Fiberfill
Head
Main colour.
RND 1: MR (6)
RND 2: inc x 6 (12)
RND 3: (sc,inc) x 6 (18)
RND 4:(2sc,inc) x 6 (24)
RND 5: (3sc,inc) x 6 (30)
RND 6-9: sc x 30 (30)
RND 10: (3sc,dec) x 6 (24)
RND 11: (2sc,dec) x 6 (18)
RND 12: (1sc,dec) x 6 (12)
FO, stuff and weave in the ends as we will be using the body tail to sew.
Body
Blue colour.
RND 1: MR (6)
RND 2: inc x6 (12)
RND 3: (sc,inc)x6 (18)
RND 4: (2sc,inc)x6 (24)
RND 5-7: sc x 24 (24)
RND 8: FLO with blue, ch 6, skip 3 st, sc 8, ch 6, skip 3 st, sc 10 (24)
Change to main colour.
RND 9: BLO of rnd 8, sc x24 (24)
RND 10: (2sc,dec)x6 (18)
RND 11: (1sc,dec)x6 (12)
FO, stuff leave a long tail to sew.
Ears
RND 1: MR (6)
RND 2: sc x6 (6)
RND 3: (1sc,inc)x3 (9)
RND 4: sc x9 (9)
RND 5: (2sc,inc)x3 (12)
RND 6-8: sc x 12 (12)
RND 9: (2sc,dec)x3 (9)
RND 10-11: sc x9 (9)
RND 12: (1sc,dec)x3 (6)
RND 13: sc x 6 (6)
Fasten off and leave a long tail to sew.
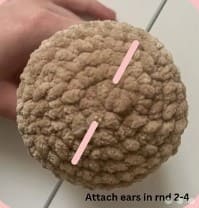
The ears will be sewn onto round 2-4 of the head.
Legs
Main colour.
RND 1: 6 MR (6)
RND 2: inc x6 (12)
RND 3: 4 dec, 4 sc (8)
RND 4: sc x8 (8)
Fasten off, leave a tail to sew, stuff lightly.
Arms (Make 2)
Main colour.
RND 1: MR (5)
RND 2-3: sc x5 (5)
Stuff, FO leave tail to sew.
Bow
The bow is worked in two separate chains, A and B. Make sure to leave a tail to sew onto the ears later.
Chain A
Ch 30, in the 2nd chain from hook slst 29, join the ends to create a loop and twist in the middle to make a figure 8.
Chain B
Ch 20, in the 2nd chain from hook slst 19, do not cut this chain. Knot this chain in the middle of figure 8 as shown in the image.
Assembly
Sew together head and body. Arms are to be sewn on in between the loops made on the body.
Legs are sewn onto Rnd 2-3 of the body 4 stitches apart.
Ears are sewn onto Rnd 2-4 of the head, use arms as guidance 1-2 stitches apart.
Embroider eyes in Rnd 7 roughly 5 stitches apart and mouth in Rnd 8 as shown in the image.
Attach the bow to ears by using the excess tail and knot them together, sew loose ends into the head.