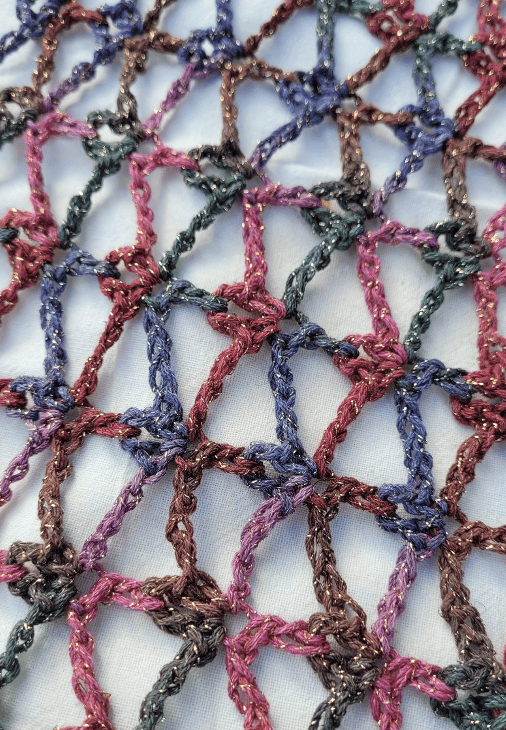
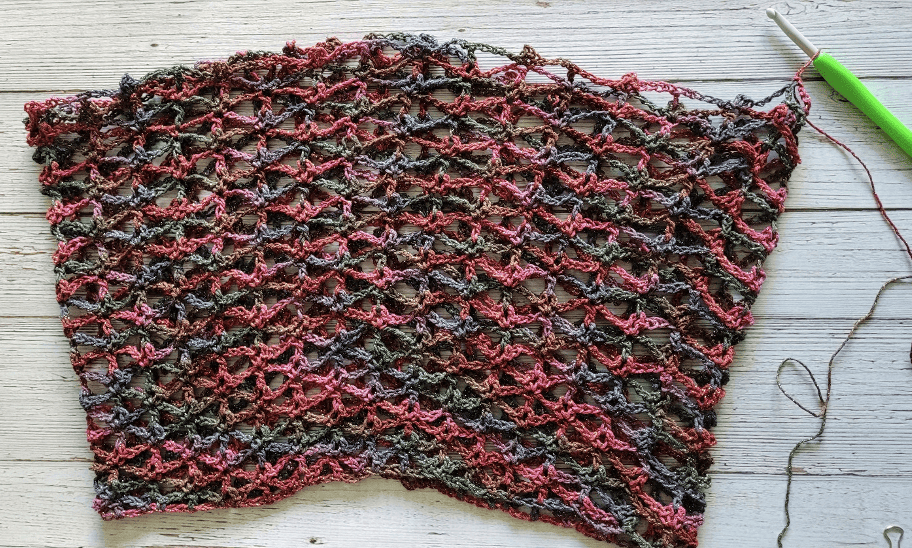
Crochet Lacy Summer Poncho


The Crochet Lacy Summer Poncho is a stylish and versatile addition to any summer wardrobe. Its intricate lace design adds a touch of elegance to any outfit, making you feel effortlessly chic whether you're at the beach or out for a casual lunch with friends. This lightweight garment is perfect for keeping you cool on hot days while still adding a pop of fashion to your look.
Skill Level: Easy
Supplies:
Approximate Finished Measurements: Small = 14” wide x 13 ½” long
Abbreviations:
Special Stitches:
Notes:
Directions are given for size Small – Sizes Medium and Large are in parentheses
Instructions:
Round 8: (Ch 1, sc-picot) all in joining sl st; [ch 4, dc in next ch-3 sp, ch 4, sc-picot in next dc] around up to ch-3 sp of last sc-picot; ch 4, dc in ch-3 sp of last sc-picot, ch 4, sl st in ch-3 sp of 1st sc-picot of round.
Bottom Edging (Last Round for all sizes): Sl st into next ch-4 sp, ch 1, sc in same sp,, ch 3, sc in same sp; [5 hdc in ch-3 sp of next sc-picot, (sc, ch 3, sc) in next ch-4 sp, ch 3, (sc, ch 3, sc) in next ch-4 sp] around up to last sc-picot; 5 hdc in ch-3 sp of last sc-picot, (sc, ch 3, sc) in last ch-4 sp, ch 3, sl st to 1st sc of round. Fasten off.
Finishing/Assembly:
- Recipes
-
 Kool-Aid Pickles
-
 Buffalo Chicken Burgers with Whipped Feta Spread
-
 French Blond Cocktail
- Funny Pictures
-
 Freshly Squeezed Caturday Memes for Today
-
 Funny Memes Selection for Today
-
 Animal Pics for Some Pleasure
- Crochet Ideas
-
 Crochet Crop Top
-
 Crochet Easter Sheep and Duck Egg Bags
-
 Crochet Summer Top
- Lifehacks
-
 How To Crochet The 3-Colored Crosshatch Stitch Tutorial
-
 Flower With Stem Stitch Photo Tutorial
-
 How to Crochet the Slanted Clusters Stitch Photo Tutorial
- DIY
-
 Crochet Smiling Flowers
-
 Crochet Glasses Pouch
-
 Crochet Herringbone Stripe Baby Blanket
- Knitting Ideas
-
 Knitted Fingerless Gloves
-
 Knitted Twilight Hug Vest
-
 Knitted Wrist Warmers