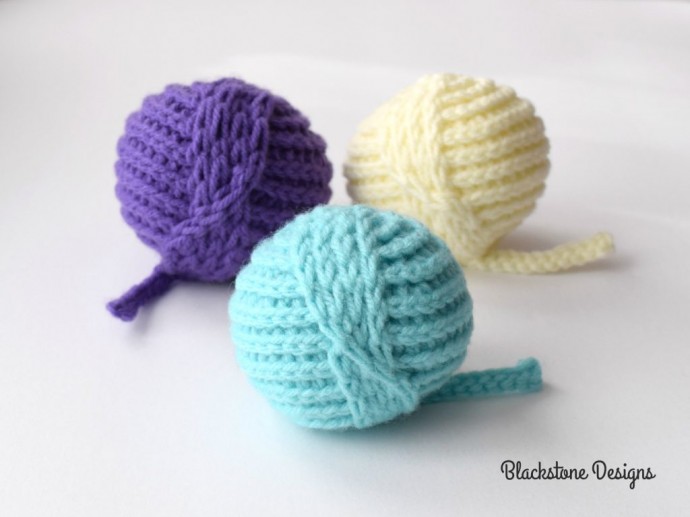
Crochet Yarn Ball Stress Reliever

Crochet yarn ball stress relievers are simply fantastic! Not only are they squishy and soft, but they also provide a creative outlet for your mind to unwind. Imagine the satisfaction of squishing a plush yarn ball in your hands when the day has been hectic. It's like a mini massage for your soul! These stress relievers can be made in various colors and textures, allowing you to customize them to suit your preferences.
Materials:
Worsted Weight Yarn (#4)
~Any Color [30 yards]
F/5/3.75mm Hook
Fiberfill
Yarn Needle
Scissors
Optional Materials
Party Balloon
Cornstarch (⅔-1cup)
Mini Funnel
Gauge
Not important for this project
Size
Approximately 2.75” diameter / 8.5”circumference
Stitch Guide
arnd = around
ch = chain
hdc = half double crochet
sl st(s) = slip stitch(es)
st(s) = stitch(es)
Surface sl st(s) = See Special Stitches
TLO = See Special Stitches
Skill Level
Easy
WRITTEN IN U.S. TERMS
Notes
- Beginning chains do not count as stitches.
- This pattern is worked in the round (no joining or chaining unless specified).
- Instructions appearing between asterisks should be repeated as indicated.
Special Stitches
Third Loop Only (TLO): The loop that runs parallel to the back side of a hdc; aka camel stitch.
Surface Slip Stitches: Working slip stitches across the surface of a project.
Instructions
R1. Make a magic ring, ch 1, 8 hdc in ring (8)
R2. In TLO: 2 hdc in each st arnd (16)
R3. In TLO: *2 hdc, hdc* arnd (24)
R4. In TLO: *2 hdc, hdc x 2* arnd (32)
R5. In TLO: *2 hdc, hdc x 3* arnd (40)
R6. In TLO: hdc in each st arnd (40)
R7-8. Repeat round 6
R9. In TLO: *dec, hdc x 3* arnd (32)
R10. In TLO: *dec, hdc x 2* arnd (24)
Insert stuffing (or other stress ball) here and continue the next steps working around it
R11. In TLO: *dec, hdc* arnd (16)
R12. In TLO: dec arnd (8)
R13. LOOSELY surface sl st up the back, across the top, and down the front to the starting point.
R14-15. Repeat 13 working parallel to the others
R16. LOOSELY surface sl st up the back, across the top, and then halfway down the front, surface sl st across the last 3 surface sl sts and then finish surface sl sts down the front. Ch 11, sl st across ch, sl st to bottom of ball; Fasten.
Finishing
- Hide all strings.


