Cozy Crocheted Hot Water Bottle Cover Tutorial

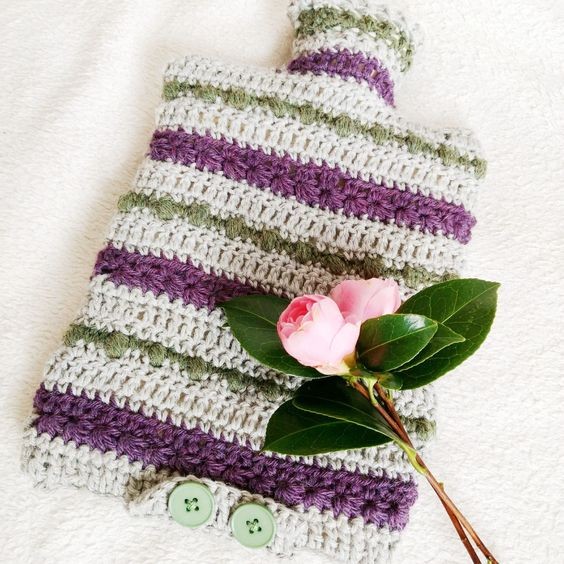
Create a cozy cover for your hot water bottle using the art of crocheting. This handmade accessory will not only keep your hot water bottle warm for longer, but it will also add a touch of charm to your bedroom or living room. By choosing your favorite yarn colors and crochet pattern, you can personalize the cover to suit your style and preferences. Crocheting a hot water bottle cover is a fun and rewarding project that allows you to showcase your creativity and crafting skills. Additionally, a crocheted hot water bottle cover makes a thoughtful and practical gift for friends and family. With just a few basic crochet stitches and some yarn, you can create a beautiful and functional accessory that will keep you warm and cozy during the colder months. Let your imagination run wild as you experiment with different colors and textures to create a one-of-a-kind hot water bottle cover.
Materials
- Hobbii Upcycled Alpaca Blend (Aran weight) in Lichen Royal Purple and Rain Cloud
- 5 mm Odyssey hook
- 2ltr hot water bottle
- 2 x 2cm buttons
- Tapestry needle and sharp scissors
Pattern Notes
The pattern is written using UK terminology. For a conversion chart to US terminology, be sure to refer to available resources.
The two pieces are worked in rows, and you should turn your work.
[Stitches written in brackets like this are all worked into the same stitch.]
For the first stitch on each row: Chain 1 to move up to the next round if the round starts with double crochet, Chain 2 if the round starts with a half treble crochet, and chain 3 if the round starts with a treble crochet. These chains count as the first stitch in the row.
Special Stitches
- Bobble stitch (using the base of 4 tr)
- Ch – chain
- Dc – double crochet
- Htr – half treble
- Tr – treble
- Ss – slip stitch
- Star stitch
Start
Make 2 sides.
Foundation
Use Rain Cloud (grey). Ch 29.
Row Instructions
Row 1: In the second ch from hook (2dc), 26dc, (2dc). Dc across. (30)
Row 2: Tr across.
Row 3: Dc across. Fasten off.
Row 4: Use Royal Purple. Star stitch across and finish with htr. (14 stars)
If you are unfamiliar with star stitch, you can check out my star stitch tutorial.
Row 5: Htr, (2htr) in the centre of each star, htr. Fasten off. (30)
Row 6: Use Rain Cloud (grey). Dc across.
Row 7: Tr across.
Row 8: Dc across. Fasten off.
Row 9: Use Lichen (green). Dc, 4tr-bobble, dc. 10 times. Fasten off.
Row 10: Use Rain Cloud (grey). Dc across.
Row 11: Tr across.
Row 12: Dc across. Fasten off.
Repeat rows 4 to 12 two more times.
Top of Bottle
Row 1: Use Royal Purple. Skip 9, 12 dc, turn leaving 9 stitches unworked. (12)
Row 2: (2trtog), 8tr, (2trtog) (10).
Row 3: Dc across. Fasten off.
Row 4: Use Rain Cloud (grey). Dc across.
Row 5: Tr across.
Row 6: Dc across. Fasten off.
Row 7 to 9: Use Lichen (green) to repeat rows 4 to 6.
Row 10 to 12: Rain cloud (grey) to repeat rows 4 to 6. Fasten off.
Flap for Buttons
(only work this on one piece)
Row 1: Use Rain cloud (grey), skip 7, 14 tr, skip 7. (14)
Row 2: 4tr, skip 1, ch 1, 4tr, skip 1, ch 2, 4tr (12 stitches and 2 ch-1-sp)
Row 3: Tr across in each stitch and ch sp. Fasten off. (14)
Assembly
With right sides facing in, use Rain cloud (grey) to slip stitch the sides together, ensuring that you leave the top open and the bottom open enough for you to insert the hot water bottle.
Turn so that right sides are facing out and put a hot water bottle into the cover. Pull the tab around and mark the place for the buttons with stitch markers. Sew the buttons in position.
- Recipes
-
 Potato Leek Soup
-
 M&M Sugar Cookies
-
 Carrot Cake Muffins with Cream Cheese Filling
- Funny Pictures
-
 Just Look At This and It’ll Make Your Day
-
 Witty Parenting Memes for Parents Raising Tiny Little Toddlers
-
 Hilariously Relatable Classical Art Memes That Might Make You Laugh
- Crochet Ideas
-
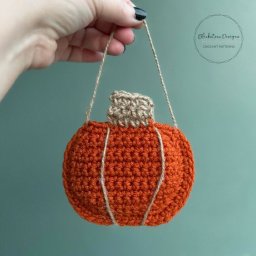 Crochet Pumpkin Treat Pouch
-
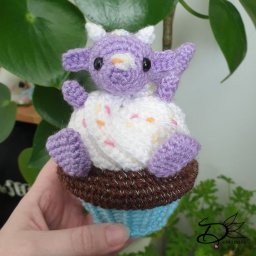 Crochet Cupcake with Dragon
-
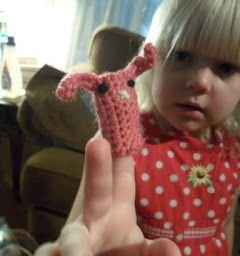 Crochet Bunny Finger Puppet
- Lifehacks
-
 Wild Net Crochet Stitch Photo Tutorial
-
 Open Ridge Crochet Stitch Photo Tutorial
-
 Aligned Four Leaf Clover Crochet Stitch Photo Tutorial
- DIY
-
 Crochet Adorable Poncho
-
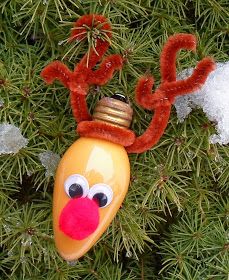 Rudolph Ornament from Light Bulb
-
 Tea Light Turkeys
- Knitting Ideas
-
 Knitted Beautiful Cowl
-
 Knitted Double Ribbed Chunky Throw
-
 Knitted Woodland Infinity Scarf