Crochet Grace Snoodie

Imagine creating your very own Crochet Grace Snoodie, a stylish and cozy accessory that combines the best of a snood and a hoodie. With this project, you can showcase your crochet skills while also staying warm and fashionable. The Crochet Grace Snoodie is perfect for chilly days when you want to add a touch of flair to your outfit.
Amazing Grace Snoodie – Materials:
450 Yards Worsted Weight Yarn -Yarn pictured is Cascade Yarns, Pacific Color Wave color 313
I Hook
Yarn Needle
Gauge:
Double Crochet 2″x 2″ = 6 Double Crochet x 3 Rows.
Stitches: Ch – Chain St – Stitch Sk – Skip Sl St – Slip Stitch Sc- Single Crochet Dc – Double Crochet Rev Sc-Reverse Single Crochet TRC- Triple Crochet
Instructions: Amazing Grace Snoodie… Free Crochet Pattern!!!
COWL
*You will be working in the round.
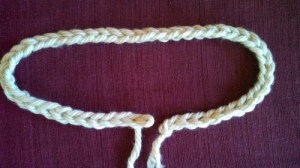
Ch 90, Join to 1st Ch to form Ring… Being very careful not to twist the chain. (See Photo)
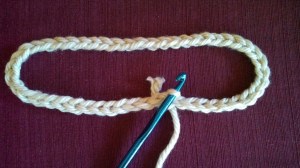
Row 1: Ch 1, Sc in same as joining and each St around, Sl St to 1st Sc to join. = 90 Sc
Row 2: Ch 1, Sc in same as joining St, Ch 2 , Sc again in the joining St, *Sk 2 Sts, (Sc, Ch 2, Sc) all in next St*, Repeat Around, Sl St to 1st Sc to Join. = 30 Ch 2 Spaces
Row 3: Sl St in 1st Ch 2 Space, Ch 3 (counts as Dc now and throughout), 2 Dc in same Ch 2 space, *3 Dc in Next Ch 2 Space(Shell made)* Repeat around. Sl St to top of Ch 3 Sp to join. = 30 Shells
Row 4: Sl St in top of 2nd Dc of Shell(Middle St of Shell) , (Sc, Ch 2, Sc) in same st, * Sk 2, (Sc, Ch2, Sc) in next St* Repeat Around. Join with Sl St to 1st Sc. = 30 Ch 2 Spaces
Rows 5-19: Repeat Rows 3 & 4 – 7 times and then Repeat Row 3 one more time.
Row 20: Ch 1, Sc in same as joining and each St around, Join with Sl St to 1st Sc = 90 Sc.
Row 21: Ch 1 Rev Sc around. Join to being St and finish off.
Cowl Bottom Edging
Join yarn to bottom edge (beginning chain) using Sl St. Ch 1, Sc in same St, Sk 2 Sts, * 5 TRC in Next St(shell made), Sk 2, Sc in next St, Sk 2 Sts* Repeat around, Sl St to 1st Sc. = 15 TRC Shells
HOOD
Ch 84
Row 1: Sc in 2nd St from hook and in each St across. = 83 Sc. Turn
Row 2: Ch 1, Sc in 1st St, Sk 1 St, *(Sc, Ch 2, Sc) in next St, Sk 2 Sts* Repeat Across to the last 2 Sts, Sk St, Sc in last St. Turn = 27 Ch 2 Sps. Turn
Row 3: Ch 3 (counts as Dc now and throughout), * 3 Dc in Ch 2 Sp (Shell Made)* Repeat across, Dc in last St. = 27 Shells and 2 Dc. Turn
Row 4: Ch 1, Sc in 1st St, *Sk 2 Sts, (Sc, Ch2, Sc) in next st (Center of previous row shell)*, Repeat Across, Sc in last St. = 27 Shells and 2 sc. Turn
Rows 5-21: Repeat rows 3 and 4 – 8 times, then repeat row 3 once more.
Row 22: Ch 1, Sc in 1st St and each St across. = 83 Sc
Row 23: Ch 1, Rev Sc across to end. Finish off. This will be the front of the hood.
Finishing off Hood
Fold Hood Strip in half bringing the short ends together (the short ends will be the bottom of the hood that will be sewn to cowl). With yarn needle and matching yarn, Whip stitch back of hood (the beginning chain edge) together starting at the bottom edge working towards the folded edge. This will keep the hood even on both sides.
Attaching the Hood
With yarn and yarn needle: Working along the bottom edge of the hood and the top of the Cowls inside edge (The back loops of the Rev Sc edging of Cowl) sew the hood into place. You will be sewing the hood base to a little more than half of the Cowl. Leaving approximately 3/8 of the Cowl open. Finish off and enjoy!!!

