Crochet Hammerhead Shark


Dive into the world of crochet with this unique and captivating project - the Crochet Hammerhead Shark! This adorable amigurumi creation brings the fascinating ocean creature to life in a whole new way. With its distinctive hammer-shaped head and intricate details, this crochet pattern is sure to impress both beginners and experienced crocheters alike.
Materials
- 2.75mm hook
- Light weight yarn in grey and white (less than 50g of each);
- Black crochet thread for mouth and gills
- 8mm safety eyes;
- Stuffing;
- Tapestry needle.
*Ch 1 and turn at the end of each row*
Tail Fins in grey:
Row 1: Ch 7, sc along (6 sts)
Row 2: Inc, sc 4, inc (8 sts)
Row 3: Inc, sc 6, inc (10 sts)
Now we will start the first fin. You will be crocheting only part way along the previous row before turning.
Row 4: Inc, sc 4 (6 sts)
Row 5: Dec, sc 3, inc (6 sts)
Row 6: Sc 4, dec (5 sts)
Row 7: Dec, sc 2, inc (5 sts)
Row 8: Sc 3, dec (4 sts)
Row 9: Dec, sc, inc (4 sts)
Row 10: Sc 2, dec (3 sts)
Row 11: Dec, inc (3 sts)
Row 12: Sc, dec (2 sts)
Row 13: Dec (1 st)
Tie off. Turn your work so that the completed fin is on the left (as you look at it) as seen in the picture below. Join your yarn and begin working on the remaining stitches from Row 3. Repeat rows 4-13 for second fin.

Body in grey:
Turn your fins so that they are pointing down. You will now join your yarn and begin to work up the body.

Row 1: Sc along (6 sts)
Rows 2-3: Sc along (6 sts)
Row 4: Inc, sc 4, inc (8 sts)
Row 5: Sc along (8 sts)
Row 6: Inc, sc 6, inc (10 sts)
Rows 7-8: Sc along (10 sts)
Row 9: Inc, sc 8, inc (12 sts)
Rows 10-11: Sc along (12 sts)
Row 12: Inc, sc 10, inc (14 sts)
Row 13: Sc along (14 sts)
Row 14: Inc, sc 12, inc (16 sts)
Row 15: Sc along (16 sts)
Row 16: Inc, sc 14, inc (18 sts)
Row 17: Inc, sc 16, inc (20 sts)
Rows 18-26: Sc along (20 sts)
Row 27: Dec, sc 16, dec (18 sts)
Rows 28-29: Sc along (18 sts)
Row 30: Dec, sc 14, dec (16 sts)
Rows 31-32: Sc along (16 sts)
Row 33: Dec, sc 12, dec (14 sts)
Row 34: Sc along (14 sts)
Row 35: Dec, sc 10, dec (12 sts)
Row 36: Sc along (12 sts)
Now we will start the head.
Row 37: Ch 7, sc 6 along the chains, then continue to sc 12 along the previous row (18 sts)
Row 38: Ch 7, sc 6 along the chains, then continue to sc 18 along the previous row (24 sts)
Row 39: Inc, sc 22, inc (26 sts)
Row 40: Inc, sc 24, inc (28 sts)
Rows 41-45: Sc along (28 sts)
Row 46: Hdc 7, sc 2, hdc 2, dc 6, hdc 2, sc 2, hdc 7 (28 sts)
Tie off. Repeat all of the above for the second panel. Put these aside for assembly later.
Belly/Head Patch (make 1 panel) in white:
The head portion of the patch will be slightly smaller than the head portion of the body panel. This is to make it easier to attach later. However, if you’re finding that the head portion of your patch is a lot smaller than the head portion of the body panel and it cannot be stretched into place, you may want to frog back a few rows and loosen up your tension.
Row 1: Ch 2, sc 1 (1 st)
Row 2: Sc along (1 st)
Row 3: Inc (2 sts)
Rows 4-6: Sc along (2 sts)
Row 7: Sc, inc (3 sts)
Row 8: Sc along (3 sts)
Row 9: Sc 2, inc (4 sts)
Rows 10-12: Sc along (4 sts)
Row 13: Sc 3, inc (5 sts)
Row 14: Sc along (5 sts)
Row 15: Inc, sc 4 (6 sts)
Row 16: Sc 5, inc (7 sts)
Row 17: Inc, sc 6 (8 sts)
Row 18: Sc 7, inc (9 sts)
Row 19: Inc, sc 8 (10 sts)
Row 20: Dec, sc 7, inc (10 sts)
Row 21: Sc 8, dec (9 sts)
Row 22: Sc along (9 sts)
Row 23: Sc 7, dec (8 sts)
Row 24: Sc 7, inc (9 sts)
Row 25: Inc, sc 8 (10 sts)
Row 26: Dec, sc 7, inc (10 sts)
Row 27: Inc, sc 7, dec (10 sts)
Row 28: Dec, sc 7, inc (10 sts)
Row 29: Ch 7, sc 6 along chains, continue to sc 10 along previous row (16 sts)
Row 30: Ch 7, sc 6 along chains, continue to sc 16 along previous row (22 sts)
Row 31: Inc, sc 20, inc (24 sts)
Row 32: Inc, sc 22, inc (26 sts)
Rows 33-35: Sc along (26 sts)
Row 36: Hdc 6, sc 2, hdc 2, dc 6, hdc 2, sc 2, hdc 6 (26 sts)
Tie off.
Sc around the inside curve only, as seen in the pictures below. Put aside for assembly later.


Pectoral Fins (make 4 panels in twos as explained below) in grey:
Row 1: Ch 6, sc along (5 sts)
Row 2: Sc along (5 sts)
Row 3: Dec, sc, dec (3 sts)
Rows 4-5: Sc along (3 sts)
Row 6: Dec, sc (2 sts)
Row 7: Sc along (2 sts)
Row 8: Dec (1 st)
Tie off first panel. Do not tie off second panel. Put both panels together, matching up all sides. Chain 1 and sc around the entire piece. (Sc, ch, sc) into the bottom corners of Row 1. Sc 2 into the same stitch at the tip of the fin. Slst to beginning st to close. Tie off and hide yarn tail inside. Repeat for second fin.
Dorsal Fin (make 2 panels) in grey:
Row 1: Ch 11, sc along (10 sts)
Rows 2-3: Sc along (10 sts)
Row 4: Dec, sc 8 (9 sts)
Row 5: Sc 7, dec (8 sts)
Row 6: Dec, sc 6 (7 sts)
Row 7: Sc 5, dec (6 sts)
Row 8: Dec, sc 4 (5 sts)
Row 9: Dec, sc, dec (3 sts)
Row 10: Sc along (3 sts)
Row 11: Sc, dec (2 sts)
Row 12: Sc along (2 sts)
Row 13: Dec (1 st)
Tie off first panel. Do not tie off second panel. Put both panels together, matching up all sides. Chain 1 and sc around the entire piece. (Sc, ch, sc) into the bottom corners of Row 1. Sc 2 into the same stitch at the tip of the fin. Stuff when you’ve crocheted about two-thirds around the piece. Slst to beginning st to close. Tie off and hide yarn tail inside.

Assembly:
Step 1: Belly/Head Patch, Pectoral Fin and Gills
The first step is to appliqué the inside curve of the white belly/head panel to your front body panel. This is the same curve that you single crocheted along earlier. You will not sew down any of the outside edges, as these will be crocheted together later. Just make sure all the edges are lined up before sewing the inside curve.
The second thing you will want to do is sew the first pectoral fin onto the front body panel of your shark. Place it above the natural curve of the belly patch. Tie a knot on the back of the panel to secure.
Stitch three little gills on the front body panel above the belly patch using black crochet thread.
Step 2: Body, Second Pectoral Fin, Dorsal Fin, Eyes and Mouth
Cut off two lengths of grey yarn about 30 cms (12 inches) long. Put them aside for later.
Place the two body panels together, matching up all sides.
**Make sure the front of your Shark is facing you as you crochet around the outside of the piece.**
Starting at the base of the tail, begin attaching the panels together by chaining one and single crocheting around the outside of the panels.
Sc 2 in the tip of each fin. Crochet right around both fins and back to the base of the tail then stop. Pull up a long loop. Stuff the tail fins now.
Continue crocheting around. You will need to switch to white when you reach the belly patch. When switching colours, insert your hook into the last stitch and pull up a loop with Colour A. Yarn over with Colour B and pull through both loops. Continue with Colour B (in this case, white).
**As you crochet along the belly and head, you will be crocheting all three panels together; both body panels and the white belly/head patch**
Stop about half-way across the belly. Now, with your tapestry needle and a length of yarn that you set aside earlier, place the second pectoral fin between the panels and attach it by sewing through three pieces; the top body panel, the fin, and the bottom body panel. You don’t need to sew through the belly patch when attaching the fin.
Now, picking up where you left off, continue single crocheting around the outside of the body. When you get to the fin, simply sc in the stitches of the belly/head patch and the front panel only; since this portion is already sewn shut, you simply need to attach the top two panels together. Once you are past the fin, continue single crocheting all three panels together as normal.
As you crochet around the head, be sure to (Sc, ch, sc) in each of the four corners of the “hammer” sections!
Stop when you’ve crocheted around the head. Pull up a long loop and leave this for now. Now that the head panel is securely in place, you will want to insert your safety eyes and stitch on your mouth using black crochet thread.
Once your eyes and mouth are in place, stuff the head.
Now, with your tapestry needle and a length of yarn that you set aside earlier, place the dorsal fin between the panels and attach the same way you did for the pectoral fin. Tie a knot to secure and hide the yarn tails between the panels.
Finish stuffing your shark.
Continue crocheting around. You will need to switch back to grey yarn where appropriate. Remember, when you reach the dorsal fin, sc in the stitches of the front panel only. Continue to sc both panels together as normal once you are past the dorsal fin.
Close with a slst to first st. Tie off. With your tapestry needle, poke the yarn tail back inside the piece.
That’s it! Now you’ll have a buddy to keep you company while watching Shark Week!
- Recipes
-
 Cilantro Lime Rice
-
 Sweet Potato Soup with Roasted Cauliflower Crumbles
-
 Americano Cocktail
- Funny Pictures
-
 Incredible Animal Pics to Have Some Good Time
-
 Totally Wholesome Doggo Memes
-
 Cute and Adorable Animals for You
- Crochet Ideas
-
 Crochet Crop Top
-
 Crochet Easter Sheep and Duck Egg Bags
-
 Crochet Summer Top
- Lifehacks
-
 How to Crochet the Plaid Stitch Photo Tutorial
-
 How To Crochet The 3-Colored Crosshatch Stitch Tutorial
-
 Flower With Stem Stitch Photo Tutorial
- DIY
-
 Crochet Smiling Flowers
-
 Use Shower Curtain Rings to Make Your Table Prettier
-
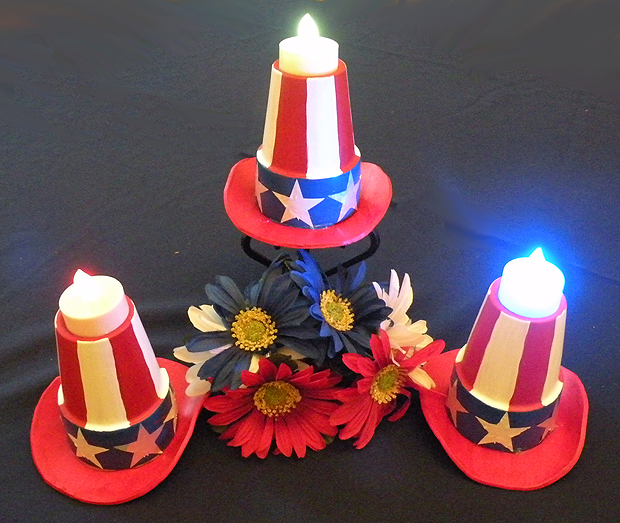 Uncle Sam Hat Candle Holders
- Knitting Ideas
-
 Knitted Tank Top
-
 Knitted Pom-Pom Booties
-
 Knitted Rabbit Dolls