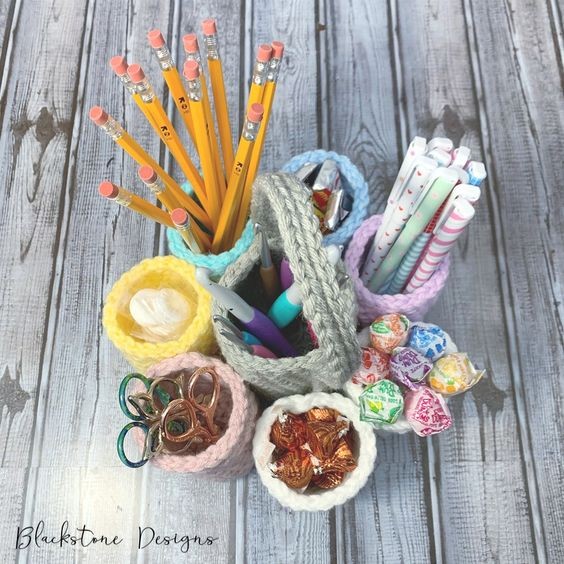
Crochet Organizer Caddy

Looking for the perfect solution to keep your crochet supplies neat and tidy? Say hello to the Crochet Organizer Caddy! This handy dandy tool is a crocheter's dream come true, with compartments and pockets aplenty to store all your hooks, yarn, scissors, and more in one convenient place. No more searching high and low for that elusive crochet hook or unraveling tangled yarn messes.
With the Crochet Organizer Caddy by your side, you'll have everything you need right at your fingertips to unleash your creativity and crochet up a storm. Happy crocheting, friend!Materials
Worsted Weight Yarn (#4)
-Any color [5 oz]
J/10/6.00mm Crochet Hook {I highly suggest Clover Amour Hooks}
Yarn Needle
Scissors
Gauge
Not important for this project
Finished Measurements
8.25″ D x 4.25″ H (after assembly)
Stitch Guide
arnd = around
ch = chain
sc = single crochet
st(s) = stitch(es)
Skill Level
Easy
Written in U.S. Terms
Notes
- This basket is made using double strands.
- Beginning chains do not count as stitches.
- Where asterisks appear, repeat the instructions between them.
- All “outside cups” are the same diameter, but I made 2 shorter for smaller items (such as paper clips).
- These cups can be lined with fabric before attaching them together. You can also insert tin cans or votive jars after attaching them. This would be handy if you needed to use it for items like sewing pins or scissors.
- I used hot glue to attach my cups and handle, but if you’ll be using it for heavy items I suggest sewing them together.
- I used 7 colors, but this project can be made in just one color also.
Instructions
CENTER CUP (Make 1)
R1. Make a magic ring, ch 1, 6 sc in ring (6)
R2. 2 sc arnd (12)
R3. *2 sc, sc* arnd (18)
R4. *2 sc, sc x 2* arnd (24)
R5. *2 sc, sc x 3* arnd (30)
R6. BLO sc arnd; sl st in next st working through both loops (30)
R7. Ch 1, 2 sc in next st (not the same space as the chain-1), *skip 1, 2 sc* arnd, sl st to join in 1st sc (30)
R8-20. Repeat R7
R21. sl st in each st arnd; Fasten. (30)
OUTER CUPS (Make 7)
R1. Make a magic ring, ch 1, 6 sc in ring (6)
R2. 2 sc arnd (12)
R3. *2 sc, sc* arnd (18)
R4. *2 sc, sc x 2* arnd (24)
R5. BLO sc arnd; sl st in next st working through both loops (24)
R6. Ch 1, 2 sc in next st (not the same space as the chain-1), *skip 1, 2 sc* arnd, sl st to join in 1st sc (24)
R7-14. Repeat R6 <<Stop at row 11 for shorter cups>>
R15. sl st in each st arnd; Fasten. (24)
HANDLE
Ch 71, sl st in each st down the side, turn, sl st in each stitch up the other side, sl st to join in 1st sl st; Fasten. (140)
Finishing
- Attach outer cups together in a circle (do not attach the first to last cup yet) — This is easier if you place them around the center cup as you go to make sure you’re attaching them in the right place.
- After all cups are attached, wrap them around the center cup, attach each cup to the center cup, and then attach the first outer cup to the last outer cup.
- Attach the handle to the outside of the center cup, between gaps of outer cups.
- Hide all strings.
