Crochet Potholder Rudolph

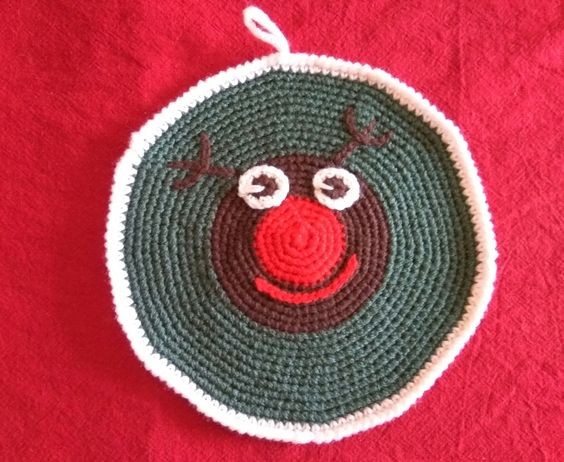
The Crochet Potholder Rudolph pattern is sure to bring a touch of festive charm to your kitchen during the holiday season! With its adorable design featuring Rudolph the Red-Nosed Reindeer, this crocheted potholder is not only practical but also a delightful addition to your home decor. Whether you're whipping up a batch of cookies or serving a piping hot casserole, this little Rudolph potholder will be there to protect your hands from the heat in style.
Get your yarn and crochet hook ready to create this cute and functional kitchen accessory that will surely bring a smile to your face every time you use it.You will need:
- 3.5 mm crochet hook
- Green, red, brown and white yarn recommended for the hook
- Scissors
- Sewing needle
Abbreviations:
- ch – chain
- st – stitch
- sc – single crochet
- reverse sc – reverse single crochet
- inc – 2 sc in one st (used to increase st number)
- X 6 – repeat 6 times
- number of st in every round is indicated in brackets at the end
Tips:
1. Do not crochet in spiral so the shapes of the nose and the head are clear. Make sl st and 1 ch at the end of every round instead.
2. The base of the pattern is that we have to add 6 st at every round. The inc stitches are over each other in the pattern (like that instructions look more understandable), but if you shift them a bit from each other, the round shapes will look more round and less hexagonal.
Instructions:
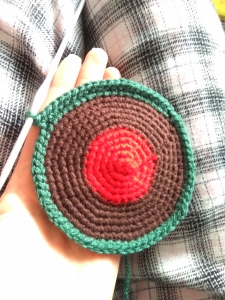
Round 1: Start with the red yarn. 6 sc in magic ring (6 )
Round 2: inc X 6 (12)
Round 3: (sc in next st, inc) X 6 (18)
Round 4: (sc in next 2 st, inc) X 6 (24)
Round 5: (sc in next 3 st, inc) X 6 (30)
Round 6: Change to the brown yarn. (sc in next 4 st, inc) X 6 (36)
Round 7: (sc in next 5 st, inc) X 6 (42)
Round 8: (sc in next 6 st, inc) X 6 (48)
Round 9: (sc in next 7 st, inc) X 6 (54)
Round 10: (sc in next 8 st, inc) X 6 (60)
Round 11: (sc in next 9 st, inc) X 6 (66)
Round 12: Change to the green yarn. (sc in next 10 st, inc) X 6 (72)

Round 13: (sc in next 11 st, inc) X 6 (78)
Round 14: (sc in next 12 st, inc) X 6 (84)
Round 15: (sc in next 13 st, inc) X 6 (90)
Round 16: (sc in next 14 st, inc) X 6 (96)
Round 17: (sc in next 15 st, inc) X 6 (102)
Round 18: (sc in next 16 st, inc) X 6 (108)
Round 19: (sc in next 17 st, inc) X 6 (114)
Round 20: (sc in next 18 st, inc) X 6 (120)
Round 21: (sc in next 19 st, inc) X 6 (126)
Round 22: Change to the white yarn. (sc in next 20 st, inc) X 6 (132)
Round 23: Make a hanging loop: 20 ch, (reverse sc in next 21 st, reverse inc) X 6 (138)
Fasten off, cut the yarn and weave in the ends.
Eyes:
Round 1: Start with the brown yarn. 6 sc in magic ring, sl st (6 )
Round 2: Change to the white yarn. 1 ch, inc X 6, sc through the center, sl st (12)
Fasten off, cut the yarn leaving tails for sewing (unfortunately, I forgot to do that :).
Sew the eyes to the head. Embroider the mouth (between Rounds 7 and 8, 15 st long) and the horns, be creative
The potholder is finished!
