Elevate Your Style with the Handmade Crochet Ballroom Purse: A Step-by-Step Guide
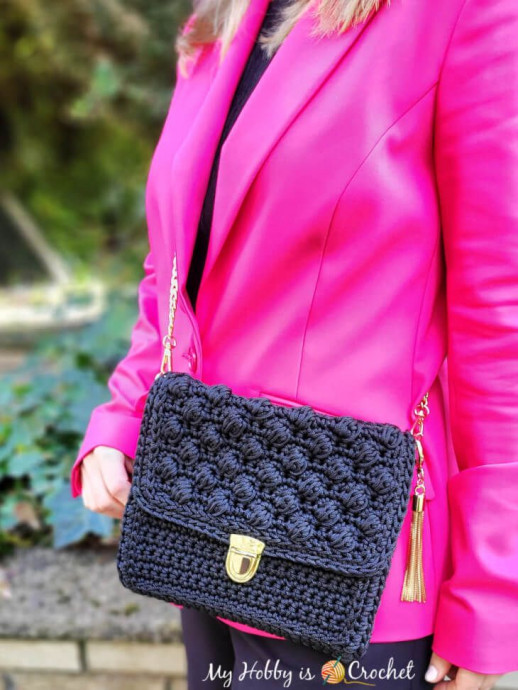
Looking for a stylish accessory that adds a touch of elegance to your outfit? The Crochet Ballroom Purse / Clutch Bag is a perfect choice! This versatile accessory is not only beautifully handcrafted but also functional, providing ample space for your essentials while complementing your fashion statement.
With its intricate crochet design and charming look, this purse is bound to turn heads and elevate your ensemble for any occasion. So, why not treat yourself to this delightful accessory and add a touch of sophistication to your wardrobe?BAG FINISHED SIZE
9.5” x 2.5” x 8.5” inches (L x W x H) or
24cm x 5.5cm x 23cm (L x W x H)
CROCHET GAUGE
11 sc and 7 rows in single crochet = 4 inches x 4 inches (10 cm x 10 cm)
BAG CONSTRUCTION
The bag is worked from 3 pieces:
- 1 large rectangle that will be folded over to form the flap and the bag body;
- 2 side pieces.
SUPPLIES
- YARN: 2 skeins of Light Viscose Ice Rope. (From the 2nd skein you will need just a small amount, cca 35 g!)
- This is a really beautiful, shiny, and sturdy rope yarn that is perfect for bags, summer hats, and home accessories.
- Material: 100% Nylon
- Color used here: 16 (Black)
- Skein Weight: About 230g (±15g)
- Length: About 200m (±10m)
- Diameter: About 3mm
- Product Care Instructions: Machine wash cold or gentle hand wash
- 5 mm crochet hook
- Yarn Needle
- Scissors
- Measuring tape
- 39.4" (100 cm) Gold Metal Flat Chain Strap for DIY bags (or replacement purse strap)
- 2 PCS O-Ring Carabiner Snap Trigger Buckle Hooks, 35 mm/1.38”
- Tuck Lock, Metal Clasp Lock: Size: 1.65*1.18in/4.2*3cm
- Optional: gold metal charm/pendant.
STITCHES, TERMS (US) AND ABBREVIATIONS
- ch: chain
- sc: single crochet
- hdc: half double crochet
- yo: yarn over
- hdc4tog: half double crochet four together cluster:
- (yo, insert hook into indicated st, pull yarn through) x4 times; you have 9 loops on the hook; yo and pull through all 9 loops on the hook to complete the cluster
- slst: slip stitch
- * to *: repeat the sequence of stitches between the stars
- beg: beginning
- RS: right side of work
- WS: wrong side of work
Invisible Finish Off: after working the last st of the last round, do not join into round with slst, instead cut yarn leaving a few inches tail; thread yarn needle with the yarn tail, insert the needle from back to front under both tops loops of the 1st st at beg of round, pull through the stitch, then insert needle between the front and last loop of the last st and pull yarn though. Weave the yarn end in.
BAG INSTRUCTIONS
The Large Rectangle = The Flap + Bag Body
The large rectangle will be started with the ball stitch pattern that will be used for the flap part, then you will continue to crochet the body of the bag using single crochet stitches only.
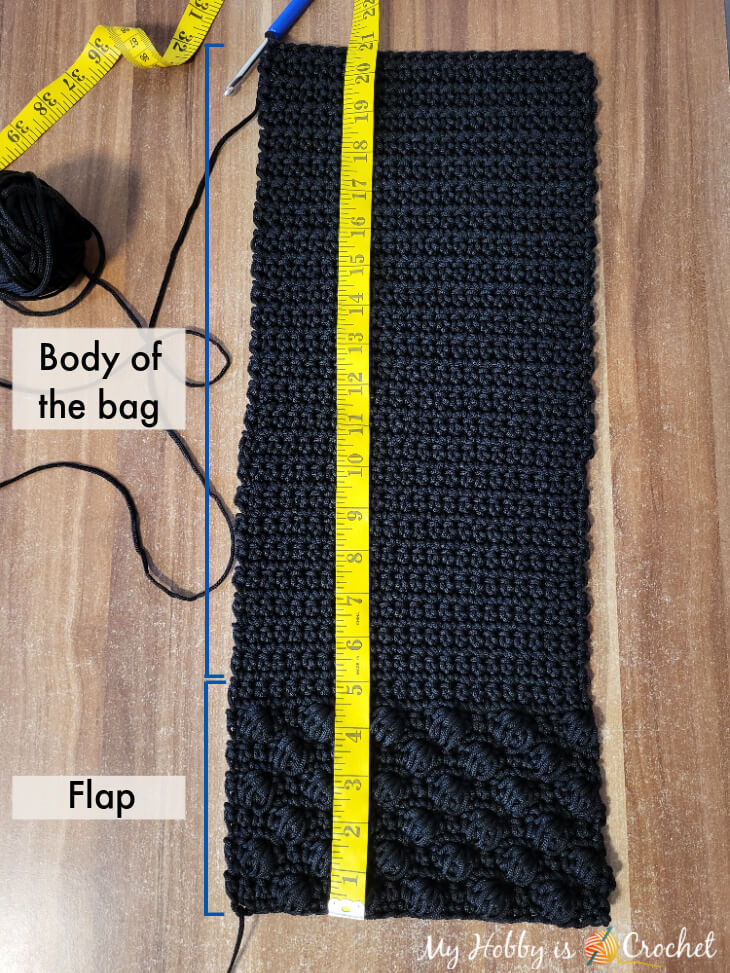
With hook size 5mm, chain 24.
(Note: Working the stitches of the first row into back bumps of chains will create a pretty edge.)
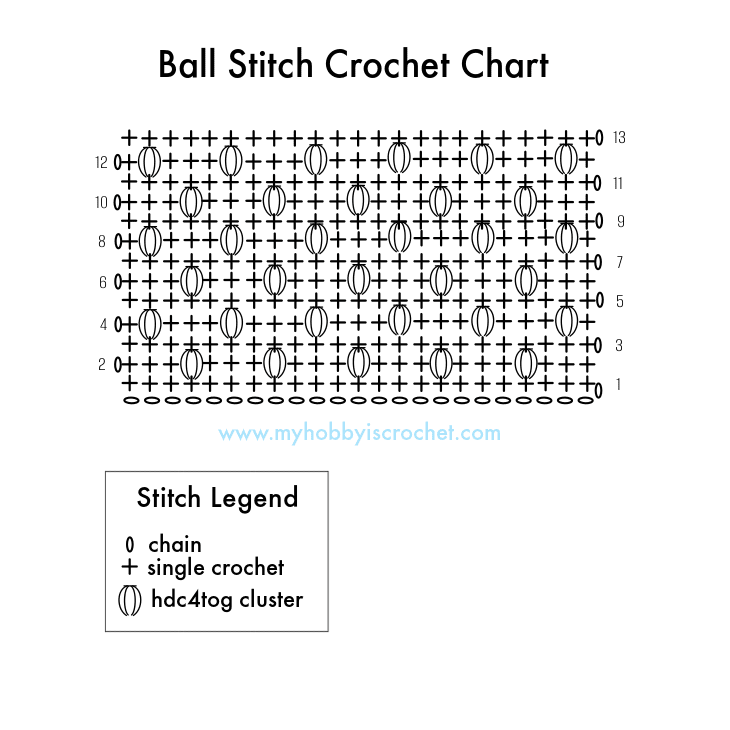
(You’ll have 5 clusters between 6 groups of 3 sc sts = 23 sts total)
Note: the clusters are worked on the wrong side, but they will pop to the right side of the work!
(In other words, you will work 1 sc in each st across!)
(You’ll have 6 clusters + 17 sc = 23 sts total)
The flap part is now finished. You will have 6 cluster rows and the last row (row 13) with sc only.
Below is the crochet chart of the flap part made with the ball stitch crochet pattern:
At the end of the last row (worked on the RS) ch1 and do not cut yarn!
Continue working a sc edging, as written below!
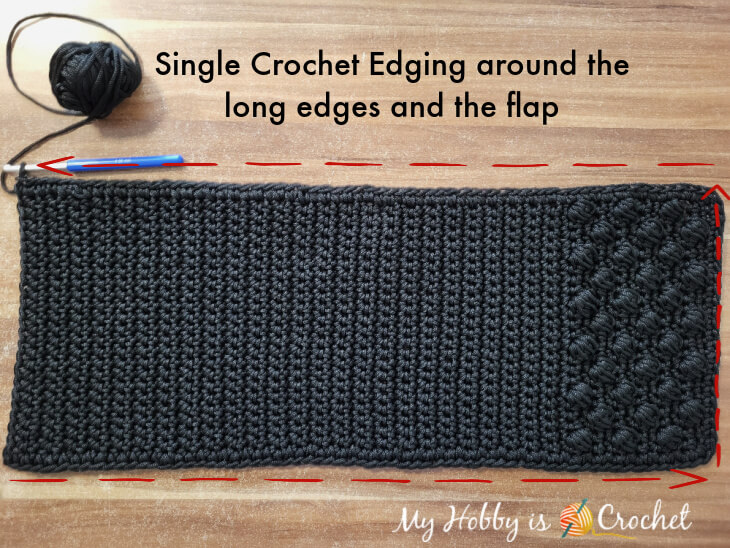
Edging Around the Long Edges and the Flap
Cut yarn leaving a long tail that will be later used to sew one side piece. Fasten off.
SIDE PIECE(S) (make two):
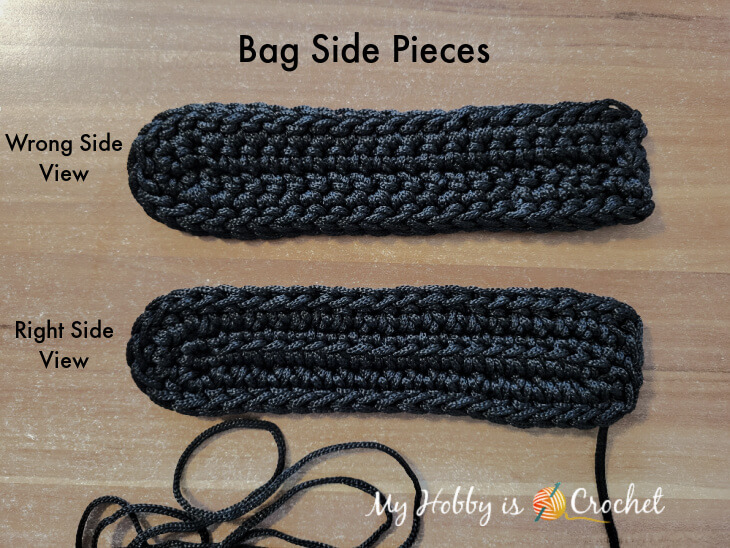
Chain 21.
(42 sts total)
Cut yarn leaving a long tail and fasten off invisibly.
ASSEMBLING THE BAG
Place the large rectangular piece with the right side facing the table, having the bag flap (with the ball stitch part) at the top.
Fold up the bottom part so that the bottom edge will be placed right under the last row of the bag flap as pictured below.
Now the right side of the bag body (and the wrong side of the flap) is facing you.
Place the side pieces with the rounded edge at the bottom!!
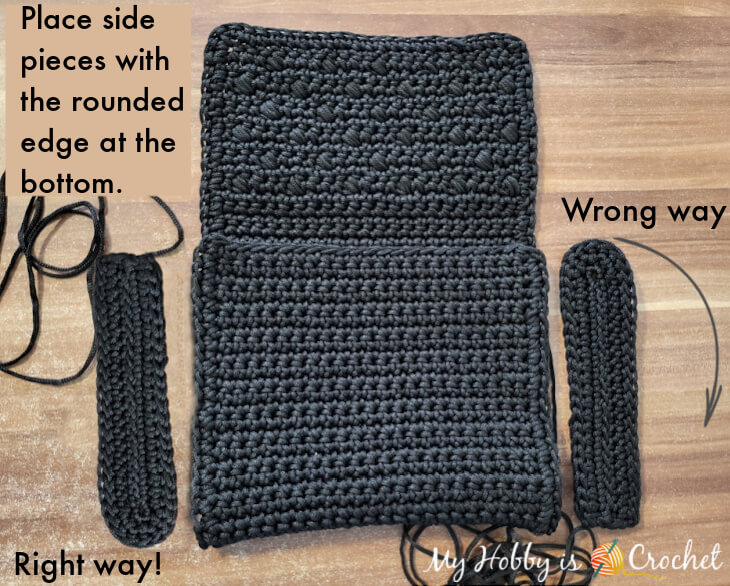
Take one side piece with the right side facing you and having the rounded edge at the bottom. Align the edge stitches of the bag body with the edge stitches of the side piece.
The bottom of the bag body will curve along the rounded edge of the side piece.
Thread a yarn needle with the yarn tail, sew the edges together inserting the needle through the back loops of the edge closer to you and the front loops of edge further from you. Do not cut yarn yet!
Sew the second side piece in the same way.
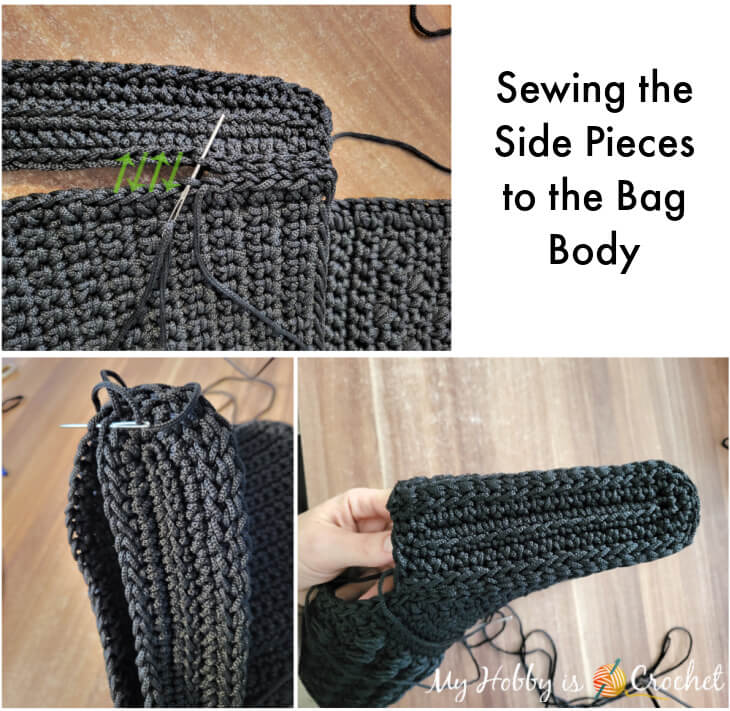
SHAPING THE SIDES
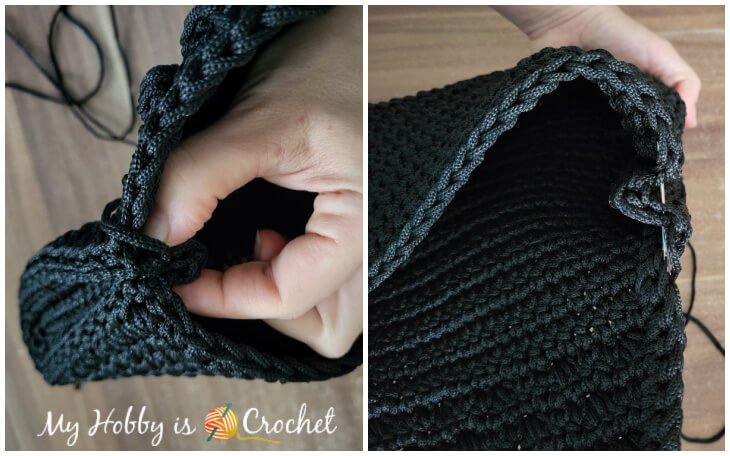
Pinch the top of a side inwards as seen in the picture above and sew across a few times to secure. Make the same for the second side.
After shaping the sides, I have decided to work one round of slip stitches around the top front body part, sides, and flap. This will give a nice finished look and will make the edges more firm.
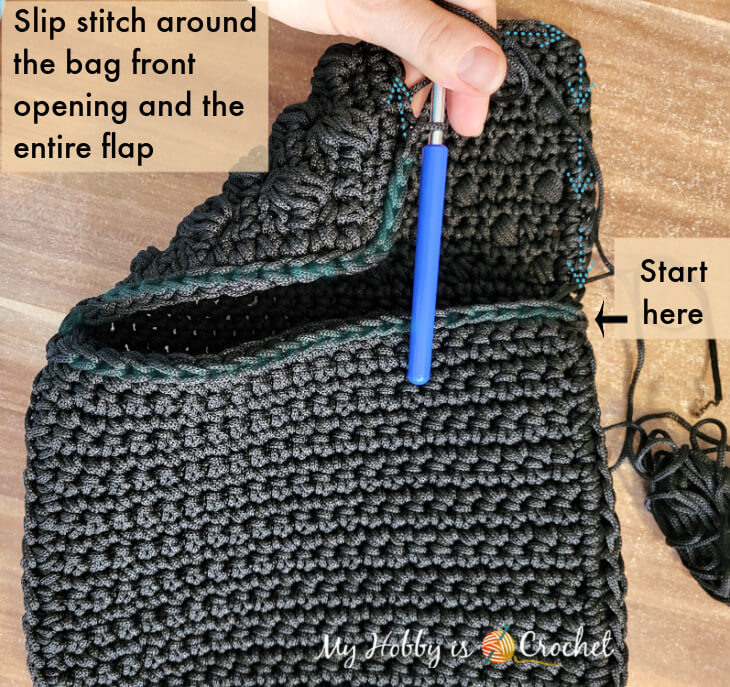
For this, hold the bag with the flap open and join yarn with slst to the first st on the edge of the bag body (to your right). Slip stitch across the front edge of the bag body, 1 slip stitch into the pinched side, then work 1 slst in each st around the flap, 1 slip stitch into the 2nd pinched side. Cut yarn and fasten off invisibly.
Embellishing the Flap with Surface Crochet
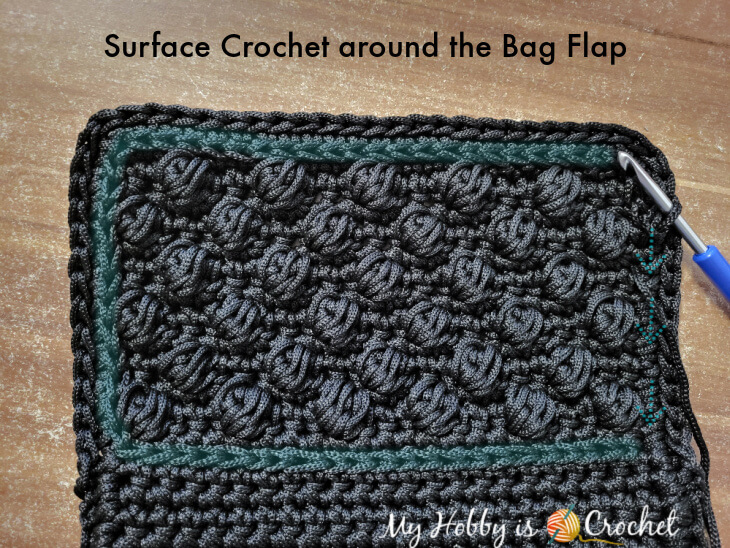
With the back side of the bag facing you and having the flap open, join yarn with slip stitch into the sc row below the first cluster (ball stitch) at the right corner. Surface crochet across (the top of the flap) and around the flap as highlighted in the picture. At the end of the round, fasten off invisibly.
Optional, work surface crochet around the front piece of the bag body.
Weave in all yarn tails. I have burned the yarn ends with a lighter to prevent the polyester strand from fraying, then quickly, while still hot, pressed it down with the help of the metal part of the scissors. (Do not touch it with your fingers please! It's hot!)
Adding the Tuck Lock
- First attach the top part of the tuck lock to the flap. For this, find the middle of the bag flap; push the edge of the flap through the gap in the tuck lock, and press hard to lock it in place.
- The bottom part of the lock will be attached to the bag body; align it with the top part and push the prongs down. Once the prongs are inserted, flatten them down.
Now the bag closure is all done!
Attaching the Snap O-Rings, Chain Strap, and Pendant
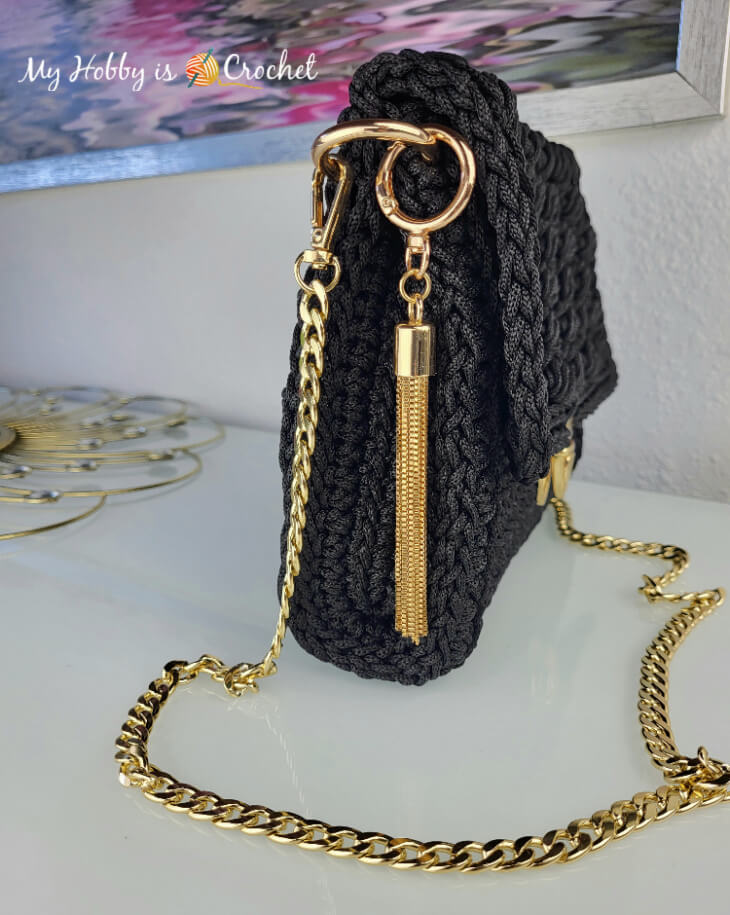
Insert one snap O-ring through the pinched side, going through all thickness of the dent created. Make the same on the other side.
Insert the metal buckles of the chain strap through the o-ring snaps.
Insert the o-ring of the pendant through one o-ring on bag side.
