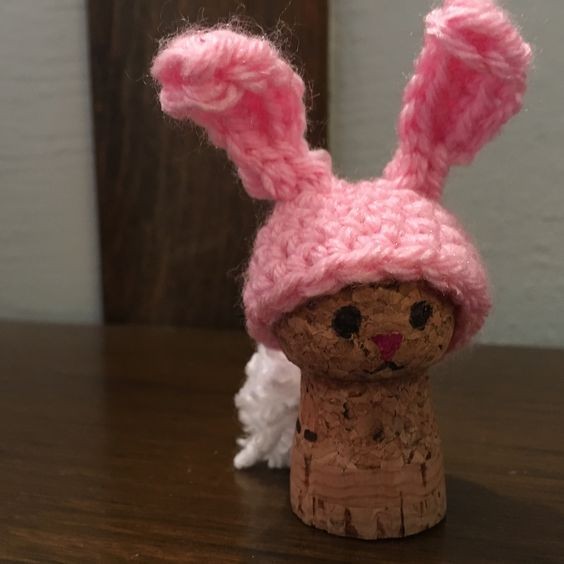
Crochet Bunny Rabbit Cork Ornaments

If you're looking for a delightful DIY project, consider making Crochet Bunny Rabbit Cork Ornaments! These charming ornaments combine the cozy art of crochet with the whimsical flair of bunny rabbits, adding a touch of handmade charm to your home decor or Easter celebrations. By repurposing wine corks and using simple crochet techniques, you can create adorable little bunnies that are perfect for hanging on a tree, decorating gifts, or even as cute little table accents.
Get creative with different yarn colors and embellishments to personalize each bunny and make them truly unique. With a few basic crochet stitches and some recycled materials, you'll have a fun and eco-friendly craft that will bring smiles to all who see them.Materials
Worsted Weight Yarn
I love this yarn – Pink
I love this yarn – White
Champagne Cork
Screw eyes
Ribbon
Black Sharpie
Pink Sharpie
1 inch pompom maker or a fork
Epoxy 6000
Gauge: is not important for this project
Abbreviations
SC – Single Crochet
CH- Chain
FO – Fasten Off
SL ST – Slip Stitch
INC – Make two Single Crochet in Same Stitch
DEC – Single Crochet two stitches together
BLOs – Back Loops Only
FLOs – Front loops only
Note: Hats are worked in the round. Use a stitch marker or a scrap piece of yarn to mark the beginning of each row. Then you don’t have to count every row. Do not join unless instructed to.
Parentheses indicate a repeat. Repeat the stitches in the parentheses for the number of times indicated.
The bracketed number [] is the number of stitches at the end of each row.
I spread my increases out so there isn’t a seam on the finished piece. If you do not like this method, you can do regular increases.
TAIL
Wrap a 1” pompom maker with white yarn to make a full pompom. Glue to the back of cork.
HAT
In Pink
Ch 2
Round 1: 6 SC in 2nd Ch from hook [6]
Round 2: (INC) 6 times [12].
Round 3: (INC, SC) 6 times [18].
Rounds 4-6: 3 rows SC [18 stitch per row].
Fasten off.
EARS (make 2)
In Pink, Chain 8
Slip Stitch in 2nd Chain from hook, SL, 4 SC, 3 HDC in last stitch, working in the unused stitches from the first stitches, 4 SC, 2 SL. Fasten off. Leave a long tail for sewing. Attach to hat.
Attach screw eye to top of cork.
Cut 6 inch section of ribbon. Thread ribbon through the screw eye and tie to hold it in place. Place the hat over the cork, pulling the ribbon through the hat. Here you can glue the hat in place to keep it from slipping.
Using the Pink Sharpie draw a small triangle for the nose.
Using the Black Sharpie draw two circles for eyes and a small mouth.
You can make them in any color.
