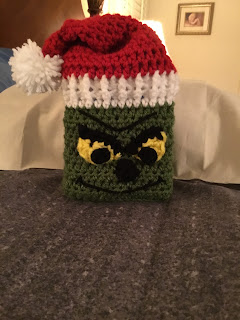
Crochet Mr. Grinch Tissue Box Cover
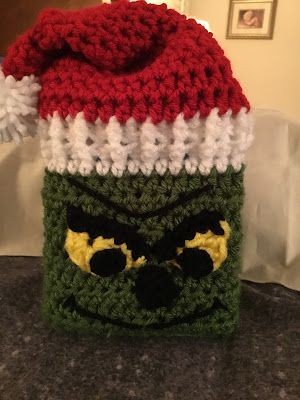
If you're looking to add a touch of whimsy and charm to your home decor, the Crochet Mr. Grinch Tissue Box Cover is a delightful choice! This adorable accessory combines the holiday spirit with functional practicality, making it a fun addition to any room. The intricate crochet work brings the Grinch character to life, perfect for adding a festive twist to your tissue boxes.
Not only does it serve as a unique conversation starter but it also brings smiles and joy to those who see it. So go ahead, crochet your own Mr. Grinch Tissue Box Cover and let this playful design bring a cheerful atmosphere to your space!Materials:
FPHDC: front post half double crochet
BPHDC: back post half double crochet
Special Note: I made my Grinch a little slouchy. I did not want mine tight-fitting around the tissue box cover. So, please be aware of this. Now, you can reduce 1-2 rows of green and 1 row of white.
Directions:
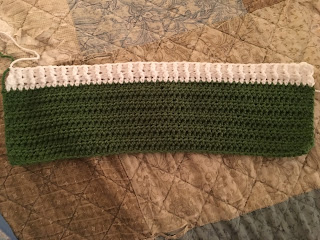
12. With white yarn, HDC in each st across. Ch1 and turn. (55)
13-14. FPHDC around first post, BPHDC around next post. Rep across. Ch1 and turn. At the end of Row 14, FO and leave a long enough tail for whipstitching the white ends together. (55)
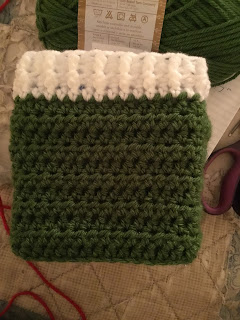
Before starting the body of the hat, go ahead and whipstitch the ends together. With right sides facing, whipstitch together and weave ends. Then turn, right side out.
Top/Hat:
1. Join red tarn in any stitch and Ch1. HDC in same st and around. Sl St join to first st and Ch1. (55)
2-3. 1 HDC in each st around. Sl St join to first st and Ch1. (55)
4. *HDC2tog, HDC in the next 8 st.* Rep from * to * 4 more times. Into the last 5 st, 1 HDC in each one. Sl St join to first st and Ch1. (50).
5. *HDC2tog, HDC in the next 3 st.* Rep from * to * around. Sl St join to first st and Ch1. (40)
6. *HDC2tog, HDC in the next 2 st.* Rep from * to * around. Sl St join to first st and Ch1. (30)
7. HDC in the next 20 st. Sk over the last 10 (this is going to create the opening for the tissues) and Sl St join to first st. Ch1. (20)
8. HDC in each st around. Sl at join to first st and Ch1. (20)
9-12. Rep #8.
13. HDC2tog 10x. Sl St join to first st and Ch1. (10)
14-15. HDC in each st around. Sl St join to first st and Ch1. (10)
16. HDC2tog 5x. Sl St join to first st and Ch1. (5)
17. HDC around. Sl St join to first st and FO. Leave tail to close up opening. Weave ends. (5)
Pompom:
1. With white yarn, I wrapped around 4 of my fingers 50 times. Tied knot in center; trimmed with scissors and attached to the end.
Nose:
1. With black yarn 6 sc into MR. Sl St join to first st and FO. Leave a long enough tail to attach. (6)
Eyes:
Outer (make 2):
1. With yellow, make a MR and Ch1. Into ring, 2 SC, 2 HDC, 2 DC and 2 TC. Pull tail to tighten center but do not join. In last st, join black yarn and Ch1. Leave a long enough yellow tail for joining. (8)
2. With black yarn, you will work across the bottom. 3 SC into the side of the last TC st, 1 SC st into the center and 2 SC st into the first SC st. FO and leave a long enough black tail for attaching. (6)
Inner (make 2):
1. With black yarn, 4 sc into MR. Sl St join to first st and FO. Leave a long enough tail to attach inner to outer ear. (4)
Eyebrows and Mouth:
1. Use black yarn and embroider.
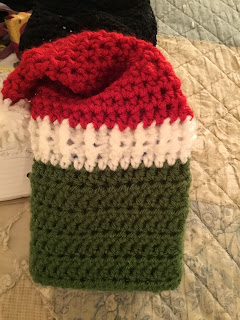
Before facial features...
Assembly:
1. Attach inner eye to outer eye. Then attach to cover.
2. Attach nose.
3. Embroider mouth and eyebrows.
4. Make sure the tissue opening is in the back and the hat hangs over the side or toward the front.
That’s it for Mr. Grinch. Quick and easy project.
