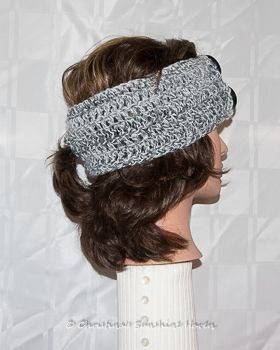
How to Make a Crochet Easy Ponytail Headband

Looking to add a touch of charm to your hairstyle? Consider making a crochet easy ponytail headband! This delightful accessory is not only stylish but practical, keeping your hair in place while looking cute. With its simple design, it's a great choice for beginners in the world of crochet. You can play around with different colors and yarn textures to match your personal style. Whether you're running errands or heading to a cozy brunch with friends, this ponytail headband is sure to become a staple in your accessories collection. So grab your crochet hook, pick out your favorite yarn, and let's get crafting!
Materials Required
| Materials Used | 4 ply worsted weight yarn (Note: the gray yarn was slightly thinner yarn, so the same amount was used but it resulted in a smaller size) |
| Hook Size | H |
| Measurements | Varies depending on yarn used |
| Notes | This project can include buttons if desired, but buttons are not necessary. You could sew it together instead. Note that the mannequin's head is slightly smaller than a human head, and it does not have long hair. The camo version has been tested and works great. This pattern is intended for adult/teen sizes. If you want to adjust it for a child size, consider using a G hook. |
Step-by-Step Instructions
Row 1: Ch 63, dc in 4th ch from hk, dc in each st across, ch 3 turn.
Row 2: Dc in BLO in each st across, ch 3 turn.
Row 3: Rep Row 2.
Row 4: Dc in BLO across 28 sts, skip 5 sts and ch 5, dc in the 5th skip st, finish dc in the rest of the sts BLO, ch 3 turn.
Row 5: Dc in BLO in each st across, including the ch 5 sts, ch 3 turn.
Row 6: Rep Row 2, except ch 1 turn at the end of the row.
Row 7: Sc in each st across, leave a 9” tail and fasten off. The tail is for sewing the buttons on. It’s estimated at 9”. Use 2 buttons on one and 3 buttons on another. Alternatively, you could sew it together without buttons and add a flower.
Finishing Touches
The hole (skipped sts) should be positioned in the back for your ponytail.
