Crochet Baby Hat

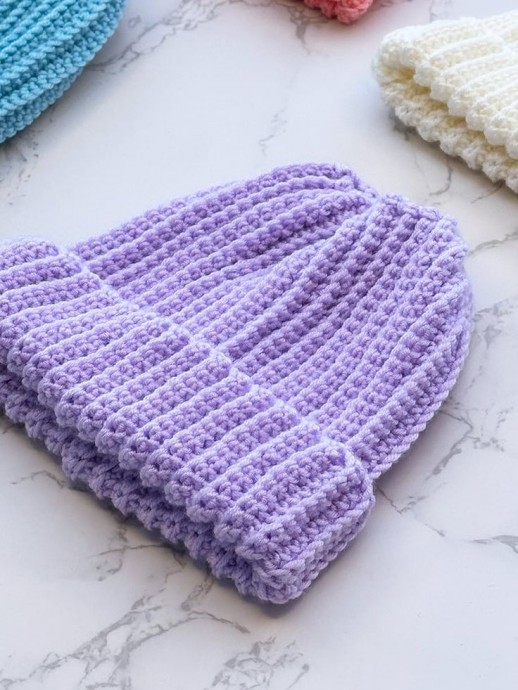
Create a charming handmade baby beanie using the art of crocheting. Craft a cozy and adorable hat for your little one with soft yarn in a variety of colors. Crocheting allows you to customize the size and style of the hat, making it a unique and thoughtful gift for a baby shower or new arrival. You can add embellishments like pom-poms, bows, or buttons to personalize the hat even further.
Crochet baby hats are not only practical for keeping your baby warm, but they also serve as a stylish accessory for any outfit. Whether you are a beginner or an experienced crocheter, there are endless patterns and tutorials available to help you create the perfect hat for your little one. You can experiment with different stitches and techniques to achieve a variety of textures and designs. Crocheting a baby hat is a relaxing and enjoyable way to spend your time, and the end result is a precious and handmade item that will be cherished for years to come.Skill Level – Basic
Size Information
- This pattern is to fit baby size 0-3 months / 3-6 months / 6-9 months.
- The first set of numbers applies to the small size, the second set to the medium size, and the third to the large size.
- (Newborn Size) 0-3 months = Height = 5 inches / Width seamed = 6 inches
- 3-6 months = Height = 6 inches / Width seamed = 6.5 inches
- 6-9 months = Height = 6.5 inches/ Width seamed = 7 inches
Gauge – 12 sts and 22 rows in 4×4 inches / 10x10cm in pattern.
The supplies you need…
Yarn
- 1 x DK Baby Yarn 100g/250 m/273 yds.
- DK/Light Worsted/8-Ply yarn (medium weight yarn)
- Yarn Suggestion: You could use cotton yarn, Lion Brand Mandala Baby, Lion Brand Babysoft, Debbie Bliss Baby Cashmerino, self-striping yarn or any other yarn that you find to be suitable.
Hook Size
4 mm (US G-6) crochet hook.
Notions
- Scissors
- Darning needle/tapestry needle
- Tape measure
Crochet Abbreviations
This pattern is written using US terms and abbreviations.
- BLO – Back loop only
- CH – Chain
- Cont – Continue
- SC – Single crochet
- Sc2tog – Single crochet decrease (single crochet two stitches together. Insert hook into stitch and draw up a loop. Insert hook into next stitch and draw up a loop. Yarn over, draw through all 3 loops on hook.)
- Rem – Remaining
- Rep – Repeat
- St(s) – Stitches
- SL-ST – slip stitch
Free Crochet Baby Hat Pattern
Work The Main Body Of The Hat
To begin, make a slipknot and create a chain (CH) leaving a long tail.
This chain is the foundation row of your project, which you will build on.
With your hook and yarn, you will chain 36 (44, 52).
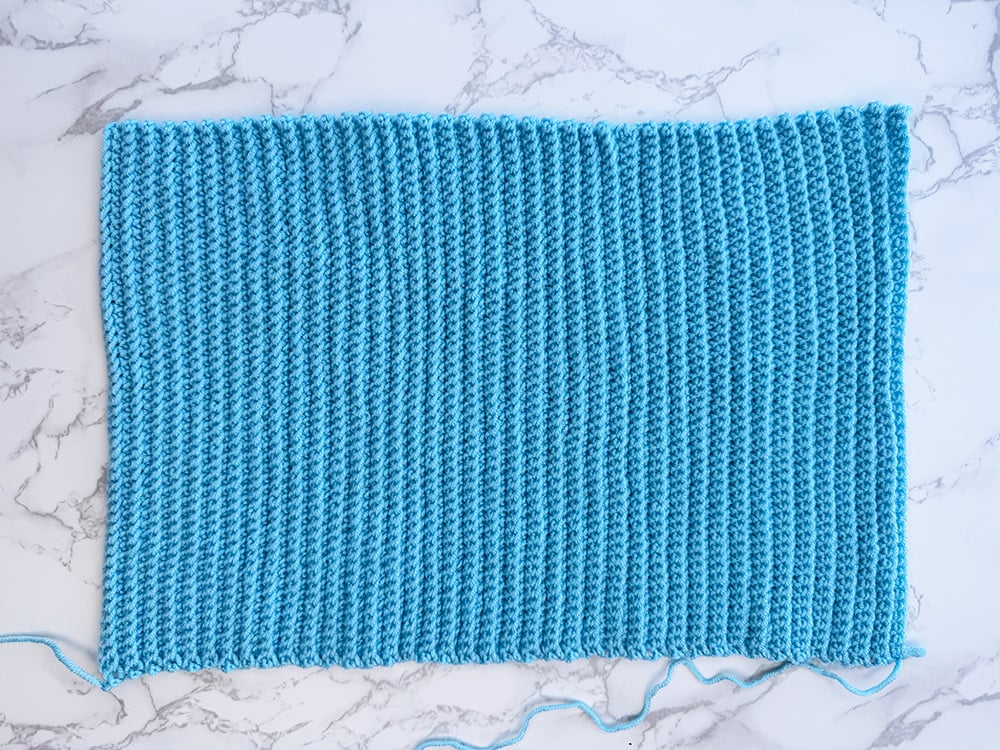
Row 1: For the first row, you will work 1 single crochet (SC) into the 2nd chain (CH) from the hook and in each chain (CH) to the end of the row and turn the work ready for row 2.
Row 2: Chain (CH) 1 stitch, then create 1 single crochet (SC) in each stitch (st) through the back loop (BLO), repeat this to the end of the row, and turn the work.
Repeat: Repeat row 2 until the work measures = 13 inches (14 inches, 15 inches) in width.
*Do not cut the yarn, as you will use it to continue the next section.

The Top Of The Hat
Youwill now add a few sc decrease (sc2tog) rows to the top to shape the hat and avoid forming a bulky gathered crown.
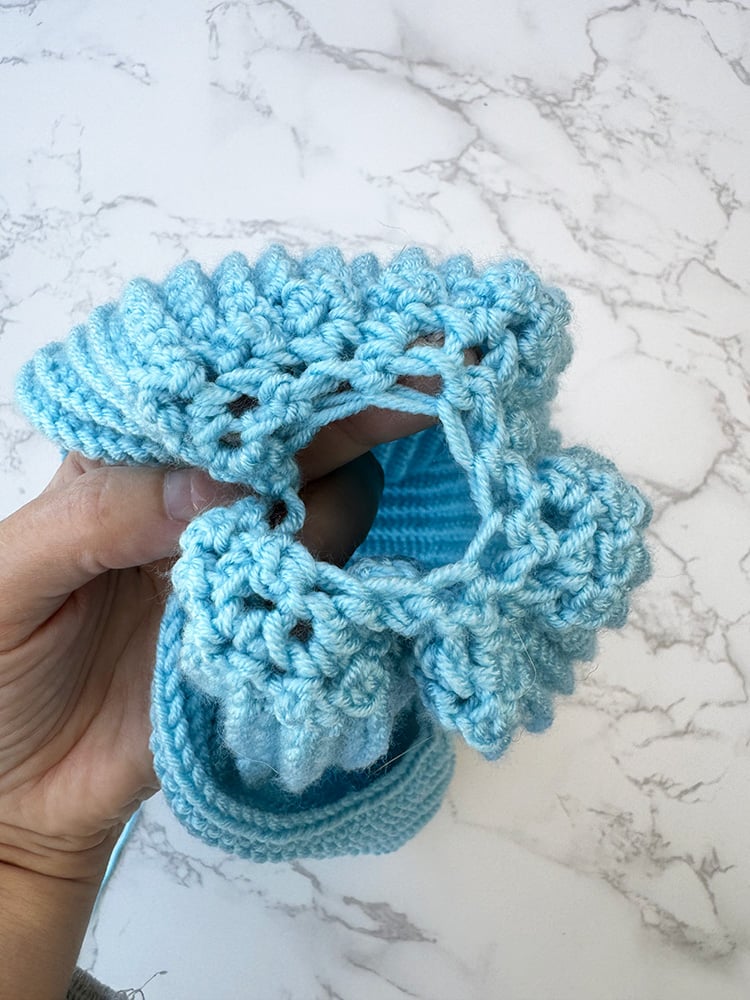
Row 1: Ch 1, work sc2tog across the width edge of the hat, sl-st to the first sc, and turn.
Repeat row 1 – once more for all sizes.
Once you have finished your rows of decreases – sl-st into the final st and leave a long yarn tail for seaming.

Making Up
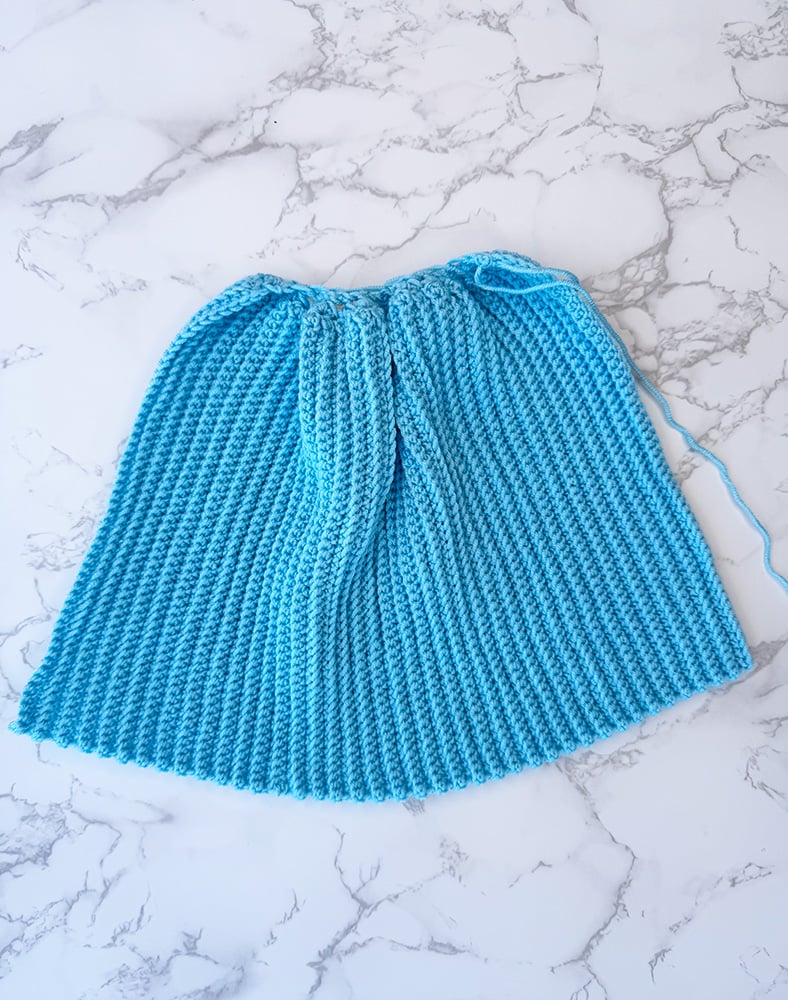
Thread the yarn tail through your yarn needle and weave in and out of the last row of sc2tog. Pull up tight to close the top of the hat.
Next, start seaming using the mattress stitch to create an invisible seam.
Stop when you have 1.5 inches (2 inches, 2 inches) left and turn the brim upwards, then seam the brim the same way with the right sides facing you.
Secure and weave in all loose ends.

Turn Up The Brim
Turn up the brim and the hat is ready to wear!
