Crochet Sun & Moon Granny Square Mini Pouch


The Crochet Sun & Moon Granny Square Mini Pouch is absolutely adorable! This tiny creation is the perfect accessory to brighten up your day. The intricate details of the sun and moon design really make it stand out. It's great for storing small trinkets or even as a keychain to add a touch of charm to your everyday essentials.
Materials Needed:
- 100% cotton yarn
- 2.5 mm crochet hook
- Scissors
- Needle for weaving in ends
Steps:
Step 1: Create the Magic Circle
Take your yarn and create a magic circle.
Chain 1.
Step 2: Round 1 – Double Crochets
Work 18 double crochets into the magic circle.
Tighten the magic circle by pulling the loose end.
Slip stitch into the second double crochet (skipping the first single crochet and chain one).

Step 3: Round 2 – Attach Second Color
Attach the second color of yarn.
Single crochet into the same stitch where you made the slip stitch.
Into the next stitch, work 2 half double crochets.
Into the next stitch, work 3 double crochets.
Into the next stitch, work 3 extended double crochets: Yarn over, insert into the stitch, pull through one loop, then yarn over, pull through two loops, yarn over, pull through two loops.
Into the next stitch, work 3 treble crochets: Yarn over twice, insert into the stitch, pull through, yarn over, pull through two loops, yarn over, pull through two loops, yarn over, pull through two loops.
Repeat the pattern from the treble crochets but in reverse: Into the next stitch, work 3 treble crochets, into the next stitch, work 3 extended double crochets, into the next stitch, work 3 double crochets, into the next stitch, work 2 half double crochets, and into the last stitch, work 1 single crochet.
Cut the yarn if you want to change the color, secure the stitch.

Step 4: Round 3 – Return to the First Color
Attach the first color of yarn.
Single crochet in each stitch around for a total of 24 single crochets.
Slip stitch into the first single crochet to join the round.
Step 5: Round 4 – Clusters and Chain Spaces
Chain 1 and work into the same stitch.
Work 2 double crochets into the next stitch and create a cluster: Yarn over, pull through two loops, yarn over, go to the next stitch, and pull through all three loops.
Chain 2.
Continue this pattern around, creating clusters with two double crochets and chaining two between clusters.
Join with a slip stitch.

Step 6: Round 5 – Creating the Border
Slip stitch into the next chain space.
Work 3 single crochets into each chain space around.
Join with a slip stitch.
Step 7: Rounds 6 – Creating the Sides
Chain 1, work 1 extended double crochet in the same stitch.
Continue with 1 double crochet in the next, and 7 half double crochets in the next 7 stitches.
Work 1 double crochet in the next stitch, 1 extended double crochet in the next, and create the corner with 1 treble crochet, chain 1, 1 treble crochet in the same stitch.
Repeat this pattern for the next three sides.
Slip stitch to join and finish off.
Step 8: Attaching Two Parts
With your third color, attach yarn in the corner and slip stitch around.
Work 1 slip stitch and chain 1 in each stitch along the edge, 3 slip stitches and chain 1 in each corner.
On the front side, create a loop with chain five on the seventh stitch and chain 40 on the back side grid.

Step 9: Finishing
Secure all ends, weave them in.
Assemble your pouch.
Your small pouch is complete and ready for use! Feel free to close it by pulling through the loop and chain created in the last steps. Happy crocheting!
No comments
Write a comment
- Recipes
-
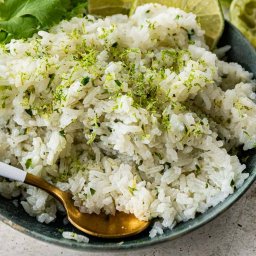 Cilantro Lime Rice
-
 Sweet Potato Soup with Roasted Cauliflower Crumbles
-
 Americano Cocktail
- Funny Pictures
-
 Funny Pics of the Day
-
 Funny Pics for Your Scrolling
-
 Some Pics to See When You’re Bored
- Crochet Ideas
-
 Crochet Crop Top
-
 Crochet Easter Sheep and Duck Egg Bags
-
 Crochet Summer Top
- Lifehacks
-
 How to Crochet the Plaid Stitch Photo Tutorial
-
 How To Crochet The 3-Colored Crosshatch Stitch Tutorial
-
 Flower With Stem Stitch Photo Tutorial
- DIY
-
 DIY Seashell Hair Pins
-
 Crochet Smiling Flowers
-
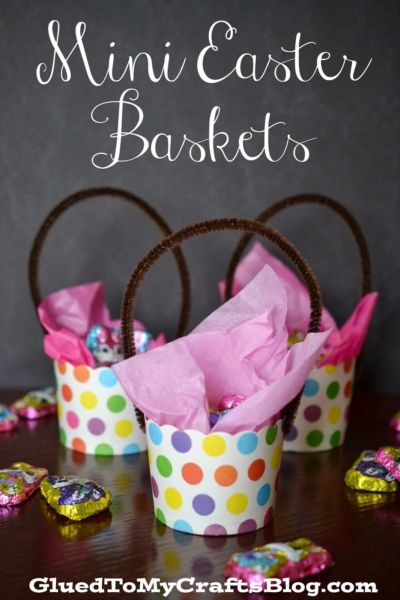 Paper Cup Mini Easter Basket Gifts
- Knitting Ideas
-
 Knitted Twist and Shout Hat
-
 Knitted Pom-Pom Booties
-
 Knitted Rabbit Dolls