Crochet Adorable Sheep


If you're looking to spread a little woolly charm, why not try crocheting adorable sheep? These fluffy creations are not only cute but also a fun and rewarding project to work on. With their squishy bodies and sweet faces, you'll find yourself smiling every time you see them. Whether you're a seasoned crocheter or just starting out, these little sheep make for a delightful addition to any crafting collection.
Materials Needed:
- Yarn– Loopara 5ply combed cotton (Green 03, Green 04, Pink 21, Yellow 28, Yellow 30, Brown 52 and White 61)
- Hook- 3.0mm
- Hot melt adhesive
- Fiber fill
- Yarn needle
- Button
- Eyeball
- Positioning pin
- Stitch marker
- Scissors
- Tweezers
How to Crochet the Head
- R1: Magic ring, 6 sc in ring, sl.
- R2: Ch, 6 sc inc, sl.
- R3: Ch, (sc, sc inc) 6 times, sl.
- R4: Ch, (sc, sc inc, sc) 6 times, sl.
- R5: Ch, (3 sc, sc inc) 6 times, sl.
- R6: Ch, (2 sc, sc inc, 2 sc) 6 times, sl.
- R7: Ch, (5 sc, sc inc) 6 times, sl.
- R8: Ch, (3 sc, sc inc, 3 sc) 6 times, sl.
- R9: Ch, (7 sc, sc inc) 6 times, sl.
- R10-15: Ch, 54 sc, sl.
- R16: Ch, 15 sc, 8 sc inc, 8 sc, 8 sc inc, 15 sc, sl.
- R17-20: Ch, 70 sc, sl.
- R21: Ch, 15 sc, 8 sc2tog, 8 sc, 8 sc2tog, 15 sc, sl.
- R22: Ch, (7 sc, sc2tog) 6 times, sl.
- R23: Ch, (3 sc, sc2tog, 3 sc) 6 times, sl.
- R24: Ch, (5 sc, sc2tog) 6 times, sl.
- R25: Ch, (2 sc, sc2tog, 2 sc) 6 times, sl.
- R26: Ch, (3 sc, sc2tog) 6 times, sl. Leave long tail, fasten off, stuff with fiberfill.
How to Crochet the Hand (Make 2)
- R1: Magic ring, 6 sc, sl.
- R2: Ch, 6 sc inc, sl.
- R3-15: Ch, 12 sc, sl.
- R16: Ch, (sc, sc2tog) 4 times, sl, fasten off, stuff with fiberfill.
How to Crochet the Foot (Make 2)
- R1: Ch 6, 4 sc in 2nd ch from hook, 3 sc in 1 st, 3 sc, 2 sc inc, sl.
- R2: Ch, 3 sc in 1 st, 3 sc, 3 sc inc, 3 sc, 2 sc inc, sc, sl.
- R3: Ch, (sc, sc inc) twice, 2 sc, (sc, sc inc) 3 times, 2 sc, (sc, sc inc) twice, sl.
- R4: Ch, 8 sc, (sc, sc inc, sc) 3 times, 8 sc, sl.
- R5-7: Ch, 28 sc, sl.
- R8: Ch, 8 sc, 6 sc2tog, 8 sc, sl.
- R9: Ch, 7 sc, 4 sc2tog, 7 sc, sl.
- R10-12: Ch, 18 sc, sl.
How to Crochet the Body
- R1: Join to 5th st from end of foot r12 with 5 sc, ch 5, 8 sc, (sc inc, sc) twice, 6 sc, 5 sc, 6 sc, (sc, sc inc) twice, 3 sc, sl.
- R2: Ch, 5 sc, 5 sc, 40 sc, sl.
- R3: Ch, 5 sc, sc inc, 3 sc, sc inc, 16 sc, (sc inc, 3 sc) 4 times, 8 sc, sl.
- R4: Ch, 56 sc, sl.
- R5: Ch, (7 sc, sc inc) 7 times, sl.
- R6-12: Ch, 63 sc, sl.
- R13: Ch, (7 sc, sc2tog) 6 times, sl.
- R14: Ch, 56 sc, sl.
- R15: Ch, 25 sc, (sc2tog, 5 sc) 4 times, 3 sc, sl.
- R16: Ch, 52 sc, sl.
- R17: Ch, 20 sc, (2 sc, sc2tog, 2 sc) 4 times, 8 sc, sl.
- R18: Ch, 48 sc, sl.
- R19: Ch, (3 sc, sc2tog, 3 sc) 6 times, sl.
- R20: Ch, 17 sc, 4 sc (joined with hand), 16 sc, 4 sc (joined with hand), sc, sl.
- R21: Ch, 42 sc, sl.
- R22: Ch, (5 sc, sc2tog) 6 times, sl.
- R23: Ch, (2 sc, 2 sc2tog) 6 times, fasten off, stuff with fiberfill.
How to Crochet the Headband
- R1: Magic ring, ch, 7 sc in ring, sl.
- R2: Ch, in BLO: 7 sc inc, sl.
- R3: Ch, in BLO: (sc, sc inc) 7 times, sl.
- R4: Ch, in BLO: (sc, sc inc, sc) 7 times, sl.
- R5: Ch, in BLO: (3 sc, sc inc) 7 times, sl.
- R6: Ch, in BLO: (2 sc, sc inc, 2 sc) 7 times, sl.
- R7: Ch, in BLO: (5 sc, sc inc) 7 times, sl.
- R8: Ch, in BLO: (3 sc, sc inc, 3 sc) 7 times, sl.
- R9: Ch, in BLO: (7 sc, sc inc) 7 times, sl.
- R10-15, ch, 54sc, sl.
- Start from the half stitch on the top of the head (3ch, sl) and end with the half stitch of the fifteenth round. Leave a long tail and fasten off
How to Crochet the Ear (Make 2)
- R1: Magic ring, ch, 6 sc, sl.
- R2: Ch, 6 sc inc, sl.
- R3: Ch, (sc, sc inc) 6 times, sl.
- R4: Ch, 18 sc, leave long tail, fasten off.
How to Crochet the Horn (Make 2)
- R1: Magic ring, ch, 6 sc, sl.
- R2: Ch, 6 sc, sl.
- R3: Ch, (sc, sc inc) 6 times, sl.
- R4: Ch, 9 sc, sl.
- R5: Ch, (sc, sc inc, sc) 3 times, sl.
- R6: Ch, 12 sc, leave long tail, fasten off.
How to Crochet the Vest
- R1: Ch 7, 6 sc in 2nd ch from hook, sl.
- R2: Ch 2, turn, sc inc, sc, 4 sc, sc inc, sl.
- R3: Ch 2, turn, sc inc, sc, 7 sc, sc inc, sl.
- R4: Ch 1, turn, sc inc, 10 sc, sc inc, sl.
- R5: Ch 1, turn, 13 sc, sc inc, sl.
- R6: Ch 1, turn, 14 sc, sc inc, sl.
- R7: Ch 1, turn, 15 sc, sc inc, sl.
- R8-11: Ch 1, turn, 17 sc, sl.
- R12-15: Ch 1, turn, 10 sc, sl.
- R16: Ch 1, turn, 10 sc, ch 6, tr, sl.
- R17: Ch 1, turn, 17 sc, sl.
- R18: Ch 2, turn, 8 hdc, 8 sc, sl.
- R19: Ch 1, turn, 8 sc, 9 hdc, sl.
- R20: Ch 1, turn, 17 sc, sl.
- R21: Ch 1, turn, 8 sc, 9 hdc, sl.
- R22-37: Rep r20-21 8 times, sl after each row.
- R38: Ch 2, turn, 8 hdc, 8 sc, sl.
- R39: Ch 1, turn, 17 sc, sl.
- R40-43: Ch 1, turn, 10 sc, sl.
- R44: Ch 1,Turn, 10 sc, ch 6, tr, sl.
- R45-49: Ch 1, turn, 17 sc, sl.
- R50: Ch 1, turn, sc2tog, 15 sc, sl.
- R51: Ch 1, turn, sc2tog, 14 sc, sl.
- R52: Ch 1, turn, sc2tog, 13 sc, sl.
- R53: Ch 1, turn, sc2tog, 10 sc, sc2tog, sl.
- R54: Ch 1, turn, sc3tog, 7 sc, sc2tog, sl.
- R55: Ch 1, turn, sc3tog, 4 sc, sc2tog, sl.
- R56: Ch 1, turn, 6 sc, sc inc, 50 sc, sc inc, 6 sc, sc inc, 63 sc, sc inc, sl.
- Finishing: Use single strand to sew dotted line along edge, attach two buttons on placket.
How to Crochet the Pants
- R1: Ch 25, join to first ch to form ring, 25 sc around, sl.
- R2-3: Ch,25 sc (fasten off first leg, continue with second leg), sl.
- R4: Ch 5, join first leg with sl st, (10 sc, sc inc, 3 sc, sc inc, 10 sc, 5 sc) twice, sl.
- R5: Ch,64 sc, sl.
- R6: Ch, (27 sc, sc inc, 3 sc, sc inc) twice, sl.
- R7-16: Ch, 68 sc, sl, leave long tail, fasten off.
How to Crochet the Large Cream of the Cream Pineapple Tart
- R1: Magic ring, ch, 6 sc, sl.
- R2: Ch, 6 sc inc, sl.
- R3: Ch, (sc, sc inc) 6 times, sl.
- R4: Ch,(sc, sc inc, sc) 6 times, sl.
- R5: (Ch 2, 4 incomplete hdc, sl) 12 times, fasten off, weave in ends.
How to Crochet the Small Cream of the Cream Pineapple Tart
- R1: Magic ring, 6 sc in ring, sl.
- R2: Ch, 6 sc inc, sl.
- R3: Ch, (sc, sc inc) 6 times, sl.
- R4: (Ch 2, 4 incomplete hdc, sl) 9 times, fasten off, weave in ends.
How to Crochet the Pineapple
- R1: Magic ring, 6 sc in ring, sl.
- R2: Ch, 6 sc inc, sl.
- R3-6: Ch, 12 sc, sl.
- R7: Ch, 6 sc2tog, fasten off, weave in ends.
- For leaves: On round 7: (Ch 4, 3 sl in 2nd ch from hook, sl) 6 times.
- Use single strand of yarn to embroider pineapple texture.
Crochet Sheep Assembly
- Align and sew the hood to the head, matching stitches one by one for a precise fit.
- Secure the horn positions with stitch markers, then begin sewing.
- Secure the horn positions with stitch markers, then begin sewing.
- Use stitch markers to secure ear positions on both sides of the cheeks, then sew in place.
- Secure the body and head with stitch markers, then sew matching stitches one by one, keeping tension tight.
- Dress the sheep with the shirt and pants.
- Assemble the cream pineapple egg tart, using the wrong side for both large and small cream pieces, and secure it with glue.
- Install the eyes between rows 13-14, spacing them 8 stitches apart.
- Embroider the nose between the eyes.
- Crochet a chain long enough for the sheep's crossbody strap length, attach to cream pineapple egg tart, secure with glue.
- Position the cream pineapple egg tart bag across the body.
Crochet Tips:
1. Maintain consistent tension throughout your work to ensure all stitches are uniform in size.
2. Pull slip stitches tight at the end of each round to create clean, well-defined shapes and details.
3. Try to use invisible single crochet whenever possible, as it creates smaller holes than regular single crochet.
4. When joining the legs, keep your tension tight to avoid gaps at the connection point.
5. Test the pants size as you crochet to ensure they'll fit properly on your sheep.
Assembly Tips:
1. When sewing the hood to the head, adjust the position as you go to ensure proper alignment.
2. When attaching the head to the body, make sure to align the front positions carefully to avoid crooked sewing.
3. Use less fiberfill in the arms to keep them soft and flexible.
- Recipes
-
 Polenta with Vegetables and White Beans
-
 Baked Cauliflower With Cheese
-
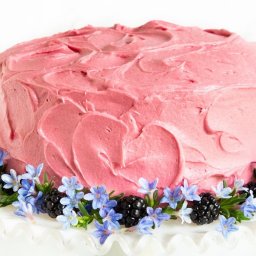 Vanilla Bean Cake with Blackberry Buttercream
- Funny Pictures
-
 Funny Dad Memes to Laugh At
-
 Have Some With These Memes Today
-
 Some Dog Snaps to Enjoy
- Crochet Ideas
-
 Crochet Summer Hat
-
 Crochet Zigzag Hat
-
 Crochet Baby Loafers
- Lifehacks
-
 How To Patch Jeans With Crochet Lace
-
 Crochet Sunburst (Sunflower) Granny Square Pattern
-
 How to Crochet the Plaid Stitch Photo Tutorial
- DIY
-
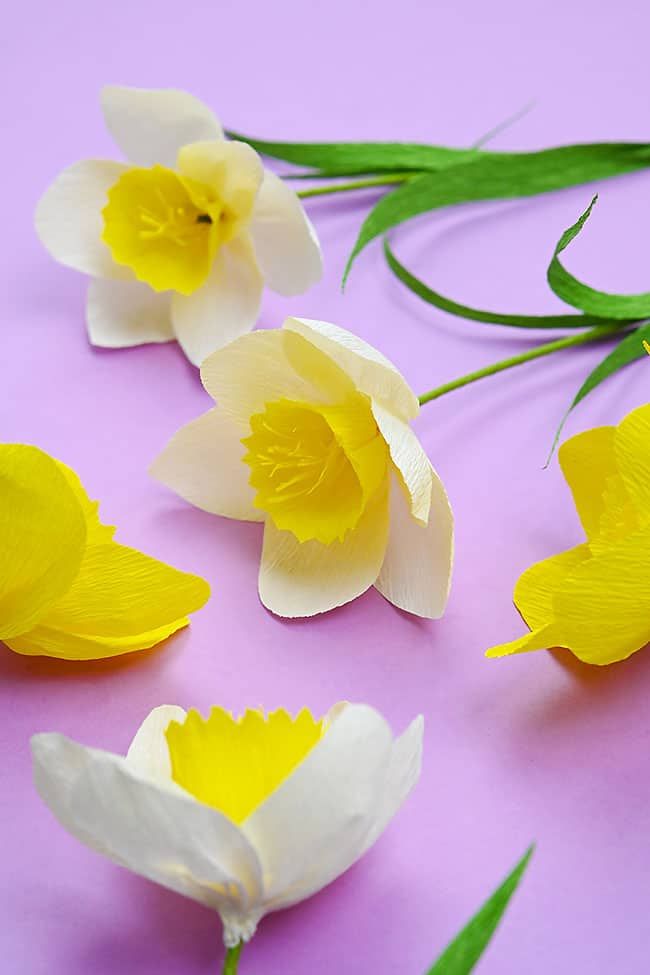 Crepe Paper Daffodils
-
 DIY Seashell Hair Pins
-
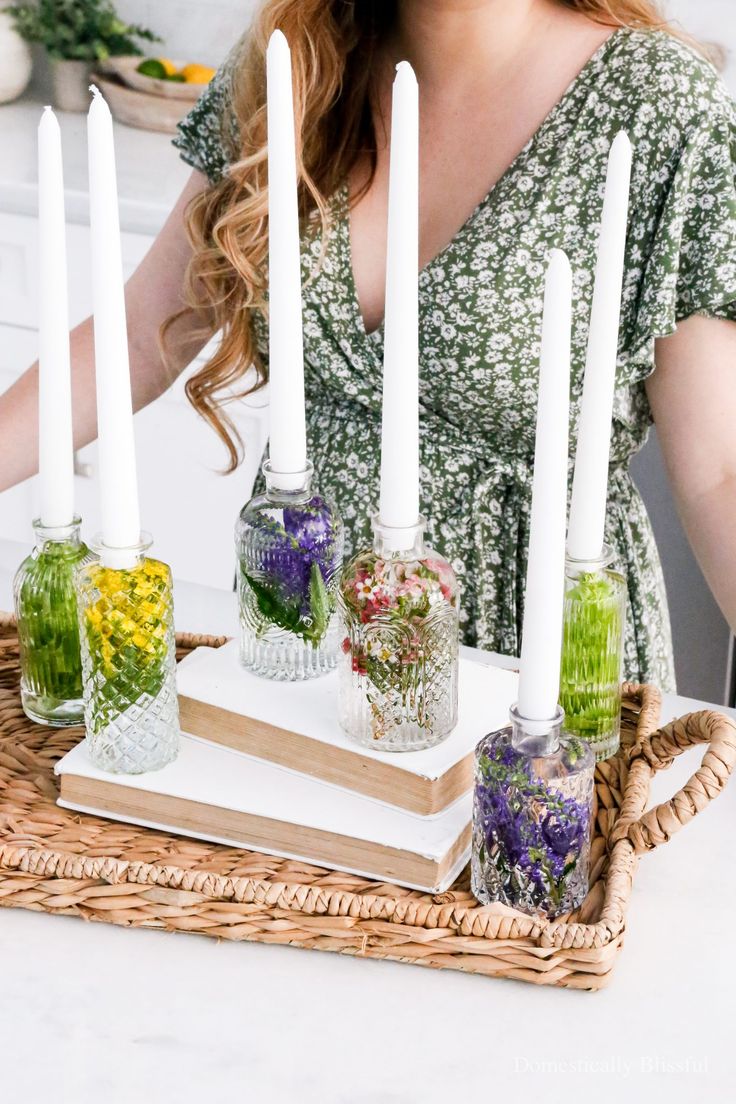 DIY Flower Candle Holders
- Knitting Ideas
-
 Knitted Lake Diamond Tank Top
-
 Knitted Beautiful Scarf
-
 Knitted Twist and Shout Scarf