Crochet Adorable Sheep


Crocheting adorable sheep is a delightful and heartwarming craft that brings a smile to both the maker and those who get to enjoy the finished product. With their fluffy appearance and cute little faces, these crocheted sheep are sure to charm anyone who lays eyes on them. The rhythmic motion of crocheting paired with the satisfaction of seeing a fluffy sheep come to life stitch by stitch makes it a truly rewarding and enjoyable project.
Materials
Caron One Pound White Yarn
Caron One Pound Gray Yarn
12 mm Safety Eyes
Tapestry Needle
5 mm Hook
Polyfill
Buttons or closures for the strap on the bottom of the pillow
A little bit of black yarn for the nose
Abbreviations (US terms)
Magic ring - mr
Single crochet - sc
Increase - inc
Decrease - dec
Half double crochet - hdc
Bobble - bobble (no abbreviation)
Chain - ch
Notes
I used acrylic worsted weight yarn, but you can use any yarn; just adjust the chain size for different weights.
I used polyfill for stuffing, but you can adapt the pattern to fit an existing pillow.
The finished pillow measures about 22 inches wide and 20 inches tall (including the head).
Instructions
Sheep head:
This pattern is made in the round.
Round 1: Using the gray yarn, make a mr and then sc x6 into the mr. (6)
Round 2: Inc in every sc. (12)
Round 3: Inc, sc. Then repeat until end of round (18)
Round 4: Inc, sc x2. Then repeat until end of round (24)
Round 5: Inc, sc x3. Then repeat until end of round (30)
Round 6: Inc, sc x4. Then repeat until end of round (36)
Round 7: Inc, sc x5. Then repeat until end of round (42)
Round 8-14: Sc in every stitch (42)
Round 15: Dec, sc x5. Then repeat until end of round (36)
Round 16: Sc in every stitch (36)
Round 17: Dec, sc x4. Then repeat until end of round (30)
Round 18: Sc in every stitch (30)
Round 19: Dec, sc x3. Then repeat until the end of round (24) (Should probably insert eyes and start to stuff the head if you haven't already.)
Round 20: Sc in every stitch (24)
Round 21: Dec, sc x2. Then repeat until end of round (18)
Round 22: Sc in every stitch (18)
Round 23: Dec, sc. Then repeat until end of round (12)
Round 24: Sc in every stitch (12)
Round 25: Dec, and repeat until end of round (6). Fasten off and weave in any ends.
With the black yarn make a wide T on the nose of the sheep, near the bottom of its head. If you make the horizontal part of the nose first, you can pull it down when you make the vertical stitch by starting at the bottom of the vertical line looping over the top line and pulling it down.
Sheep Ears:
This pattern is made in the round. Make 2.
Round 1: Using the gray yarn, make a mr and then sc x6 into the mr. (6)
Round 2: Inc in every sc. (12)
Round 3: Inc, sc. Then repeat until end of round (18)
Round 4: Sc in every stitch. (18)
Round 5: Dec, sc. Then repeat until end of round (12)
Round 6: Sc in every stitch (12)
Round 7: Dec, and repeat until end of round (6).
Round 8: Sc in every stitch (6), Fasten off the yarn but leave a tail for sewing. Do not stuff the ears.
Sheep Feet:
This pattern is made in the round. Make 4.
Round 1: Using the gray yarn, make a mr and then sc x6 into the mr. (6)
Round 2: Inc in every sc. (12)
Round 3: Sc in every stitch. (12).
Round 4: Inc, sc x3. Then repeat for the rest of the round. (15).
Round 5-6: Sc in every stitch. (15). Fasten off and leave tails for sewing.
Pillow Part of the Pattern:
Top part:
This pattern is made in rows.
Row 1: Ch x50 and then turn.
Row 2: In the second ch from the hook make a hdc. Continue making hdc for the rest of the row (49). Then ch x1 and turn.
Row 3: In the first stitch (not the chain), make a sc. Then ch x2 and move onto making a bobble stitch in the next stitch.
*Bobble Stitch: A bobble stitch is made by yarning over, inserting the hook into the stitch, yarn over, draw loop back through stitch, yarn over pull through 2 loops then STOP. You will have a half completed dc hanging from your hook. Repeat the steps 4 more times until you have 5 half completed dc stitches hanging from your hook and 6 loops ON your hook. Then yarn over and pull through all 6 loops.*
Make a sc in the next stitch next to the bobble stitch. Then repeat alternating ch x2 + bobble stitch, sc for the rest of the round. The last stitch in the round should be a sc.
You will find that one side of the project has the bobbles and the other side is flat. The flat side is the “wrong” side and will be the inside side, while the bobbles is the “right” side and will be on the outside of your pillow.
Ch x1 and turn.
Row 4: Make a hdc in the first stitch available and work hdc into every stitch in this row (49). Then ch x1 and turn.
Row 5-30: Repeat rows 3 and 4 for the rest of the rectangle (49). Then fasten off and weave in the ends.
Bottom Part:
This part of the pattern is worked in rows.
Row 1: Ch x50 and then turn.
Row 2: In the second ch from the hook make a hdc. Continue making hdc for the rest of the row (49). Then ch x1 and turn.
You want to make sure the size of the hdc and bobble square are similar in size, you may need to either add chains in the beginning to achieve the right size, or move up a hook size. I was fine making the bottom rectangle with the same number of stitches as the bobble top.
Row 3-30: Repeat row 2. Then fasten off the yarn and leave a long tail for sewing.
Strap:
This part of the pattern is made in rows:
Row 1: Ch x13 and then turn.
Row 2: In the second ch from the hook make a sc and make sc for the rest of the row (12). Then ch x1 and turn.
Row 3: Sc in every stitch for this row (12). Then ch x1 and turn.
Row 4-16: Repeat row 3 (12). Then ch x1 and turn.
Row 17: Sc x2, ch x2 and skip the following 2 stitches below, sc x1, (ch x2 and skip the 2 stitches below) x2, then sc x2 (12).
This row is for making holes for the 1” buttons. If you have other sized buttons, please adjust this row to fit your buttons.
Finishing:
Sew the ears to the sheep's head.
Next sew the pillow top and bottom together, stuff and sew shut.
Then sew the head to the top-middle-edge of the pillow.
Sew the little feet onto the corners of the pillow, you can stuff them a little if you would like.
Finally sew the strap and buttons onto the bottom side of the pillow. You want them to be along the middle edges of the pillow.
And now you have a completed crochet sheep pillow pet pattern!
No comments
Write a comment
- Recipes
-
 Herb Tofu Dip
-
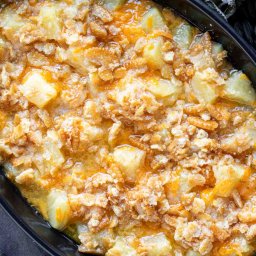 Southern Pineapple Casserole
-
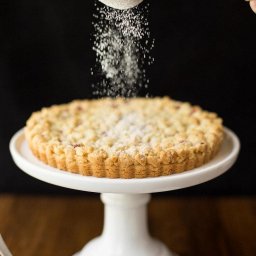 Raspberry Jam Shortbread Tart
- Funny Pictures
-
 Funny Science Memes for Your Entertainment
-
 Wonderful and Cute Cat Pics
-
 Some Memes for a Good Time
- Crochet Ideas
-
 Crochet Beautiful Headband
-
 Crochet Summer Hat
-
 Crochet Zigzag Hat
- Lifehacks
-
 How To Patch Jeans With Crochet Lace
-
 Crochet Sunburst (Sunflower) Granny Square Pattern
-
 How to Crochet the Plaid Stitch Photo Tutorial
- DIY
-
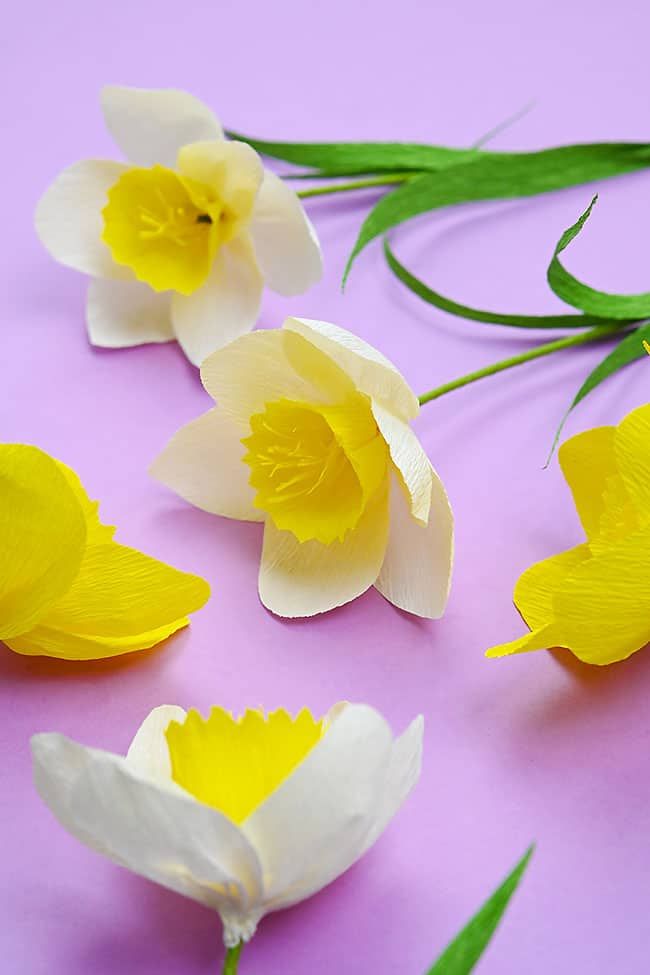 Crepe Paper Daffodils
-
 DIY Seashell Hair Pins
-
 Crochet Unique Scarf
- Knitting Ideas
-
 Knitted Lake Diamond Tank Top
-
 Knitted Beautiful Sweater
-
 Knitted Summer Sweater