Crochet Plush Dog Amigurumi
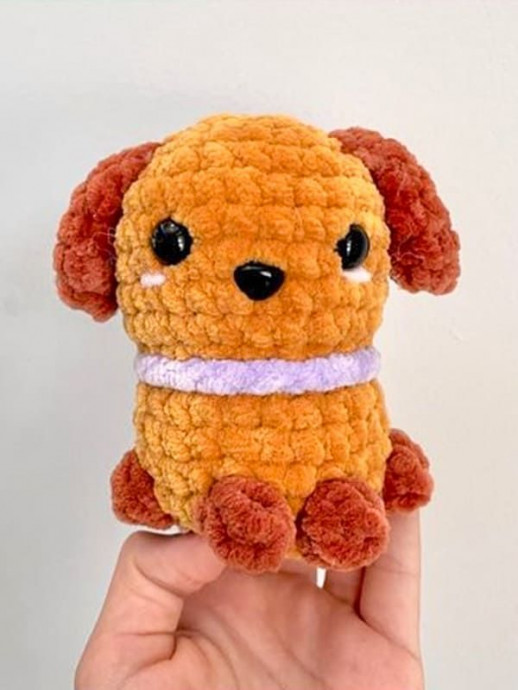
Creating a crochet plush dog amigurumi is like bringing a bundle of joy to life with just a hook and some cozy yarn! These adorable little pups make perfect cuddly companions that are sure to warm your heart and put a smile on your face. Whether you're gifting it to a friend or keeping it for yourself, the process of crafting a crochet plush dog amigurumi is not only fun and rewarding but also a great way to unleash your creativity and spread some handmade happiness. So grab your materials, start crocheting, and get ready to welcome your very own fluffy best friend into your home!
Abbreviations
MR: Magic ring
Sc: Single crochet
Dec: Decrease
Inc: Increase
Slst: Slip stitch
Hdc: Half double crochet
BLO: Back loop only
FLO: Front loop only
St: Stitch
BO: Bobble stitch
Head
Rnd 1. 6 sc in MR (6)
Rnd 2. 6 inc (12)
Rnd 3. (sc,inc)*6 (18)
Rnd 4. (2sc,inc)*6 (24)
Rnd 5. (3sc,inc)*6 (30)
Rnd 6-9. sc in each st (30)
Rnd 10. (3sc,dec)*6 (24)
Rnd 11. (2sc,dec)*6 (18)
Add the safety eyes between rnd 7-8, about 6 stitches apart.
You can add or embroider a nose to the puppy, one row under. Move onto the body now.
Body
Stuff as you go.
Rnd 12. In the FLO: (2sc,inc)*6 (24)
Rnd 13-15. sc in each st around.
Rnd 16. 5 sc, cc BO, cc 3sc, cc BO, cc 1sc, cc BO, cc 3sc, cc BO, cc 8sc (24)
CC: Color change. You need to change colours for the legs on the dog. Your bobble stitches can be done in the colour you want the legs to be.
Rnd 17. In the BLO: (2sc,dec)*6 (18)
Rnd 18. (1sc,dec)*6 (12)
Rnd 19. (dec)*6 (6)
Fasten off and weave in end.
Ears (make 2)
Rnd 1. 6 sc in MR (6)
Rnd 2. sc, inc x3 (9)
Rnd 3-5. sc in each st around (9)
Fold the ear in half, and sc 4st across.
Fasten off, do not stuff and leave a long tail for sewing.
Collar
With the colour you want the collar to be, chain 23-26 (depending on your tension) and fasten off, leaving a long tail for sewing.
Assembly
Sew the ears onto round 4 of the head.
Weave in the end.
Sew the collar around the neck of the dog. (weave in both the ends).


