Crochet Hybrid Tea Rose Flower

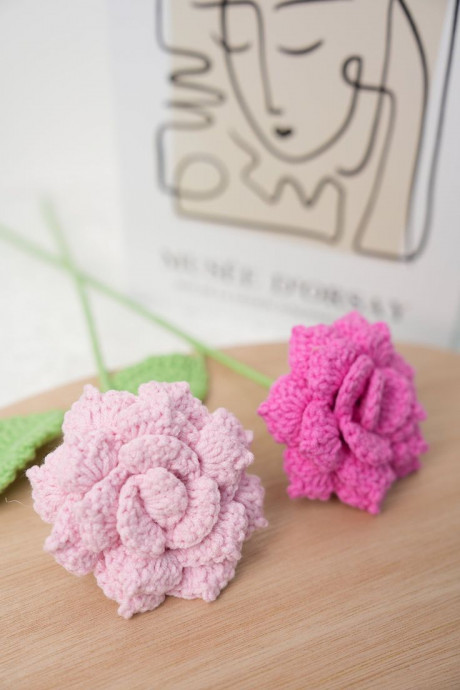
The Crochet Hybrid Tea Rose Flower is a delightful and charming project for anyone who loves to crochet! With its intricate details and beautiful design, creating this crochet rose will not only be a fun and rewarding experience but also a lovely addition to your crafts collection. Whether you are a beginner or an experienced crocheter, this floral masterpiece is sure to brighten up your day and bring a touch of elegance to your creations.
So, grab your yarn and crochet hook, and let's get crafting this gorgeous Hybrid Tea Rose together! Happy crocheting!
Materials Needed
- Yarn – Loopara 4ply combed cotton (Green 09, Pink 57, Pink 59)
- Hook – 2.0mm
- Flower Rod – 30cm long (No.2)
- Iron wire – 0.5mm diameter
- Hot Melt Adhesive
- Stitch Marker
- Scissors
- Needle-nose Pliers
Step By Step Tutorial
How to Crochet One-Piece Petal (Make 1)
- R1: Ch 53
- R2: 52 sc in 2nd ch from hook
- R3: Turn, ch 5, dc, sk 2, (dc, ch 2, dc) rep to end
- R4: Turn, ch 3, in ch-2 sp (dc, ch 2, 2 dc), in next ch-2 sp (2 dc, ch 2, 2 dc) rep to end
- R5: Turn, ch 1, in ch-2 sp (4 dc, picot, 4 dc), sl , rep, (8 dc) rep 4 times
How to Crochet Flower Base (Make 1)
- R1: Magic ring, ch 2, 20 dc, sl
- R2: (Ch 8, 2 sc in 2nd ch from hook, 2 hdc, 2 dc, 1 tr, sk 3, sl ) rep 5 times
How to Crochet Leaves (Make 1)
- R1: Ch 12, add wire, sc in 2nd ch from hook, hdc, 7 dc, hdc, 3 sc in next st (tip), hdc, 7 dc, hdc, sc
- R2: (Sc, ch 2) rep to tip, (sc, ch 2, sc) at tip, (ch 2, sc) rep to end
Hybrid Tea Rose Assembly
- Inserting the flower stem wire through the center of your crocheted petal.
- Use needle-nose pliers to bend the wire at the top, securing it in place.
- Apply a small amount of glue to fix the wire to the petal's center.
- Start wrapping the first round of the petal around the center. Use small dabs of glue to shape the flower as you go.
- Thread the stem wire through the flower base you've created.
- Secure the flower base to the bottom of your rose with glue.
- Begin wrapping the stem, starting from the base of the flower.
- As you wrap, pause to attach your crocheted leaves at desired intervals.
Notes
Crochet Tips:
1. Keep your tension loose when crocheting the petals. This will result in a fuller, more voluminous flower shape.
2. After completing the last stitch of the flower base, locate the first stitch of the second round. Use your hook to pull the working thread through this stitch, then tie it off with the tail you left at the beginning. Trim any excess threads.
3. When finishing the leaf, wrap the yarn around the wire twice before fastening off. This secures the wire within the crochet work.
Assembly Tips:
1. When using the glue gun to attach petals, apply small amounts of glue only to the first round of petals. This prevents the glue from sticking to your hands.
2. For a more polished look, consider gluing one of the flower base sepals over the end of the petals. This helps conceal any visible seams.
3. When wrapping the stem, pay extra attention to the area where the flower base meets the stem. Wrap this section a couple of extra times for a smooth transition. Throughout the assembly process, aim for tight, close wrapping for a neat finish.


